Ephesus

Pigeon Island in Kusadasi Harbor

Looking toward the sea from Ephesus

Ruins along the main street of Ephesus

Bas relief panel depicting Aries

Ruined colums against the clouds

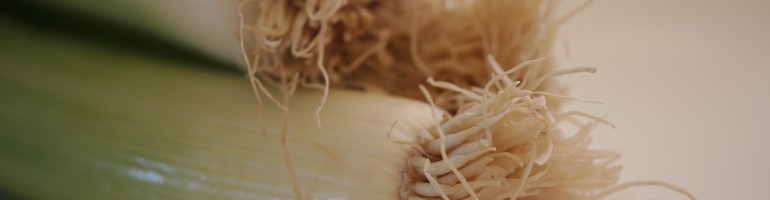
The feral cats of Ephesus

Beautiful stonework

Mosaic pavement

Marble door frame in a Terrace House

Marble panel and steps in a Terrace House

Mosaic floor in a Terrace House

Interesting disc found in a Terrace House

Wall decorations in a Terrace House

A beautiful marble floor

The Library of Celsus

The Lower Agora

A wall incorporating discarded shards

The Great Theater

Detail from the Harbor Baths

Dusk over Pigeon Island
One of the highlights of our recent visit to the Mediterranean was the ruins of Ephesus in Turkey. Our ship docked in the nearby port of Kusadasi (Bird Island) which is named after the island, now called Pigeon Island, which dominates the harbor. The island is crowned by an ancient Byzantine fortress which has been rebuilt several times over the centuries and is still a commanding presence. The island has restaurants and entertainment centers and is connected to the mainland by an ornate causeway. At night the lights along the causeway and on the fortress battlements create a stunning view.
Ephesus is not far away on a modern highway and is only a little over a mile from the modern Turkish city of Selçuk, population 36,000. . Ephesus dates back thousands of years and was one of the twelve cities of the Ionian League during the seventh century BCE. One of the seven wonders of the ancient world, the Temple of Artemis, was located nearby. Ephesus was a center of Greek culture until the second century BCE when it became a part of the Roman Empire. At its height, the city had between 250,000 and 500,000 inhabitants and was one of the largest cities in the entire empire. Later, it was an important city of the Byzantine Empire. Its dominance was because it was a center of trade, related to its harbor. Over the years and in spite of dredging efforts, the port and the river silted up, and Ephesus became landlocked. Earthquakes and Arab raids also contributed to the decline of the city, and it was abandoned in the eighth century.
Ephesus was important in early Christian activities. Because of its size and importance, there were early missionary activities there. In the Book of Acts in the New Testament, there is a story of Paul arriving to preach in the massive open-air theater. He was discouraged from doing so by friends who worried for his safety. One of Paul’s’ letters, “Epistle to the Ephesians”, was addressed to the Christian community in Ephesus. Tradition has it that Saint John was imprisoned here and that Jesus’s mother Mary lived out her final days in a house a bit removed from the city.
Ephesus was clearly a wealthy city. The ruins, including baths, gymnasia, temples, theaters, and enormous residences all bear that out. The Library of Celsus is beautifully restored and preserved. In its day it served as a mausoleum for a prominent Roman as well as a library with many scrolls.
Terrace homes of wealthy residents line one side of the main thoroughfare, Curetes Street. The houses were at their peak from about 100 to 700 CE at around the time of abandonment of the city. The rooms filled with dirt resulting in remarkable preservation comparable to that in Pompeii and Herculaneum. Still under excavation, the homes reveal elaborate mosaic floors, ornate wall decorations, and marble doors, walls, and pools.
The enormous theater, seating 35,000 has been amazingly well-preserved as have the agoras (gathering places) with their arcades and shops, public latrines, a brothel, and numerous public buildings.

Map of archaeological site open to visitors
Of course the marble streets are filled with tourists, and you could easily spend much more time than that alloted in the usual tours. Even with all that, though, it is a place well worth visiting.
Lokum
This is a traditional sweet that was invented by a famous Turkish cook in the 1700’s. It is soft, sweet, dusted in sugar, and usually flavored with rosewater. Supposedly lokum or Turkish delight is offered to guests with coffee, but you will see it everywhere, boxed up for purchase from street vendors or small shops.
There are many recipes for lokum on the internet. In general, they fall into three categories depending upon what is used as a firming agent. Some use cornstarch; some use gelatin; and some use pectin. This recipe is derived from one published in the Joy of Cooking as late as 1975. Subsequently the recipe disappeared from the index of the cook book, I think because the candy may turn into a sticky mess if you are not careful. I have made the recipe several times over the years, and this is by far the most successful version. You need to make sure the pan and waxed paper are well-greased or you will never get the candy out of the bottom of the pan. Actually, I had to throw away the pan the first time I tried making Turkish delight. You also need to make sure that you cook the sugar mixture at least to the soft ball stage or it will not get firm enough.
My very strong advice is that you should travel to Turkey and buy your supply of Turkish delight from a street vendor. Failing that, go to your local Middle Eastern market.

Pan prepared with overlapping sheets of buttered waxed paper

Pistachios

Candy cooking with added pistachios

Cooling candy

Lokum (Turkish delight) cut into squares and dusted with confectioners’ sugar
RECIPE
Lokum (Turkish Delight)
Ingredients
- 2 tablespoons water
- 1 packet ( ) liquid fruit pectin
- ½ teaspoon baking soda
- 1 cup light corn syrup
- ¼ cup sugar
- ¼ cup fruit jelly
- 1 tablespoon lemon juice
- ½ cup unsalted pistachio nuts, coarsely chopped
- confectioners’ sugar
Method
- Prepare an 8 x 8 inch baking pan: grease well with butter, line with two buttered sheets of waxed paper arranged crosswise and overhanging the rim of the pan. Set aside.
- Combine the water, pectin, and baking soda in a heavy 2 quart sauce pan. The mixture will expand and foam.
- In a second saucepan, combine the corn syrup and sugar.
- Bring the corn syrup and sugar mixture to the boil and heat to the soft ball stage, 240° F. Check with a candy thermometer. Then bring the pectin and baking soda to the boil over another flame. Stir until foaming subsides.
- Gradually pour the pectin mixture into the sugar mixture, stirring continuously.
- Stir in the jelly
- Remove from the heat, stir in the lemon juice and pistachio nuts.
- Pour into the prepared pan and let cool at room temperature for at least 3 hours or preferably over night.