Monthly Archives: May 2015

SOPAIPILLAS AND HONEY

A swarm of bees has invaded one of our canales, the little troughs that drain rain water from the flat roofs of New Mexico. We don’t know the first thing about bees, so that prompted a call to the local bee expert who advised that we call Nicolas, an expert bee keeper who specializes in extracting bee hives. Part of his fee is that he keeps the queen bee for a new pollinator hive. He has many hives that he moves around the orchards and farms of Northern New Mexico. Nicolas grew up in Provence, helping his uncle move hives in the fields of lavender that are so well known in that part of France.

“Nico” assessed our situation and then returned with his bee-keeping gear including his netted hat, heavy boots, and full-length coveralls with thick gloves that extended to his elbows.


Nico in full bee-protective gear

Nico in full bee-protective gear

Unfortunately, the bees proved more aggressive than usual, although Nico did not believe they had been Africanized. Still, he did not want to use the queen with her “bad genes”  in his pollinator hives. He did plan to capture the bees without exterminating them. That required a new strategy, and we are still waiting for Nico to come back with additional equipment.

As spring has arrived, the bees have become more active. In fact, they dive bomb us during the afternoon if we walk below their nest. They are more peaceful when they are busy among the flowers.


As a gift, Nico brought us a small jar of honey collected from his bees.  He has a business where he sells his honey, Fool’s Gold Honey. That made me think about ways to use honey beside just smearing it on a hot biscuit. What could be a better alternative than a Northern New Mexico sopaipilla? Sopaipillas are deep-fried flaky puffs  very similar to the beignets of New Orleans. They are also related to Navajo (or Pueblo) fry bread and buñuelos that are such important parts of Southwestern cuisine.

As to sopaipillas, there is no doubt that they originated in Northern New Mexico. My first memory of them was in 1948 when I visited my aunt and uncle, then living in Los Alamos. The recipe that follows is theirs.  The popularity of sopaipillas has spread throughout the Southwest, and they now are on the menus of practically every Tex-Mex restaurant, including those in New York City. They are usually served at the end of a meal with honey and maybe butter to pour inside, but they can be dusted with powdered sugar, coated with honey, served with jam, or even stuffed with chili con carne or carne asada as a main dish. Any way you eat them, they are delicious.  My most memorable sopaipillas – actually non-sopaipillas – were served years ago in the Cactus Taqueria in Dumas, Texas. The restaurant is no longer open. While traveling, our family stopped for lunch. We ordered the usual tacos and enchiladas. Sopaipillas were promised as dessert. Next to us, three cowboys were just finishing their meal, so the waitress delivered three big sopaipillas. At first, each of the cowboys poured honey into his dessert from a plastic dispenser sitting on the table. Shortly, one of the cowboys, unsatisfied with the flow of honey from the dispenser, stuck the end in his mouth and sucked away. We paid our bill as quickly as we could, and left with the waitress chasing after us shouting, “You still have your sopaipillas coming!”

Sopaipillas are very simple, and very easy to make, but there are a few tricks. First, the dough needs to be rolled to the right thickness. Too thick or too thin, and they will not puff up. Second, the oil for frying must be the right temperature – close to 400ºF. Otherwise they will not puff and/or become greasy. Finally, they need to be held under the surface of the oil for awhile when you first put them in the hot oil.  Otherwise they will not puff up. If they don’t puff up immediately or completely, they will not.

RECIPE

Sopaipillas

Ingredients

  • 1 cup unbleached all-purpose flour
  • 1 teaspoon baking powder
  • ¼ teaspoon salt
  • 2 tablespoons lard or vegetable shortening
  • ¼ cup water

Method

  1. In a large bowl, combine the flour, baking powder, and salt. Cut in the lard or shortening with a pastry blender until the mixture resembles cornmeal.
  2. Add the water and knead gently until the dough comes together. If it is too sticky, add another teaspoon or so of flour. If it is too dry, add more water, a few drops at a time until the dough holds together and forms a smooth ball.
  3. Turn the dough onto a heavily floured surface. Knead gently by flattening it out, folding it in half, flattening out again, and folding in half again. Repeat the process 10 or so times. Then form into a ball, cover with plastic wrap, and let rest for 15 minutes
  4. Place the rested dough on a floured surface and roll it out into a rectangle about ¼ inch thick. Cut into rectangles, squares, or triangles about 6 inches on a side.
  5. Cover the individual pieces with a cloth while you prepare to fry them.
  6. Heat at least 3 inches of oil in a heavy skillet or deep-frying pot to 400°F. When the ol is hot, gently drop one or two pieces of dough in the oil. With a spatula or pancake turner, hold the pieces under the surface of the oil until they start to puff. When the sopaipillas are brown underneath, turn them over and brown on the other side. Remove from the oil, and drain on several thicknesses of paper towel. If you wish, at this point drench the hot sopaipillas in powdered sugar or a mixture of sugar and cinnamon. Keep the finished sopaipillas in a warm oven (170 – 200°F) while you finish cooking the remaining pieces of dough. Serve with honey and butter while still warm.
  7. This should make 10 to 15 6-inch sopaipillas.

After I had written this post, I realized that I had already written about sopaipillas nearly a year and a half ago (October 9, 2013).  Worse, I had told the same stories about my aunt and uncle and about eating sopaipillas in the Cactus Taqueria. I guess that’s because good stories are worth hanging on to, or more ominously I should chalk it up to old age. I need to ask my kids if I have started to repeat myself. I don’t think I want to know the answer.

I have included some of the images from the earlier post, but as a  request for forgiveness, I have added some images of the wildflowers and garden flowers that have attracted bees from our hive.

1 Comment

Filed under Food, Photography, Recipes

POPOVER – POPUNDER

Popovers – when they work – are one of the easiest and most impressive quick breads. When they don’t work  they often wind up as a doughy lump that no one wants to eat.

There has been a lot written about what it takes to make a successful popover.

Some insist that the oven needs to be hot. Others say it works just as well to start the popovers in a cold oven. Still others say that the batter needs to be poured into a hot pan before it is put in the oven. I have not done an exhaustive study of the issue, but for me pouring room-temperature batter into a pan that has been heated in the oven as the oven gets to baking temperature has always worked.

Some say that you should only use a special popover pan, usually with six cups. Others say a 12-place muffin pan works better and you wind up with twice as many popovers. Again, I haven’t done a scientific study, but either seems to work just fine.

Some say that the pans must be heavily buttered with at least a tablespoon of butter in each cup. Others say that a little salad oil in each cup works just fine. I have tried both, and while I don’t know the real food chemistry, I believe that a good coat of a solid fat like butter is important to let the batter creep up the sides of the cup. I have had successes and failures with oil, but a good coating of butter (although not the mega dose that some recipes call for) always seems to work.

Some say that a lower constant baking temperature works just as well as a beginning hot temperature reduced to a lower temperature. I favor the latter. I’ve watched through an oven window with the light on many times, and the popping seems to be over at the end of 15-20 minutes of high temperature baking. The lower temperature crisps the popovers without burning them.

Some say you should pierce the popover half way through the baking to make sure the inside loses its “eggy” consistency and flavor. I think that can be dealt with by just baking the popovers a little longer.

You can use different flours or add a teaspoon of grated cheese or other flavoring, but the popovers will probably not rise as impressively.

Finally, I also believe that a well-mixed smooth batter at room temperature is key to success.

Here are some popovers Carol and I made during our recent visit in her home.

Hot from the oven

Hot from the oven

RECIPE

Popovers

Ingredients

  • unsalted butter to coat the baking cups generously (6-space popover pan or 12-space muffin pan)
  • 1 cup all-purpose flour
  • ½ teaspoon salt
  • 2 eggs, beaten
  • 1 cup milk (whole, 2%, 1%, or skim will all work)
  • 1 tablespoon melted unsalted butter

Method

  1. Generously coat the cups of the preferred baking tin with butter. Place in the middle of the oven and turn the oven on to 450°F to heat the pan and the oven.
  2. In the meantime, Combine the four and salt in a 4-cup measuring cup or a large mixing bowl with a pouring spout.
  3. Beat the eggs until light and well-mixed. Stir in the milk and butter. Add the liquid mixture to the dry ingredients.
  4. With  a whisk or mixer beat the batter for a minute or two until well-blended and smooth.
  5. When the oven has reached temperature, remove the heated baking pan to a trivet or heat-proof surface.
  6. Fill each baking cup 1/3 to 1/2 full, distributing the batter evenly to all cups. If you misjudge and run out of batter, you can use a large spoon, moving quickly to redistribute the batter more evenly.  Return the filled baking pan to the middle of the oven
  7. Bake undisturbed for 20 minutes. Then reduce the oven temperature to 350°F and bake for an additional 20 minutes.
  8. Remove from the oven. Loosen each popover by running a thin knife around the edge, and transfer to a serving basket. Serve immediately while still warm, with lots of butter and/or jam.
  9. Yields 6 popovers baked in a popover pan or 12 popovers baked in a muffin pan.

4 Comments

Filed under Food, Photography, Recipes

OYSTER AND ARTICHOKE SOUP

While working on my recent post about baked oysters New Orleans style, I got to thinking about all of the food I have enjoyed focused on oysters: oysters on the half-shell, oysters Rockefeller, oyster po’boys, etc., etc. I also got to thinking about all of the good meals I have enjoyed in New Orleans.

One outstanding oyster dish from New Orleans immediately came to mind: Potage Le Ruth, invented by Chef Warren Leruth and served at his fabled Le Ruth’s Restaurant on the West Bank in Gretna. Before he opened his restaurant, Leruth had gained recognition  as a baker, chef and food innovator. He had been personal chef to General Clark when he was in the army in Korea, and he helped to develop the famous Duncan Hines cake mixes at Proctor & Gamble. So it was not surprising when he decided to open his own place in his home town.

New Orleans is one of those cities where everyone wants the latest gossip about new restaurants and hot places to go. When Le Ruth’s opened in 1966, it caught everyone’s attention with its creative cuisine. Food critics at the time said that Leruth rescued New Orleans dining from itself because all of the old-line restaurants had started to rest on their reputations and the food had become more or less the same. Le Ruth’s changed all of that and soon gained the reputation as being undoubtedly the best restaurant in the city. That was evidenced by the difficulty in snagging a reservation.

It was not the easiest place to get to. You could use the bridge over the Mississippi River, but it was far easier to ride the Gretna ferry from the foot of Canal Street and then catch a cab to the restaurant.

I remember clearly the first time I ever ate at Le Ruth’s. A group of colleagues and I were attending a business meeting in downtown New Orleans. We had made our reservations well in advance, and everyone was looking forward to the experience. We found our way to the restaurant, took our seats at the table and, ordered wine. One of the group stuck two of the corks from the wine bottles in his nostrils  when they were offered to him. He announced that the wine was perfect. We all laughed, but two distinguished ladies at the next table raised their eyebrows. I don’t exactly recall, but I believe that at least the wine taster had spent a sizeable part of the afternoon on Bourbon Street.

It is a good thing we didn’t get tossed out. Le Ruth had the reputation for responding to critical letters with scathing rebukes from an “anonymous” diner. For folks who gave real offense, he would assign four waiters to the corners of the tablecloth of the miscreant. At a signal, they would lift the cloth to form a sack of food, dinnerware, and wine while Leruth would announce that he “had picked up the check” and summarily declare, “Get out of my restaurant!” I am certain that Warren Leruth would know how to handle the current generation of whiners on Yelp.

Le Ruth’s served many delicious and unique dishes, but perhaps the most famous was Potage Le Ruth. Unfortunately, to my knowledge there is no extant authentic recipe. Leruth said that he had  the original locked up in a vault. Nevertheless, imitations – none as good – soon showed up on the menus of most of the other high-end restaurants in New Orleans. Then recipes for oyster and artichoke soup began to appear in local newspapers. Many of the knock-offs used cream, but Leruth bragged that his recipe contained no cream.  The soup is a sort of rich velouté based on a blond roux, so you really shouldn’t need cream.

Surprisingly, some food writers say that Leruth used canned artichokes. My version does, too, although respected New Orleans chefs insist that only fresh artichokes, properly cooked and prepared, will do. If you want to use fresh artichokes, probably four medium are about right. My version is adapted from a recipe that appeared in one of the Shreveport newspapers of the time. Be advised that it is not the real thing. I have taken the additional liberty of adding some whole oysters in the style of an oyster stew. Even though it lacks authenticity, I think you will find it a most delicious soup.

RECIPE

Oyster and Artichoke Soup

Ingredients

  • 4 tablespoons unsalted butter
  • ½ medium onion, chopped finely
  • 1 rib celery, chopped finely
  • 1 small carrot, peeled and chopped finely
  • 14 ounce can artichoke hearts, quartered
  • 3 cups hot fish stock
  • ¼ teaspoon ground thyme
  • 1/8 teaspoon ground bay
  • 1/8 teaspoon cayenne
  • 1 teaspoon salt
  • 1 teaspoon Worcestershire sauce
  • 1 pint oysters
  • 1 teaspoon white vinegar or lemon juice (about)
  • 1 pinch sugar (about)
  • ¼ cup madeira

Method

  1. Melt butter in the bottom of a heavy soup pot over medium heat. Add the onion, celery, and carrots and sauté until the onions are translucent and the other vegetables have wilted. Do not brown.
  2. Add the flour and continue cook over medium heat and stirring frequently until the flour is completely incorporated and the raw taste has disappeared, about 2 minutes.
  3. Drain the artichokes and add to the sautéed mixture.
  4. Stir in the hot stock, thyme, bay, cayenne, salt and Worcestershire sauce. Simmer partly covered for 45 minutes.
  5. Strain the oysters in a fine-mesh strainer to remove any bits of shell and sand, saving the liquid. Set aside about half the oysters to be stewed later, and chop the remainder. Add the chopped oysters to the oyster liquor and then stir into the simmering soup, cooking for another 10 minutes below the boil
  6. With an immersion blender, blend the soup until smooth. Correct seasoning with vinegar and sugar. Add the madeira. If you wish, at this point you may strain the soup through a chinois for an especially smooth soup, or you can omit that step.
  7. Return the soup to medium-low heat and stir in the remaining oysters, cooking until they are firm and the edges are curled.
  8. Serve immediately or cool to serve later. Then, reheat to the boiling point and serve immediately. Grilled farm-style bread makes a good accompaniment.

2 Comments

Filed under Food, Photography, Recipes, Restaurants

THREE CITIES OF SPAIN CHEESECAKE

Mothers’ Day and Susan’s birthday coincided this year, so during our visit to Los Angeles, Carol needed a dessert for our celebration. One of Susan’s favorites is cheesecake, and this is one of Carol’s favorite recipes.

She originally found it in Gourmet magazine, and it has been published widely since then in other magazines and on the internet.

But everyone (or nearly everyone) gives credit to the Three Cities of Spain coffee house in Santa Fe for the original. Many years ago, the popular artists’ street, Canyon Road, was a narrow dirt road heading up the canyon from Paseo de Peralta. The Santa Fe artists’ colony was experiencing a boomlet in the 1950s-1970s, and this was one of the places on Canyon Road where the struggling artists hung out, drinking coffee, smoking, and eating cheesecake. There were nearby bars for more serious drinking at night.

For reasons unknown to me, Three Cities of Spain closed in the 1970s, Canyon Road was paved, and the old adobe home which housed the coffee house was transformed into Geronimo, one of the best and most famous restaurants in Santa Fe. The restaurant was named after the man who built the house in 1756.

I think you’ll like the cheesecake.

hree Cities of Spain cheesecake after the first baking

Three Cities of Spain cheesecake after the first baking

Spreading on the topping.

Spreading on the topping.

Birthday candles for more mature adults

Birthday candles counted out for more mature adults

Blowing out the candles

Blowing out the candles

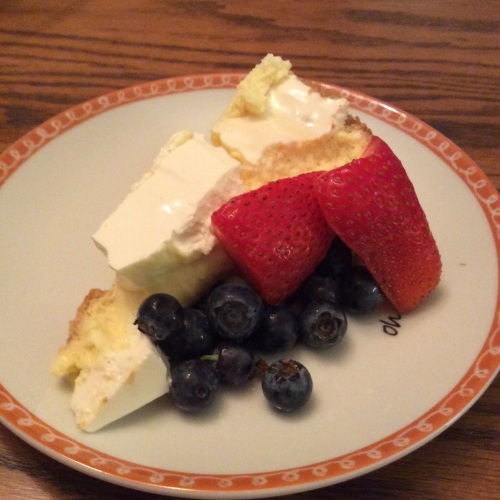
Cheesecake with berries

Cheesecake with berries

RECIPE

Three Cities of Spain Cheesecake

Ingredients

CRUST

  • 11 graham crackers, ground fine (1½ cups)
  • 1/3 cup unsalted butter, softened
  • 1/3 cup sugar
  • 1/8 teaspoon salt

FILLING

  • 24 ounces (3 packages) cream cheese, softened
  • 4 large eggs
  • 1 teaspoon vanilla
  • 1 cup sugar

TOPPING

  • 16 ounces sour cream
  • 1 tablespoon sugar
  • 1 tablespoon vanilla
  • berries (optional)

Method

  1. Stir together crust ingredients. Sprinkle half of mixture onto the bottom of a buttered 9½ inch springform pan. Then press the mixture up the side of the pan about 1¼ inches. Sprinkle and press the remaining half of the mixture into the bottom of the pan.
  2. With an electric mixer, beat the cream cheese until light and fluffy. Then beat in the eggs, one at a time. Beat in the vanilla and sugar until just combined.
  3. Pour the cream cheese and egg filling into the crust. Bake for 45 minutes at 350ºF or until the center of the cake is set.  Cool on a rack for 5 minutes.
  4. Stir together the topping ingredients.  Drop by spoonfuls around the edge of the cake and spread gently into the center.
  5. Return to the 350ºF oven for another 10 minutes.
  6. Remove from the oven and cool completely on a baking rack before chilling overnight in the refrigerator.
  7. Serve at room temperature with or without optional berries.

4 Comments

Filed under Food, Photography, Recipes, Restaurants, Travel

BAKED OYSTERS NEW ORLEANS STYLE

At the end of our train trip from Seattle to Los Angeles, we spent a few days with our daughter, Carol, and her family. She is an excellent cook, and she always tries to make some interesting food during our visits. She also knows that Susan loves oysters, and since she grew up in Louisiana, New Orleans style baked oysters seemed perfect – even though it is May. The recipe in her recipe box is called Oysters Mosska, undoubtedly so as not to get in trouble with Mosca’s restaurant in the New Orleans suburb of Westwego and home to the eponymous Oysters Mosca.

Mosca’s is one of the old-line favorite restaurants of local residents, having opened in 1946 and operated by the same family ever since. Part of its charm is that it is not easy to find. It is on Highway 90 a ways after you cross the Huey P. Long Bridge, but it sits back from the road, is a low-slung white-painted clapboard building that looks more like a house, and has only a small, dimly lit sign. When we were living in Louisiana, I drove right by it more than once. An interesting story is that the place was where everyone went after a night spent in the gambling houses that populated this now-lonely stretch of road. As well, rumor has linked the restaurant to the local Mafia, but the Moscas have neither confirmed nor denied that rumor.

Once inside, you are struck by the liveliness of the place. It is brightly lit and filled with families enjoying themselves. Even with a reservation you may have to wait on the straight-backed chairs lined up against the walls.

Th menu is fairly limited but filled with Italian standbys that all have a full quota of garlic. Virtually every table has at least one order of Oysters Mosca. In the old days, the dish would be served in a metal cake pan, and each diner would fish out his or her helping of succulent oysters.

To my knowledge the family has never provided an authorized version of the recipe for Oysters Mosca. We have a made-up version in our family cookbook that is a close approximation. As I mentioned above, this version comes from Carol’s recipe collection and is labelled “Oysters Mosska”, I suspect to protect against any accusations of copyright infringement.

If you do decide to visit the restaurant, be advised that they do not accept checks or credit cards – cash only. But they do have a convenient ATM inside the dining area.

Oysters cooking in liquor/beef stock sauce

Oysters cooking in liquor/beef stock sauce

Ready for the oven

Ready for the oven

Ready to serve

Ready to serve

Baked oysters New Orleans style

Baked oysters New Orleans style

RECIPE

Baked Oysters New Orleans Style

Ingredients

  • 1 tablespoon vegetable oil
  • ¼ cup yellow onion, diced
  • 1½ tablespoons garlic, chopped
  • 1 pint shucked oysters with liquor
  • 1 cup beef stock
  • 1 tablespoon parsley, finely chopped
  • Creole spice
  • salt and pepper
  • 1 cup bread crumbs
  • 2 tablespoons Parmesan cheese, freshly grated
  • 1 tablespoon basil chopped
  • 1 tablespoon olive oil

Method

  1. n a saute pan over mediu heat, cook onions untile translucent. Then add garlic and stir for about 1 minute.
  2. Add the oyster liquor and the beef stock. Bring to the boil and simmer until the liquids are reduced to about one-half.
  3. Add the oysters and parsley. Return to the boil and then remove from heat. Adjust seasoning with Creole spice, salt, and pepper.
  4. Transfer to a metal cake pan or a shallow baking dish.
  5. Combine bread crumbs, Parmesan, chopped basil, 1 teaspoon of Creole spice, and olive oil. Sprinkle over the top of the oysters.
  6. Place under a pre-heated broiler for 8 to 10 minutes or until the top is brown and bubbling.
  7. Serve immediately. 2 or 3 servings

2 Comments

Filed under Food, Photography, Recipes, Restaurants, Travel

THE COAST STARLIGHT REBOARDED

After several days of visiting with our children and their families in San Francisco, Susan and I finished our trip on the Coast Starlight to Los Angeles. Our son, Peter, drove us to San Jose through rush hour traffic. (Isn’t every hour rush hour on the 101?) We waited in the restored art deco station until the train pulled in – already about 15 minutes late.

image

For this leg of the trip, we booked a small roomette. We wouldn’t be using the sleeping bunks, but the extra space gave us some leg room, and the fare entitled us to lunch and dinner in the dining car as well as access to the comfortable chairs in the observation area of the parlor car.

image

As the train pulled out around 10 in the morning, two things became apparent. First, and I have observed this before, trains take you along the underbelly of American cities. We passed many hobo camps. Some of them were collections of cardboard boxes, old tires, a few blankets, and a fire ring. Others were more elaborate, with tents, tattered sofas, and grocery shopping carts filled with clothes and whatever. None of the sites was occupied, which made me wonder, “Where do these folks go during the day?”

The camps disappeared once we got out of the city, but it was then that I made my second observation: We think of California’s Central Valley as the garden of America. If you have travelled on Interstate Highway 5, you know that the Valley is rich with agriculture. But it is mostly fields of fruit and nut trees, dairies, and alfalfa fields. The real gardens line the 101 in the Santa Clara and Salinas Valleys between San Jose and Paso Robles. There are huge fields of strawberries with workers in long rows, bent over to harvest the fruits. There are artichokes, lettuce, onions, cabbages, broccoli, garlic, and many plants that cannot be identified from a moving train. Gilroy has been called “Garlic Capital of the World” (although that title probably now belongs to some place in China) and you can smell the garlic when you go through town.

Of course, there are grapes – in recent years all of California seems to have become one big vineyard – but there are also huge fields of ornamental houseplants. And most of the farms are filled with armies of harvesters with their beat-up old cars parked along the edge of the fields next to portable toilets mounted on little trailers.

We went to the dining car for lunch as the train headed into the mountains. W enjoyed the views, but the lunch choices were the same as they had been for our first day on the train. We passed on the sautéed panko-crusted chicken with mashed potatoes and instead opted for the “Chicken Caesar Salad” which was actually the regular salad mix with chicken, the same little hard croutons, and Newman’s Own salad dressing. I didn’t see any Parmesan. And there were certainly no anchovies. All told, though, it was pretty good and better than the panko chicken.

image

The highlight of the trip was just ahead. Shortly after a stop in San Luis Obispo (“SLO Town” to Californians) we headed onto the coast. The train hugged the cliffs as it made its way around Vandenberg Air Force Base where we could see several towers that are used to launch the military’s experimental rockets. Then it was beautiful beaches, surf, rocks, lighthouses, and steep cliffs.

We enjoyed the wine tasting again, and then it was time for dinner. We ate in the parlor car, and even though they were running out of things, we enjoyed the vegetarian lasagna rolls for Susan and the three-pepper braised short ribs for me. The sun playing on the waves turned out to be a magical background for a very nice meal.

Soon enough we got to Santa Barbara and then it became continuous freeways and people until we pulled in to the Los Angeles Union Station right on time. There was one last treat for a memorable trip, it was raining while we waited for our daughter, not enough to break the terrible West Coast drought, but enough to give some hope.

2 Comments

Filed under Food, Photography, Travel

OCTAVIA

When we’re in San Francisco, Sarah always suggests restaurants for us to try. There are so many places that one never runs out of first-time experiences, but it is always especially interesting to try out a new spot.

Sarah and Evan’s friend, Melissa Perello, has operated Frances for a number of years. When the restaurant first opened it was a sensation on the local food scene and was a nominee for James Beard Best New Restaurant. It remains a very popular place.

Now Melissa and her fiance, Robert, have embarked on a new venture, taking over the space that was once occupied by Quince when Evan worked there as chef de cuisine.

Melissa and Robert have transformed the place. It is filled with light from the floor-to-ceiling windows, and the casual tables and warm but muted colors have made the restaurant inviting and comfortable.

image

Sarah wanted to take me to dinner while Susan got to babysit. That turned out to be what I consider a perfect division of labor. I got to eat – which I love to do – and Susan got to mind the grandchildren – which is one of her very favorite activities.

The service was warm and welcoming. Kim, our excellent server, had made a conscious decision to move from another San Francisco standby where she had worked for nine years. She was happy with her decision. All of the other servers seemed as happy, friendly and efficient.

Of course, surroundings and service are both essential to a good experience, but in the end it is all about the food. Octavia did not disappoint.

As with so many contemporary restaurants, the Octavia menu is designed to encourage sharing of several small plates before the main course. With Sarah’s professional guidance, we chose a half dozen or so small plates to share.

First was the “Deviled Egg” with Fresno chile relish, marash pepper and spice. The quotation marks indicated it was not a real deviled egg, and that was so. It was a perfectly peeled mollet egg (That is so hard to do – have you ever tried it?) topped with a spicy red chile sauce. The yolk ran out a golden yellow with my fork attack, mixing with the chiles to form a creamy sauce.

Chilled squid ink noodles with Cortez bottarga (salted fish roe), lemon oil, and green garlic came as a beautiful mound of black noodles dusted with gold. The chill took the edge off of the flavor that can sometimes doom a dish made with squid ink. The flavors of the ingredients came together. All I could think of was that I wanted more.

image

Mushrooms “A La Grecque” were a mix of hens of the woods, trumpets, and shiitakes in a light pickle and served with thick slabs of toasted house-made levain.

image

Fried artichokes were crispy on the outside and tender inside with thin shavings of Pecorino Siciliano, walnuts, and mint. If you like artichokes, you would love these.

image

Beef tongue with charred broccoli, toasted garlic, and marrow broth was flavorful. The tongue was so tender and well-cooked that it literally fell apart in my mouth. Some folks are squeamish about tongue, but when it is well prepared it is a great delicacy in the same way that sweetbreads are a special treat. With both, though, you should not plan on having your cholesterol measured the next day.

image

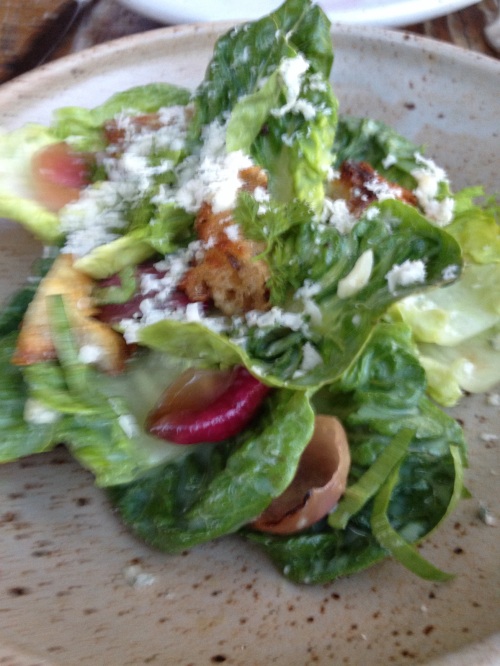
The salad was based on a local favorite lettuce, Little Gems, and tossed with Point Reyes blue cheese, grilled red onions, ramps (at the height of their too-short season right now) and buttermilk.

image

Sarah ordered the quail with morel mushrooms, spinach, and English peas. The quail was perfectly cooked, one of the best signs of an accomplished chef.

image

I ordered the paccheri pasta – great big rings – with olive-oil-poached bacalao (salt cod) and fennel pollen.

image

We ordered three different desserts. They were all delicious, but we saved them to take back to Susan, the Dessert Queen, as our thanks for being the resident baby sitter.

After dinner, Sarah had a nice visit with a well-known local restaurant reviewer and food critic and her son, a well-known Master Sommelier, who had been sitting at the next table. Chef Melissa also came out and visited with Sarah. It was a very special evening in a new San Francisco restaurant that promises to be a big success.

4 Comments

Filed under Food, Photography, Restaurants, Travel

ON BOARD THE COAST STARLIGHT

It seemed like the natural thing to do. We still hadn’t seen enough scenery, and a leisurely ride in a sleeper between Seattle and Los Angeles with a break in the Bay Area sounded like a lot of fun and a good way to relax. (Do you need to relax when you’re retired?)

We left our hotel before rush hour for a short taxi ride to the carefully restored Amtrak station. Our train from Vancouver, BC, pulled up to the gates, a good-sized crowd loaded up, and at exactly the designated hour we departed downtown Seattle.

There is always the mystique that trains take you to scenic places – and often that is true – but in big cities, you frequently see things that have been carefully hidden: truck terminals, rows of box cars and tank cars, and hobo camps filled with crumpled sleeping bags, cardboard boxes, and plastic crates.

At the same time, it is interesting to look out at the panoramas of the city and scenes that you would miss from the freeway. Soon enough, the messiness of the city gives way to the countryside, with lush trees, hillsides of yellow-flowered shrubs, and fields in every imaginable shade of green.

We missed breakfast at the hotel, so we were looking forward to lunch in the dining car. The steward came by and gave us a slip of paper with our time to show up in the dining car.  Then, at the appointed time, we heard an announcement that we should make our way to the dining car.

If you have never eaten in a dining car, there is a very fixed ritual, which the server will describe with a certain fatigue and indignation that must come from having done the same thing with thousands of past passengers. You sign your name and fill in the blanks for your car number and room. The server fills in everything else after you have chosen your meal.

Unlike Agatha Christie’s Orient Express, you should not anticipate fine dining. After all, the main reasons you take a train are the scenery and the leisurely pace. In fairness, though, the experience beats the current state of airline food (Is there such a thing any more?)

As is customary, we were seated with two strangers: one was a very pleasant middle-aged man who was on his way to help his niece celebrate her college graduation; the other was a college-aged young man who had absolutely no interest in engaging in conversation with old galoots. He wolfed down his sandwich as soon as it was delivered, mumbled something about how nice it was to meet us, and hastily beat an exit out the door.

We selected the sautéed chicken special. It came with a salad composed of the white ends of iceberg lettuce leaves (How did they manage to buy nothing but white ends?) and two cherry tomatoes that rolled around on the thin plastic plate with every lurch of the car, defying my best efforts to spear them with the little salad fork. The main dish was a breaded chicken breast that looked suspiciously like a chicken tender and had a similar taste. It was accompanied by a mound of mashed potatoes decorated with yet another cherry tomato. Dessert was a choice of cheesecake, cheesecake with strawberries, chocolate mousse, or ice cream. They all came in little plastic cups.

The food highlight of the day was a wine tasting in the parlour car mid-afternoon. It was very pleasant and cost only $7.50 per person. The steward gave everyone good pours of actually not-too-bad wine. Our experience was so good that we decided to change our dinner reservations from the dining car to the parlour car. That was a good choice because we got a table by ourselves, and the pepper steak was not too bad. Dessert choices were the same, but this time they were removed from the plastic cups and served on little plastic plates with the Amtrak logo.

image

Never mind. The scenery, especially in the Cascade Mountains was spectacular, and we stayed up, looking out the window until dark.

Then the car attendant made up our beds, and we settled in for the night. Sleeping was not too bad. We woke up with the train in the station at Sacramento. We dressed, went to breakfast in the parlour car, and sat in the comfortable chairs next to the tables, watching the scenery until it was time to get off th train in Emeryville.

The best food of the trip was a hamburger that our daughter prepared for lunch when we got to her apartment  – mushrooms, Swiss cheese, bacon, arugula, shallots, and dill pickles. Good food at the end of an interesting trip.

image

6 Comments

Filed under Food, Photography, Restaurants, Travel