Monthly Archives: May 2013

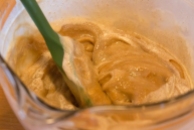
REGGIE’S AMAZING MICROWAVE PRALINES

Reggie Graves, one of our best friends from our days in Louisiana, recently paid us a visit. Reggie is well-known for his championship chili – I have written about it in the past – but he is an excellent cook besides that.  Whenever we have a chance to visit with Reggie, you can be sure that there will be good food and lots of talk about food.

We were definitely not disappointed on this visit. Reggie brought us a huge bag of shelled pecans and the promise to make his favorite microwave pralines.

During one evening of reminiscing about old times, we talked about a famous praline shop in the New Orleans French Quarter on Decatur between Jackson Square and the French Market. I am not sure that the shop still exists, especially after the devastation of Hurricane Katrina. The memory lingers on, beginning with the fragrance of caramel and roasted pecans drifting out onto the street for blocks around the shop. The accompanying visual is of a huge woman hovered over an equally huge copper pan filled with bubbling caramel and pecans. The woman would stir and stir the mixture until it was just right, and then she would ladle dollops of the blazing hot mixture onto a cool marble table. When the pralines had cooled, she would wrap them in squares of waxed paper, ready for sale to the many tourists who had lined up to watch her. Of course, the taste memory is biting into a golden brown praline filled with pecans and cooked so perfectly that the caramel was soft and chewy without any sugary texture.

Making pralines at home can be a challenge. First, you probably don’t have a big copper vat. Then there is the matter of getting the caramel cooked just right so that it is creamy without a trace of sugar crystals. That means that many home cooks – this one included – prefer to buy their pralines from a good candy store.

Those challenges are what makes this recipe so great. You can make perfect pralines in just a few minutes using your microwave. The biggest problem is to make certain that the time of cooking is tied to the wattage of your microwave oven. This recipe is designed for a 1000 watt appliance. To make it a general recipe, I tried to see if there are tables or graphs to suggest how you should adjust cooking time according to oven wattage. Indeed, there are lots of tables available, but I found most of them confusing and difficult to use. Instead, I developed a simple formula which you can use as a beginning guideline. You will probably need to experiment to find the ideal time for your oven, but a beginning point is to divide 1000 by the wattage of your oven and multiply the cooking time in this recipe (12.5 minutes) to find the approximate correct cooking time for your oven.

The other essential secret is to use a large enough (eight cups at least) microwave-proof bowl to boil the praline mixture.

With that, here is the recipe:

RECIPE

Ingredients

  • 1 pound light brown sugar
  • 1 cup heavy cream
  • 2 cups shelled pecan halves
  • 2 tablespoons butter
  • enough softened butter to grease a large baking sheet

Method

  1. In the large microwave-proof bowl or pitcher, combine the brown sugar and cream.
  2. Using a 1000 watt microwave oven with turntable, cook the brown sugar and cream mixture on High for exactly 12.5 minutes
  3. Using a hot pad, transfer the bowl with the cooked mixture to a heat-proof surface.
  4. Stir in the pecan halves and the butter,
  5. Working quickly, when the pecans are completely coated and the butter is melted and incorporated, form the pralines
  6. With a soup spoon or tablespoon, ladle spoonfuls of the mixture onto the buttered baking sheet.
  7. Cool enough before eating so that you don’t burn your tongue, but pralines are delicious warm or cold.
  8. If you get tired of eating just the pralines, try crushing them before sprinkling them over dishes of vanilla ice cream

2 Comments

Filed under Food, Photography, Recipes

SHRIMP, CORN, AND BLACK BEAN SALAD WITH CHILE-LIME VINAIGRETTE

I’m still working on emptying the freezer. I found more shrimp. I also had some leftover corn on the cob from a cookout the day before. With a can of black beans from the pantry, all of that seemed like the makings of a spring salad. For this recipe, you need to boil the shrimp in their shells, along with some crab boil. My choice is Zatarain’s liquid boil, because it is easy to use, but any brand will work.  Don’t cook the shrimp too long or they will become tough. Chill them in ice water before you peel them, and then refrigerate  until you are ready to use them.  Prepare the corn by cutting the kernels off the cobs. A sharp knife is just fine for the job, but if you are a gadgeteer, you might have fun using a special device for removing the kernels while leaving a beautiful, symmetric cob.

Dress the salad with the accompanying chili-lime vinaigrette to complete the Southwestern slant of the salad. This should serve two to four.


RECIPES

Shrimp, Corn, and Black Bean Salad

Ingredients

  • 10  16-20/pound frozen shrimp with shells, thawed
  • 2 tablespoons liquid Zatarain’s crab boil
  • 2 tablespoons salt
  • 2 cooked ears of corn
  • 1 can (14 ounces) black beans, drained and rinsed
  • ½ cup chopped green bell pepper
  • 2 ribs, celery, diced
  • ½ medium red onion, diced
  • ¼ cup pecan halves, chopped coarsely
  • ¼ cup sliced black olives
  • 2 ounces feta cheese, crumbled
  • 8 cherry tomatoes, halved
  • salt and pepper to taste

Method

  1. Add the thawed shrimp to 4 quarts of boiling water to which has been added the salt and crab boil. Return to the boil and boil for 5 minutes. Drain and chill the shrimp in water and ice. When cool, peel the shrimp. Refrigerate until ready to use.
  2. With a sharp knife or circular corn cutter, cut the kernels off the corn cobs. Set aside until ready to assemble the salad.
  3. In a large bowl, combine the corn kernels, black beans, bell pepper, celery, onion, pecan pieces, and olives. Add the feta cheese crumbles and toss lightly.
  4. Dress with the chile-lime vinaigrette, toss lightly, and top with shrimp and tomato halves.
  5. Serve. Makes 2 to 4 servings

Chile-Lime Vinaigrette

Ingredients

  • 1 large lime, juiced
  • 1 tablespoon Dijon mustard
  • ¼ teaspoon garlic powder
  • ¼ teaspoon ground cumin
  • ½ teaspoon ground red chiles (your choice of heat)
  • ½ teaspoon salt
  • ¼ teaspoon ground black pepper
  • 1 teaspoon  turbinado sugar
  • 6 tablespoons extra virgin olive oil

Method

  1. In a medium bowl, whisk the lime juice and mustard together untill well combined.
  2. Whisk in the dry ingredients until completely incorporated.
  3. Slowly, one tablespoon at a time, whisk in the olive oil. Make sure that each tablespoonful is completely incorporated before adding the next.
  4. Correct the seasoning with salt and pepper. Then use the entire recipe to dress the shrimp and vegetable salad. Serve immediately.

3 Comments

Filed under Food, Photography, Recipes

CINCO DE MAYO, MARGARITAS, AND ZACATECAS

There is a common misunderstanding that Cinco de Mayo is the Mexican equivalent of the American Fourth of July. Actually Mexican Independence Day is September 16th (Dieceséis de Septiembre) and it is a really big national holiday in Mexico. On the other hand, Cinco de Mayo memorializes the victory of a seriously outmanned Mexican army fighting an invading French force in the city of Puebla. The event is celebrated in Puebla, but the holiday really got its start among Mexican immigrants in Los Angeles and other Western and Southwestern cities around the time of the American Civil War (1860-1865) The purpose of the celebration was to demonstrate native pride among the Mexican immigrants. Over time the day has come to be celebrated in much of the United States, and now has seen retrograde movement into Mexico where it is increasingly celebrated.

My own view is that the day has become popular because it provides an excuse to celebrate spring, drink your share of Coronas and/or margaritas, and eat lots of tacos and chips and salsa. That seems reason enough, and I plan to celebrate Cinco de Mayo this year.

Even though Mexican beer (Tecate, Corona, Bohemia, Dos XX, Negra Modelo) is probably the most popular alcoholic beverage for the holiday, there are undoubtedly many pitchers of margaritas drunk before the day is over. These days, many bartenders use bottled margarita mix and cheap tequila. This is a recipe for a not-very-tasty drink that can be used simply to get a buzz (and a headache). A well-made, delicious margarita should be made with fresh lime juice, good quality tequila (preferably “white” or clear, not brown, with the label, “100% agave) and your choice of orange liqueur. Commonly Triple Sec is used, but it is a little harsh for my taste. Cointreau and Grand Marnier are preferable, but my new favorite is Citronge, made by the Mexican distiller of Patrón tequila. You will also need ice to dilute the other ingredients a bit and bring out the flavors. Use coarse salt if you like a salty rim. Just don’t ask me about frozen margaritas – I don’t much like them.

Zacatecas is one of the great colonial cities of Mexico. Shortly after the Spanish conquest, an enormous lode of silver was discovered, and Zacatecas mines provided much of the silver wealth of the Spanish Empire. The city is nested in a beautiful mountain valley with the Sierras nearby. In its heyday, the city was filled with ornate churches decorated with silver, gold, and other precious materials. The churches have been long ago  stripped of their riches, but the beautiful buildings remain. Many shops are filled with gorgeous silver jewelry and household goods. There are charming restaurants and cafés along with comfortable hotels. One of the most comfortable lodgings is fashioned from an abandoned bull ring with modern rooms surrounding the still-existing bull ring. You can almost see the toreadors and hear the crowds.

There is now a namesake of this fascinating city.  Restaurateur Mark Giffen, a James Beard Foundation winning chef best known for his elegant Santa Fe restaurant, The Compound, has created Zacatecas Tacos + Tequila in the Nob Hill district of Albuquerque. It is a casual space that is popular with students from nearby University of New Mexico along with older patrons. There are lots of choices of tequila, as the name suggests, and you can tailor your own margarita with your favorite tequila and orange liqueur. The food consists of creative twists on old standbys – something you would expect from a chef with Giffen’s credentials and reputation.

The queso fundido is beautifully presented and flavorful. House-made chorizo serves as the base of the dish. It is tasty and not too spicy. The cheese is melted , lightly browned, and appropriately oozy. The dish reminds me of the first time I ever had the dish in a sidewalk café in Tlaquepaque, Mexico over thirty years ago.

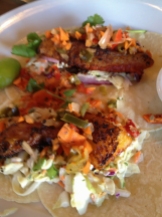
The fish tacos are well presented with perfectly grilled fish and well-seasoned cole slaw. The best part is the fresh house-made corn tortillas.

The chicken molé is unlike any version of the dish I have ever had. Topped with a nest of fresh spinach, the tender chicken breast is smothered in molé and surrounded with grilled calabacitas.

All in all, ours was a good dining experience and worth another visit.

RECIPE

Favorite Margarita

Ingredients

  • juice of 1 large lime
  • 2 ounces 100% agave tequila
  • 1 ounce orange liqueur
  • 2 ice cubes

Method

  1. Combine all of the ingredients in a cocktail shaker. Shake.
  2. Strain into a 6 ounce bar glass filled with ice cubes. (optional, moisten the rim beforehand and dip in coarse salt.)

4 Comments

Filed under Food, Photography, Recipes, Restaurants

SHRIMP-STUFFED POBLANO CHILES WITH TOMATILLO-CHIPOTLE SALSA

One of the classic dishes of Mexico is chiles en nogada: poblano chiles stuffed with shredded pork (picadillo) and topped with walnut sauce (nogada), and pomegranate seeds. Supposedly the dish was invented in the city of Puebla in 1821. The green poblano chiles, white  walnut sauce, and red pomegranate seeds symbolize the colors of the Mexican flag. In season, chiles en nogada is a popular dish throughout Mexico , especially on September 16, Mexican Independence Day.

This is not the season. Fresh walnuts are not available and pomegranates don’t appear until late summer. Still, I thought about making the dish when I located some walnut halves in the freezer I am under instructions to clear out. I also saw some nice looking poblanos in the supermarket. As well, the walnut sauce sounded too complicated, so I decided to stuff the chiles with some pre-cooked, pre-shelled shrimp from the meat counter and cremini mushrooms from the refrigerator drawer. Then I topped it all with crema, the Mexican version of sour cream. The final dish still turned out green, white, and red because I used some tomatoes in the stuffing.

As a side dish, I made a tomatillo salsa with chipotle. That took only a few minutes and gave a little extra kick for those who wanted it. Avocado slices finished things off for a festive and surprisingly light dinner.

RECIPES

Shrimp-Stuffed Poblano Chiles

Ingredients

  • 4 fresh poblano chiles
  • ¼ cup walnut halves or pieces
  • 2 tablespoons olive oil
  • 6 crimini mushrooms, washed, trimmed, and quartered
  • ½ pound pre-cooked, shelled shrimp (31/40 per pound)
  • 3 Roma tomatoes, peeled, seeded, and chopped coarsely
  • ¼ cup scallions including green tops, sliced
  • ½ cup cilantro leaves, coarsely chopped
  • juice of ½ lime
  • salt and pepper to taste
  • 1 tablespoon adobo sauce (optional, see recipe below)
  • Mexican crema

Method

  1. Roast poblanos over an open flame until the skin is evenly charred. Place in a zipper bag, seal, and let rest until cooled. Then remove the charred skin under running water, slit one side, remove seeds and core, dry, and set aside.
  2. In a small sauté pan over medium heat dry roast the walnuts until lightly browned and the oils have begun to be released. Stir frequently. Be careful not to burn. Remove from the heat, cool, chop coarsely, and set aside.
  3. In the same sauté pan, heat the olive oil over a medium flame. Add the quartered mushrooms and sauté until they are soft and lightly browned. Drain, cool, and set aside.
  4. In a medium bowl, combine the shrimp,  walnuts, mushrooms, shrimp, tomatoes, scallions,  cilantro, and lime juice. Adjust the seasoning with salt and pepper. Stir in the optional adobo to suit your taste.
  5. Fill the prepared poblano chiles and arrange on individual plates. Drizzle with crema, and serve.

Roasted Tomatillo-Chipotle Salsa

Years ago, the first time I made this for my chef son-in-law, he liked it so much that he copied the recipe to the collection he keeps in his laptop. The salsa is refreshing and quite different from the usual bottled kinds. You can make it as hot as you like by varying the number of chipotles and the amount of the adobo sauce. Tomatillos, along with tomatoes, belong to the nightshade family, but they are more tart than tomatoes, stay green when ripe, and are covered with a papery husk that needs to be removed before eating or cooking. They can be eaten raw, but the tart flavor is not very good, in my opinion. Roasting them mellows the flavor. Tomatillos  used to be hard to find except in Mexican grocery stores, but now they are in nearly every supermarket. Chipotles are actually smoked jalapeños. You can find them canned in a spicy adobo sauce.

Ingredients

  • 5-6 fresh tomatillos (about 1 pound)
  • 1 tablespoon olive oil
  • 1 small red onion, chopped fine
  • ½ cup cilantro leaves, stemmed and chopped coarsely
  • 2 chipotles (canned in adobo sauce)
  • 1 tablespoon vinegar
  • 1 teaspoon dried Mexican oregano
  • salt and pepper to taste

Method

  1. Remove the husks of the tomatillos. Then broil them for 15 to 20 minutes on a baking sheet that has been lined with aluminum foil. Turn occasionally. Remove from the broiler when the skin has dark brown spots all over and the flesh is soft and somewhat watery.
  2. In a small skillet, sauté the chopped onion in the olive oil until soft and translucent. Do not brown.
  3. Transfer the onion to a medium bowl. Chop the tomatillos finely and add them to the onion. Add more adobo sauce if you want the salsa to be more piquant. Stir in the vinegar and cilantro. Correct the seasoning with salt and pepper.
  4. Serve as a dip with tortilla chips or as a condiment with a main course.

1 Comment

Filed under Food, Photography, Recipes