Monthly Archives: September 2016

SHRIMP-STUFFED MUSHROOMS

We’ve had our son and his two daughters visiting us the last few days. He was in town for a meeting, and the children flew in by themselves for the weekend. During their visit they took a couple of hikes and spent an afternoon at the swimming pool at the Community Recreation Center. The pool is a favorite place for all of our grandchildren because of the giant water slide.

The fist day, they visited Tent Rocks National Monument. The tent rocks are columns of volcanic tuff as high as 80 feet and topped with more durable cap rocks. The site has a slot canyon that you have to squeeze through to get to the top of the mesa. There are also petroglyphs if you look carefully.

The second day they visited Tsankawi Ruins, part of Bandelier National Monument. The trail leads to the top of a mesa where the ruined ancient village is littered with decorated pottery shards. Much of the trail winds through the volcanic tuff layer. It has winding, deep grooves, probably worn by countless foot steps, but possibly also carved out so that potential invaders had to come up the steep hillside in single file.

On our son’s arrival, we had refreshments on the patio. Something more substantive than salted nuts but less than a full meal seemed in order. Stuffed mushrooms sounded like the perfect alternative. Shrimp was a perfect stuffing. As you’ll see in the recipe, there is a lot of chopping. You could use a food processor instead. Just be careful not to turn everything to mush. I prefer hand-chopped ingredients to give contrasting textures and bursts of different flavors.

RECIPE

Shrimp-Stuffed Mushrooms

Ingredients

  • 12 3-inch crimini mushrooms
  • olive oil
  • ½ pound boiled shrimp, cleaned and tails removed
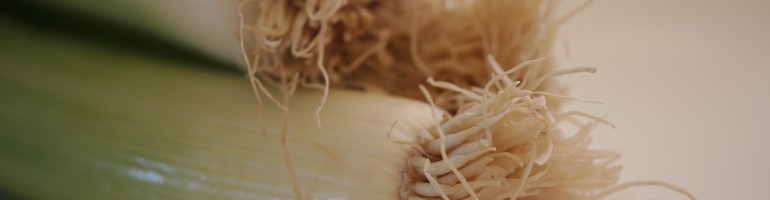
  • 1 scallion
  • 2 tablespoons mayonnaise
  • ¼ cup panko
  • ¼ cup pine nuts, lightly toasted in a small dry saucepan
  • ½ teaspoon Old Bay seasoning
  • salt and pepper to taste

Method

  1. Remove the stems from the mushrooms and set aside.
  2. In a large sauté pan over medium heat, sauté the mushroom caps on both sides in about 1 – 2 tablespoons of olive oil. Transfer to a small baking sheet, hollow side up.
  3. Chop the mushroom stems and sauté in the same pan using more olive oil as needed. Transfer to a small bowl and set aside.
  4. Chop the shrimp finely. Chop the scallion finely, including the green top.
  5. In a bowl, combine the chopped shrimp and scallion, reserved chopped mushroom stems, mayonnaise, panko, and pine nuts. Stir in Old Bay seasoning, and add salt and pepper to taste.
  6. Fill each mushroom cap with the shrimp mixture. Bake in the middle of an oven preheated to 350°F for 20-30 minutes. Remove from the oven, transfer to a plate, and serve while still warm.
Advertisement

10 Comments

Filed under Food, Photography, Recipes, Travel

EASY PEASY BURGUNDY BEEF

Summer is winding down, and so is our local farmers’ market. Apples and pears fill baskets of all sizes. The air is bathed with the singular smell of roasting chiles. That smell always anticipates the fragrance of burning piñon as nights cool off and fireplaces are lit. Nearly every vendor has piles of potatoes of all shapes, colors, and sizes. This last week I bought fresh-roasted green chiles which I used for pork posole for my visiting son and fingerling potatoes with no particular fate in mind for them.

I considered creamed potatoes with green peas, which is a long-time family favorite, I decided against that because I would still have to come up with a protein. Then I thought of Burgundy beef or, in its French guise, boeuf Bourguignon. The first time I ever had Burgundy beef was in my internship days. I was making $75 a month, so any cheap or free food was always welcome. Most of the hospitals still had staff meals, so they served as the house staff’s main source of sustenance. In general, the food was less than gourmet.  One of my colleagues was dating  a dietetics intern who worked at the VA hospital. She always knew the menus in advance, and the VA food was by far the best. We would make sure to go to the VA when the menu was especially good, and we always were sure to make Burgundy beef night.

At the time we were mystified about the name, certain  – especially with the VA – that it didn’t refer to Burgundy wine. What a surprise when a couple of years later, my new bride and I were watching Julia Child on our 14-inch black and white television set in our basement apartment. Julia made what we considered to be a very fancy French dish. boeuf Bourguignon. We realized that it was our old VA standby, Burgundy beef. We tried out Julia’s recipe in Mastering the Art of French Cooking, Volume I. It was the most delicious stew that either of us had ever had. But like most Julia recipes, it was not straightforward, requiring multiple steps to get each ingredient cooked just so before everything was combined.

This is an easy version that is still pretty good. I used a braising pan in the oven, cooking the stew for about 4 hours at low temperature, but a slow cooker would work perfectly. Julia Child’s recipe doesn’t call for green peas. She suggests them on the side, but I tossed in some frozen peas at the last minute for color and a boost of the healthy index. The most important thing is to make it easy on yourself.

RECIPE

Easy Peasy Burgundy Beef

Ingredients

  • 1 pound stir-fry beef, cut into 1 – 2 inch chunks  (Choose your own kind of beef. Stew meat is fine; filet would be over the top.)
  • olive oil
  • 2 tablespoons all-purpose flour
  • 2 cups beef stock
  • 1 cup red wine
  • 1 tablespoon tomato paste
  • 6-8 stems of fresh thyme
  • 2 bay leaves
  • 2 cloves garlic, peeled
  • 8 ounces white button mushrooms (one fiberboard basket)
  • 10 boiling onions, blanched, outer skin peeled, root and stem ends trimmed and pierced
  • 1 large carrot, peeled and cut in obliques
  • 1 rib celery, cut in triangles
  • salt and pepper to taste
  • 1 cup frozen green peas, thawed (optional)

Method

  1. Over high heat in a braising pan, brown the beef in olive oil. Stir in the flour to coat the beef. Cook until the flour is lightly browned and the oil is absorbed.
  2. Add the beef stock, red wine, tomato paste, thyme, bay leaves, garlic, mushrooms, onions, carrot and celery. Return to the boil and cover.
  3. Transfer to the middle of an oven preheated to 215°F. Braise for 4 hours, until the potatoes are cooked through and the beef is tender. Stir occasionally, and correct the seasoning with salt and pepper.
  4. About 10 minutes before you are finished cooking, stir in the peas. Serve.

Leave a comment

Filed under Food, Photography, Recipes

BUCATINI ALL’ AMATRICIANA

Bucatini is one of my favorite pastas. It is sort of like eating spaghetti on steroids or macaroni for Lilliputians. One of the best ways to eat it is in the style of Amatrice, the Italian town that was devastated recently in the massive Italian earthquake. Recipes abound. Mario Batali and Anne Burrell, both famous for their Italian-based cooking, have recipes on the internet. So does Giada de Laurentiis. Two of my favorite versions are by Marcella Hazan in Essentials of Classic Italian Cooking and Tom Maresca and Diane Darrow in La Tavola Italiana.  Not surprisingly, with so many recipes there must be controversy as to what is exactly the “correct” way to prepare this famous and classic dish.

Controversy begins with the pasta. Most folks accept the notion that bucatini is the real deal. But you may have a hard time finding it, so spaghetti or penne are quite acceptable substitutes. Then there’s the matter of tomatoes. Some advocate canned whole San Marzano tomatoes while some argue that only fresh can be used. You may have to settle for Roma unless you are lucky enough to find San Marzano. Most agree that tomatoes should not overwhelm the other ingredients, but that is a quantitative judgement. There is much disagreement about the choice of meat. Traditionalists call for guanciale, cured pork jowl, more strongly flavored  but similar to pancetta, which for most writers is a totally acceptable substitute.  The cheese proponents come down on either the side of Parmigiano Reggiano or pecorino romano. You can find a middle ground and use both. The purists would not countenance American parmesan and romano.  Finally, there is a choice for heat from chiles. Pepperoncini are perhaps most commonly used, but then there is a debate about whether to leave them in the sauce or remove them. Red pepper flakes are often a substitute, and many other chiles have been recommended. Actually, all of these many choices mean that the cook has unlimited options and can really create a dish that is uniquely his or hers.

Here’s how I cooked it last night.

RECIPE

Bucatini all’Amatriciana

Ingredients

  • 1 tablespoon olive oil
  • 1 tablespoon unsalted butter
  • 1/3 pound guanciale, sliced and cut into ¼inch x ½ inch rectangles (Be sure to have the butcher cut off the thick rind. It is tough and not very tasty. Use pancetta if you can’t find guanciale)
  • 1 medium onion, diced finely
  • 5 green chiles (or red pepper flakes to taste)
  • ½ cup dry white wine
  • 5 fresh Roma tomatoes, blanched, peeled, seeded, and coarsely chopped
  • 3 tablespoons freshly grated Romano cheese + more for garnish
  • 3 tablespoons freshly grated Parmesan cheese
  • ½ teaspoon ground black pepper
  • salt to taste
  • 1 pound dry bucatini (imported Italian Granoro brand is a good choice)

Method

  1. Heat the oil and butter in a large sauté pan over medium heat. Add the sliced guanciale, stirring frequently  until it begins to crisp but is not completely rendered. Stir in the onions and continue to sauté until the onions are translucent and have begun to caramelize, about 5 minutes. Add the chiles and cook for another minute or two. Stir in the wine and cook until the wine has almost completely evaporated.
  2. Add the tomatoes, and cook over medium-low heat, stirring frequently, for another 20 minutes. Stir in the grated cheeses. Remove the chiles.
  3. Boil the bucatini in a large pot of boiling salted water until cooked through but slightly al dente, about 8-10 minutes.
  4. Transfer the cooked bucatini to the warm sauce in the large sauté  pan, tossing to completely coat the pasta with the sauce. Serve immediately with more grated Romano cheese. Should serve 4-6.

8 Comments

Filed under Food, Photography, Recipes

PORCUPINES IN MUSHROOM GRAVY

Here’s another riff on comfort food of the past.  For many mothers of the 1950s, -60s, and -70s, porcupine meatballs or just porcupines were a standby and family favorite. The recipe was included in The Joy of Cooking at least as early as 1943 and as late as 1974, but it had disappeared by 1997. I haven’t been able to find a recipe in contemporary cook books, but there are still several versions on the internet.

My first experience with porcupines came during my graduate school days. I lived with the family of one of my best grade school friends who had moved to Houston. The mother was a very good cook, but her meals were very much of the era. She knew dozens of ways to fix ground beef, and there was nothing that couldn’t be improved with a can of tomato or cream of mushroom soup.

Porcupine meatballs were one of her specialties. Whenever she made them, cheers would go up from the younger children in the family as well as me. The version in the Joy of Cooking called for a can of condensed tomato soup. Her version was more refined, using a can of tomato sauce with seasonings. Both recipes, however, called for rolling the meatballs in rice before cooking them. Internet recipes combine raw rice in the meatball. The recipe that follows uses Mrs. M.’s method.

I have also made two significant changes: first, I have made what are basically hamburgers instead of meatballs (much easier) and second, instead of some kind of tomato sauce, I have used a brown sauce with mushrooms. In part, this is because lately we have been eating lots of Italian dishes with tomato sauces, and I’m getting a little tired of tomato sauce of any sort on any thing.

Sorry, the images are not my best. I confess that the finished dish does not look like much, but I promise that it tastes good – almost as good as at Mrs. M’s table.

RECIPE

Porcupines in Mushroom Gravy

Ingredients

  • 4 tablespoons butter
  • 4 tablespoons flour
  • 4 cups beef stock
  • 1 tablespoon tomato paste
  • 4 medium white mushrooms, sliced
  • 1 pound ground beef
  • ½ small onion, diced finely
  • 1 egg
  • ½ cup bread crumbs
  • ½ teaspoon garlic powder
  • dash ground bay leaf
  • ¼ teaspoon ground thyme
  • ½ cup long grain rice
  • 3 tablespoons vegetable oil
  • salt and pepper to taste

Method

  1. Melt the butter in a medium saucepan over medium heat. Stir in the flour until well combined. Cook until the mixture is bubbling, about 5 minutes. Do not allow to color. Whisk in the beef stock, stirring vigorously to break up any lumps. Bring to a boil, then reduce the heat and simmer until the mixture is thickened. Stir in the tomato paste and mushrooms. Cook for another 5 minutes. Then reduce the heat to the lowest setting to keep the sauce warm until you are ready to add it to the porcupines.
  2. In a large bowl, combine the ground beef, onion, egg, bread crumbs, garlic powder, bay, and thyme. Use your well-washed hands and mix gently until well combined.
  3. Divide the mixture into 4 equal-sized pieces. Shape each into a patty about 5 inches across and ¾ inch thick.
  4. Place the raw rice in a bowl large enough to accommodate the patties. Individually, place the patties in the rice, pressing down with your hand to make sure the rice sticks to the surface and turning until the patty is completely and evenly coated with rice. Repeat the process with all four patties
  5. Heat the vegetable oil in a heavy bottomed cooking pot with lid. Add the rice-covered patties and allow them to brown lightly, turning once. Stir in the warm mushroom sauce slowly to avoid any flare-up. Bring to the boil and then reduce to a simmer. Cover and cook for 30 – 40 minutes until the rice is done. Check from time to time during the cooking.
  6. Serve one or two patties to each diner with a good helping of the sauce.

11 Comments

Filed under Food, Photography, Recipes

BAKED POTATO A LA KING

àBecause we’ve been trying to restrict kitchen time lately, we’ve been eating a lot of baked potatoes. They’re easy, nutritious, and – depending on what you put on them – can be fairly low in calories. I confess, I usually don’t worry about that last dictum and load them up with cheese, sour cream, butter, bacon, scallions, mushrooms, and whatever else I can find. But that has gotten boring.  I had some chicken in the refrigerator that needed to be used and so I thought about coming up with a baked potato topping that would get me away from the blahs while still avoiding extended kitchen time.. Creamed chicken on toast or waffles is always a winner, so why not creamed chicken on baked potatoes. It turned out to be very easy and pretty tasty.

RECIPE

Baked Potato à la King

Ingredients

  • 4 chicken thighs
  • 4 cups chicken stock
  • ½ teaspoon poultry seasoning, or to taste
  • 4 tablespoons unsalted butter
  • 4 tablespoons flour
  • 1 rib celery, diced
  • 3 scallions, including green tops, sliced
  • 3 medium button mushrooms, sliced
  • 3 snacking peppers, seeded and sliced
  • salt and pepper to taste
  • 2 medium russet potatoes
  • butter or vegetable shortening
  • Parmesan cheese, freshly grated

Method

  1. In a three-quart sauce pan, place the chicken thighs in the chicken stock and bring to the boil. Reduce to a slow boil and cook for 30-40 minutes. Remove the chicken to a plate and cool. Remove the meat and discard the skin and bones. Cut or shred into bite-sized pieces and set aside.
  2. Strain the stock and cool. Clean and dry the sauce pan and return to medium heat. Add the flour and butter, stirring until a smooth roux is formed and is bubbling. Cook a few minutes to remove the raw flour taste, but do not allow the roux to color. Stir in the strained chicken stock and return to the boil. Allow to boil gently to reduce the mixture by about half.
  3. Add the celery, scallions, mushrooms, and snacking peppers. Simmer for 10 minutes. Adjust seasoning with salt and pepper.
  4. Meanwhile, scrub the potatoes, rub them generously with butter or vegetable shortening, and pierce in several places with a kitchen fork. Bake  for 1½ hours in a small baking dish in the middle of an oven preheated to 350°F (You can use whatever temperature/time combination you prefer, but I believe that a lower temperature and longer cooking time yield a fluffier potato).
  5. When the potatoes are cooked through, remove from the oven and transfer the potatoes to soup bowls. Open the potatoes, add additional butter, salt, and pepper if you prefer. Ladle some of the chicken mixture over the potatoes, top with grated Parmesan cheese, and serve immediately


4 Comments

Filed under Food, Photography, Recipes

ESQUITES (CORN SALAD), BRUSSELS SPROUT SLAW, AND PORK

The fresh produce season is beginning to wind down. You can feel it in the cooler mornings around here. That means the chile roasters shift into high gear, and corn season reaches its peak. There are lots of local farmers who grow excellent sweet corn, but arguably the best comes from a little town on Colorado’s Western Slope, Olathe. The town even have a noted Sweet Corn Festival in August.

My wife was gone for a few days to tend to some family matters in Texas. To celebrate her return, I thought a good meal would be pleasant in the now-beautiful evening. Even without prompting she declared in one of our phone calls that she did not want to go out to a restaurant. She can read my mind.

The pressure was on to come up with something tasty. Steak is always the obvious choice, but I’ve fixed that so many times when she returns from a trip that I knew she would be expecting it.  A pork chop makes a good substitute. That made me think of the abundance of fresh corn available right now. Then I got a cue from the New York Times. Melissa Clark had an article about elote: roasted ears of corn dusted with ground chiles along with lime juice and crema. Around here and along the border, elotes are popular street foods sold out of food carts and even little hand-pulled wagons. Delicious, but not very elegant. Esquites are nearly the same thing except the kernels of corn have been cut off the cob. That sounded great with grilled pork.

For a green vegetable, slaw made with raw Brussels sprouts instead of cabbage completed the menu.


RECIPES

Esquites (Corn Salad)

Ingredients

  • 2 ears fresh sweet corn, shucked and silk removed
  • 2 tablespoons butter
  • 2 tablespoons Mexican crema or sour cream
  • 2 cloves garlic, minced with microplane
  • 5 scallions, chopped
  • 1 bell pepper or several snacking peppers, seeded and diced
  • ½ cup chopped cilantro leaves
  • 4 ounces Mexican cojita cheese, crumbled (If you can’t find cojita, you can substitute feta)
  • salt and pepper
  • ground chiles, your choice of heat
  • 1 lime, cut in 8 wedges

Method

  1. Roast the whole ears of corn until individual kernels are browned. I used my chile roaster, but you can use a dry frying pan over high heat, turning the corn frequently. You can also use your barbecue grill if you have it fired up. Remove the roasted corn from the heat, cool, and cut the kernels off the cobs using a sharp knife. Set aside the corn kernels if you plan to make the esquites later.
  2. Melt the butter over medium heat in a medium frying pan. Stir in the corn kernels and cook for a few minutes, stirring frequently.  Stir in the sour cream, scallions, pepper, and cilantro. Cook for about 5 minutes until the peppers are softened.
  3. Stir in the crumbled cojita and stir gently until the cheese is well combined. Correct seasoning with salt and pepper. Sprinkle with ground chile. Serve immediately with lime wedges.

Brussels Sprout Slaw

Ingredients

  • 8-10 Brussels sprouts
  • 1 rib celery, diced
  • 4 scallions including greens, thinly sliced
  • 1 Granny Smith apple, diced
  • 1 carrot, peeled and grated with a coarse grater
  • 2 tablespoons mayonnaise (about)
  • juice of ½ lime
  • 1 teaspoon celery seed
  • 1 teaspoon minced dill fronds or dried dill weed
  • salt and pepper to taste

Method

  1. Using a mandoline, shred the Brussels sprouts. If there are unshredded leaves remaining, chop with a large chef’s knife until the shreds are fine enough to please you..
  2. Stir in the celery, apple, and carrot. Add mayonnaise to taste along with the lime juice.
  3. Stir in the celery seed and minced dill fronds. Adjust seasoning with salt and pepper. Chill in the refrigerator for 1 hour before serving.

12 Comments

Filed under Food, Photography, Recipes