Monthly Archives: March 2013

MORE EAST TEXAS – FRIED CATFISH AND HUSH PUPPIES

A fish fry is one of the great traditions of the entire South, but nowhere is it more on display than in East Texas and nearby Louisiana and Arkansas. The corners of these three states are so akin to one another that residents of the region call it the ArkLaTex. If you use that name, everyone knows where you live, and everyone knows what you think is important in life. Years ago we lived in Shreveport where one of the favorite eating haunts was the Cypress Inn. This huge, ramshackle place sat on the banks of the Cypress Bayou and though they had a lot of choices on the menu, nobody ever went there except to eat their fried catfish dinner complete with hush puppies.


The hush puppies were golden balls of melt-in-your mouth goodness – crispy outside, creamy inside of cornbread and chopped onions.  Now, you may have had the eraser-shaped hush puppies in one of the big “country-style” chain restaurants, but those are a pale, tasteless copy of the real thing. The Cypress Inn had the real thing, and you could make a whole meal of hush puppies alone.

The catfish was equally delicious with a golden, crunchy outside of cornmeal crust  and the flavorful tender catfish inside.

Catfish, especially those caught from a lake or bayou can have a muddy taste to them. These days, though, most are farmed in huge tanks or ponds. Still, it’s worth using an old trick that locals swore by to get rid of the muddy taste. A good soak in buttermilk is supposed to brighten the taste of the catfish, and I do belive that it works. That soak is part of the method of this recipe.

The other parts of the Cypress Inn meal  were the hand-cut cole slaw and the fresh cobbler, apple or peach depending on the season. You probably have your own favorite recipes for these, but you definitely need to have some slaw, tartar or cocktail sauce, and fruit cobbler handy when you sit down to enjoy fried catfish with hush puppies.


RECIPES

Fried Catfish

Ingredients

  • 4 catfish fillets, skin and bones removed, about 4-6 ounces each
  • 1½ cups buttermilk
  • 1 cup flour
  • 1 tablespoon Old Bay seasoning
  • 1 tablespoon paprika
  • 2 teaspoons salt
  • 1 teaspoon  ground black pepper
  • 1 cup yellow cornmeal
  • vegetable oil for frying

Method

  1. In a shallow pan or plate, cover the catfish fillets with buttermilk. Cover with plastic wrap and refrigerate for at least 4 hours or overnight.
  2. In another pan or plate, combine the flour, seasoning, paprika, salt and pepper.
  3. Fill another pan or plate with the cornmeal
  4. When you are ready to fry the catfish, remove the buttermilk-soaked fillets from the refrigerator and transfer to the plate with the flour mixture, letting any excess buttermilk drain from the fillets. Turn each fillet in the mixture so it is completely coated with the flour mixture.
  5. Then transfer the coated fillets to the cornmeal, again turning them so they are completely coated with the cornmeal
  6. Fry the fillets, one at a time or in batches  in a deep pan with about 2 inches of vegetable oil pre-heated to 350⁰F (177°C), turning them over so that both sides are golden brown and crispy.
  7. Drain on paper towels and serve immediately while still hot.

Hush Puppies

Ingredients

  • 1½ cups yellow cornmeal
  • ½ cup flour
  • 1 teaspoon baking powder
  • ½ teaspoon baking soda
  • 1 teaspoon salt
  • ¼ cup scallions, green tops only, chopped very finely
  • 1 cup buttermilk
  • 1 large egg, beaten
  • vegetable oil for frying

Method

  1. Stir together the cornmeal, flour, baking powder, baking soda and salt so that they are completely mixed
  2. Add the chopped scallions, buttermilk, and beaten egg. Mix so that they are thoroughly combined.
  3. By spoonfuls, drop the mixture into a deep pan with about 2 inches of vegetable oil that has been heated to 350⁰F (177°C), turning until the hush puppies are golden brown on all sides.
  4. Drain on paper towels and serve while still hot.  Makes about 30 hush puppies.


7 Comments

Filed under Food, Photography, Recipes, Travel

CORNBREAD AND SPRINGTIME IN EAST TEXAS

This is the best season to be in East Texas. The winter rains have filled up the ponds and encouraged the emerging leaves into a hundred different shades of green.  The days have warmed without the blazing heat that will begin in only a few weeks. The nights are still cool and perfect for sleeping.

Unlike most of the rest of Texas, the “Piney Woods” are set on rolling hills which are filled with Southern pines, hickories, sweet gums, maples, and oaks of several varieties. This time of year, though, the redbud trees announce themselves as well as Spring. Beautiful shades of pink and red light up the woods.

More hidden in the depths of the forests, dogwoods hang like clouds in the shadows. The branches spread, and the white sepals seem to drift suspended. Close up, the markings remind us of the legend of the dogwood serving as the wood of the cross. It seems appropriate that the beautiful show occurs in the Spring.

East Texas has not lost the commercial opportunities of the redbuds and dogwoods. The Palestine Dogwood Festival (that’s Pal’-a-steen, Texas) provides visitors an opportunity to eat street food, watch the crowning of the festival queen, and tour the beautiful woods.

There are lots of foods that typify East Texas, including fried catfish, hush puppies, greens of all sorts (collards, kale, pokeweed), and at other times of year, black-eyed peas.  For me, though, the quintessential food is cornbread.

Cornbread is almost universally popular, especially in the South. Craig Claiborne, the famous New York Times editor and food critic from Mississippi declared that there are more recipes for cornbread than magnolia trees in the South! Yet finding good recipes for plain cornbread in cookbooks is a difficult task.  Moreover, the popularity of packaged cornbread kits has made it even harder to find a real home-made chunk of cornbread.

If you decide to bake your own cornbread,  there are  decisions that need to be made.  Cornbread made from white cornmeal tends to be more popular in the east with yellow cornmeal gaining increasing popularity the further west you travel.  Northern cornbread, or “Yankee cornbread” as it is commonly called in East Texas, usually contains some sort of sweetening – molasses, maple syrup, sugar, or honey;  Southern cornbread  usually does not contain sweetening, but these distinctions between north and south are not absolute.

This is a version of Southern cornbread, baked in a cast iron skillet as, in my opinion,  all authentic cornbread must be. Some time ago, we had an informal family competition for the best cornbread recipe. This was my entry. One of my daughters used a recipe from one of her friends. It contains sugar (heresy!) and is more like cake. But it is so good that you could wind up eating the whole thing by yourself. I plan to post that recipe in the near future.

RECIPE


Southern Cornbread

Ingredients

  • 2 tablespoons bacon fat for greasing the baking pan
  • 1 cup all-purpose flour
  • 1 cup yellow cornmeal
  • 1½ teaspoons baking powder
  • ½ teaspoon baking soda
  • 1 teaspoon salt
  • 2 jumbo eggs, room temperature
  • 1½ cups buttermilk
  • 4 tablespoons unsalted butter, melted

 Method

  1. Preheat the oven to 425°F (218°C) . Grease a 9 inch cast iron skillet with bacon drippings and place in the oven 10 minutes before you are ready to pour in the batter.
  2. In a large bowl, combine the dry ingredients: flour, cornmeal, baking soda, baking powder, and salt.
  3. In a small bowl, combine the wet ingredients: buttermilk, beaten egg, and melted butter. When they are well combined, stir them into the dry ingredients.
  4. Mix the batter for only a few beats until the mixtures are combined and the large lumps have been smoothed. Do not overbeat.
  5. Remove the heated skillet from the oven, pour in the batter, and immediately return to the oven. Bake for 15 minutes in the top half of the oven. Turn  the skillet 180 degrees and continue to bake for another 15 minutes or  until the top is lightly browned. Remove from the oven, cool for about 5 minutes, then cut into eight wedges, and serve immediately while still warm.

7 Comments

Filed under Food, Photography, Recipes, Travel

TAORMINA, SICILY AND CANNOLI

Sicily is such a beautiful place with deep blue seas and fleecy clouds The surf pounds against the beaches, and the mainland of Italy is just across the Straits. The island traces its history back to Greek times when Syracuse was one of the great city states. Since then it has had a tumultuous history as its own country  as well as under the dominance of many other countries and empires including the Greeks, Romans, Byzantines, Turks, Arabs, and Italy.

That rich history has produced amazing archeology, architecture, food, and customs. The beautiful sunlight has produced a sunny population that seems to take everything in stride.

In the USA, many think of Sicily as the home of the Godfather. That stereotype annoys the locals. At the same time, they often feel obliged to mention it – mostly so they can dispel the myth.

Messina is the port city at the straits, and it is filled with beautiful old buildings and famous churches. Undoubtedly, one could spend days exploring, but the highlight of our trip was a drive along the coast and up a narrow winding road to the town of Taormina. The port is beautiful. with the Stele of the Madonna greeting and saying farewell to vessels as well as wishing a blessing for the city and for all sailors. The mainland of Italy is just across the Strait of Messala which is 1.9 miles across at its closest point and 3.2 miles from Messala to the mainland. Plans to build the world’s longest sing-span suspension bridge are well along.

Taormina has been a tourist destination since Grecian times. The town looks down on the coastline far below, and in the distance, clouds play around the summit of Mount Etna. The air is clear and sunny, and the town streets are lined with interesting shops, ancient palaces, and vendors of all kinds.

One of the required visits is the Greek amphitheater on a hill overlooking the town. The walk is steep but not very long. It is well worth it. The ruin is very well-preserved, and the views from its upper heights are spectacular. It is impossible to visit without thinking of the countless people who have been here before you.

After the visit, the walk back down the hill leaves most tourists either hungry, thirsty, or both. There are plenty of vendors in little stalls to accommodate, and the choices seem limitless, ranging from soft drinks to pasta.

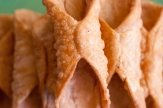
Among the most popular items for sale are the cannoli. There are different sizes and different flavors, and they make great treats to enjoy on the stroll back to the center of the town. The recipe that follows is my take on the pistachio cannoli that we bought on our stroll down the hillside. To make your own, you will need some special aluminum cannoli molds for shaping the shells. Molds should be easily available at a well-stocked kitchen store. A 4 inch cutter is also handy. You may find a nest of cutters of different sizes another useful purchase.


RECIPES

Shells

Ingredients

  • ¾ cup all-purpose flour
  • ¼ teaspoon ground cinnamon
  • ½ teaspoon sugar
  • ½ teaspoon cocoa
  • 1 tablespoon unsalted butter
  • 3 tablespoons limoncello or other citrus-flavored liqueur
  • 2 teaspoons madeira
  • 1 egg white whipped lightly until it is slightly foamy

Method

  • In a medium bowl, combine the flour, cinnamon, sugar, and cocoa.
  • Cut in the butter with a pastry blender so that the mixture resembles coarse meal
  • Add the liqueur and wine and combine with a fork until the mixture comes together as a firm ball
  • Wrap the ball of dough with plastic wrap and refrigerate for 30 minutes or more.
  • Divide the dough in half, and roll out each half on a lightly floured surface to about 1/16th inch thick and large enough to cut out 4 4 inch circles using a cookie cutter or a cardboard circle as a template.
  • Using a rolling-pin, roll each circle into an oval.
  • Wrap each oval around a cannolo mold, long side parallel to the mold. Seal the seam with a dab of the egg white.
  • Fry each cannolo shell  in a heavy pan containing about 2 inches of canola oil and pre-heated to 375°F, turning until the shell is well browned and crisp.
  • Transfer to a pad of paper towels to let cool enough until you can easily remove the mold without burning your fingers.
  • Continue to fry the shaped shells until they are all fried. Set in a dry place ready for filling.

Filling

Ingredients

  • 8 ounces fresh ricotta
  • ¼ cup baker’s sugar
  • 1 teaspoon vanilla extract
  • 1/3 cup miniature chocolate chips + more to sprinkle on the filled cannoli
  • ¼ cup ground unsalted pistachio nuts + more for dusting the fille cannoli

Method

  • In a medium bowl, combine all of the ingredients, mixing well.
  • Transfer to quart-size zippered plastic bag and chill in the refrigerator until you are ready to fill the shells
  • When you are ready,  cut a ¼ inch corner off the plastic bag so that it can be used as a pastry bag
  • Fill both ends of each cannolo. Dust with ground pistachios and sprinkle a few chocolate chips on each end
  • Serve immediately so the cannoli don’t get soggy.

7 Comments

Filed under Food, Photography, Recipes, Travel

HOW TO MAKE A HOT TORTILLA

If you have never eaten a freshly made tortilla, you do not know what you have been missing. Home-made tortillas are to the ones you buy in the supermarket like a slice of home-baked bread compared with the white-bread dough balls you also buy in the supermarket.

Fortunately, modernity has had an impact on tortilla making. If you had been a Native American making tortillas years ago, you would have had to make hominy or posole by mixing dried corn with wood ash, washing off the husks, and then grinding the still-damp corn kernels. Then you would mix that with a little salt (maybe) and knead it with a little water to the right consistency to form masa – literally  “dough”  to make tortillas, arepas, papusas, etc. These days, all you have to do is buy a sack of masa harina de maiz para tortillas y tamales (The package may have all or only some of these words – don’t worry, buy it.) The two most common brands in the USA are Quaker and Maseca. Masa harina or masa flour is actually dried masa which only needs water to form the dough.

Even though making the dough is easy, you may need some special equipment to make perfect tortillas. Of course experienced Mexican and Native American cooks just pat out perfectly round tortillas between their two hands. That expertise comes only from years of practice, so consider using some simple and inexpensive assistive devices.

Cast metal tortilla press made in Mexico

Cast metal tortilla press made in Mexico

First is the tortilla press. Several models are available in cooking shops or from the internet. The one I use was made in Mexico of cast iron. Some versions are made from wood; some have non-stick surfaces. They will probably cost around $20. If you don’t want to invest in one, you can use a small length of 2 inch PVC pipe as a sort of rolling-pin. With practice, that works OK, but it’s still not as good or easy as a press.

Second is the plastic protector. If you try to make tortillas on a bare press surface, they will probably stick – even with the “non-stick” variety – so you need plastic from which you can peel off the tortilla. I use a plastic sandwich bag. With a sharp knife, open the sides of the bag. Do not slit open the bottom fold of the bag. That way you will have a long, narrow plastic sheet with a fold in the middle. This will cost only about 2 cents or so.

Cast iron comal made in Mexico

Cast iron comal made in Mexico

Third is the comal. This is a round cast-iron pan with low sides. Mine is from Mexico. You can buy a similar one from a kitchen store or from the internet for around $20. You can also use a cast-iron skillet. The important thing is that the pan holds heat, so a light weight pan won’t work as well, and a non-stick pan really isn’t needed.

Ball of masa sandwiched in the prepared bag, ready to be pressed

Ball of masa sandwiched in the prepared bag, ready to be pressed

Another perfect tortilla ready to be baked

Another perfect tortilla ready to be baked

A pressed tortilla ready to be tranferred from the plastic to the palm of the hand and then the hot comal

A pressed tortilla ready to be transferred from the plastic to the palm of the hand and then the hot comal

RECIPE

Ingredients

  • 2 cups masa harina
  • 1 1/3 cups warm water
  • ½ teaspoon salt
Freshly-pressed tortilla baking on the hot comal

Freshly-pressed tortilla baking on the hot comal

Flipped over to be baked on the second side, this tortilla shows the color and brown spots from a well-heated comal

Flipped over to be baked on the second side, this tortilla shows the color and brown spots from a well-heated comal

Method

  • Combine all ingredients in a medium bowl. Stir until completely combined into a soft dough. If the flour does not all come together, add a few drops of additional water.
  • Cover with plastic wrap and set aside for 30 minutes. This will allow the water to be completely absorbed make a smoother masa. If the masa is still crumbly, you can add a few more drops of water. Just be judicious in your additions, because you don’t want the masa to be too soft.
  • When you are ready to make the tortillas, remove the plastic wrap, knead the masa gently a few times, and then divide the dough into 12 equal-sized pieces. For more precision, you can weigh them (Each individual ball should weigh 1/12th of the weight of the total ball), but that may seem too compulsive.
  • One at a time, remove the pieces of dough, recovering the others with plastic film. Roll the dough into a ball
  • Prepare the tortilla press by covering the opened press with the prepared plastic sandwich bag. Then place the ball of dough in the  center of the bottom plate of the press. Cover with the flap of the sandwich bag, cover with the free plate of the press, and press down smoothly with the lever of the press.
  • Remove the plastic with the pressed tortilla from the press. Turn the tortilla into your hand, and then transfer gently to the middle of the comal which has been pre-heated over a medium-high flame.
  • Bake for about 30 seconds or until the underside is a light toasty color with dark brown flecks. Turn over and bake for another 30 seconds or so. The tortilla may puff up during the baking. That’s good. You can use a pancake turner to flatten the tortilla against the surface of the comal to make sure that the whole surface of the tortilla is baked.
  • Adjust the heat under the comal if the tortillas burn or do not bake quickly enough.
  • Press one tortilla while the previous one is baking. Continue the process until all of the dough balls have been used.
  • Keep the baked tortillas warm in a folded tea towel or in a special tortilla warmer. Serve immediately.
Insulated cloth tortilla warmer - slip warm tortillas into a slot on the side as you make them

Insulated cloth tortilla warmer – slip warm tortillas into a slot on the side as you make them

Stacking tortillas with cheese in preparation for huevos rancheros

Stacking tortillas with cheese in preparation for huevos rancheros

Once you get them baked, just slather them with butter and eat while warm. They are delicious that way, but they also make great huevos rancheros.

Huevos rancheros with black beans - there is no better breakfast

Huevos rancheros with black beans – there is no better breakfast

10 Comments

Filed under Food, Photography, Recipes

SAN FRANCISCO: RICH TABLE AND GREENS

We are once again in San Francisco babysitting. Sarah and Evan were in Mumbai doing a pop-up and in Singapore. While we have been here the semifinalists for this year’s James Beard awards were announced.

With more than a little excitement, we learned that Rich Table had been named to the “long list” of 29 restaurants being considered for “Outstanding New Restaurant”.

San Francisco is well represented in the competitions for best restaurant, best chef, best pastry chef, best bar, best restaurateur, etc. There is one other San Francisco restaurant in the new restaurant category, and 24 candidates in the various categories.

The famous San Francisco restaurant, Greens, is one of twenty semifinalists in the category of Outstanding Restaurant. Greens is now one of the grandes dames of the San Francisco restaurant scene. It has been around since 1979 with Edward Espe Brown as one of its founders and Deborah Madison as the Founding Chef. Brown had already achieved prominence as the author of the “Tassajara Bread Book”, a collection of recipes from his stint as a budding Buddhist, baker, and cook at the Tassajara Zen Mountain Center. Deborah Madison had been cooking at the San Francisco Zen Center and the famous Chez Panisse. At the time, there was no vegetarian restaurant in San Francisco – probably few or none in the entire USA – and a lot of critics gave the venture little chance for success. But the setting was so beautiful and the food was so good, that it wasn’t long before Greens was a huge success.

As well, Brown and Madison wrote the classic “Greens Cookbook”, but they have both moved on to other ventures. Brown lives in Marin and has become a popular cooking teacher, speaker, and mentor as well as being a highly respected Buddhist priest. Deborah Madison has moved to Santa Fe where she has been a chef and teacher and has written books, essays, new articles, and several award-winning cookbooks. She has been recognized by the James Beard Foundation many times and has received a MFK Fisher writing award.

View of Fort Mason and Greens Restaurant from across the marina

View of Fort Mason and Greens Restaurant from across the marina

View from Greens Restaurant of the marina and the Golden Gate Bridge in the distance

View from Greens Restaurant of the marina and the Golden Gate Bridge in the distance

Decades later, Greens continues to be recognized as one of the best vegetarian restaurants in the country if not the world.

Branches of Spring-flowering trees in the entryway

Branches of Spring-flowering trees in the entryway

Greens Restaurant dining room with the massive tree trunk

Greens Restaurant dining room with the massive tree trunk

The setting is spectacular, especially for lunch. Seasonal flowers greet you in the entryway before you are led into a spare but elegant dining room centered around a huge polished tree trunk. Sunlight streams through floor-to-ceiling windows which look out on a marina filled with sail boats and the Golden Gate Bridge on the horizon. Tables are polished wood set off by small bowls of fresh flowers.

Flowers in a sunny window

Flowers in a sunny window

The staff is extremely friendly and helpful. They engage in pleasant conversation, but know when it is time to leave you alone. They know the menu in great detail, and since that changes daily, they have to stay on top of what comes out of the kitchen. If you are not sure, they may even invite you to try a small sample.

Bread from Acme Bakery comes to the table promptly while you look over the menu. Water is immediately offered, and if you want something else to drink – wine, beer, cocktails, soft drinks – your order is taken promptly and brought as promptly.

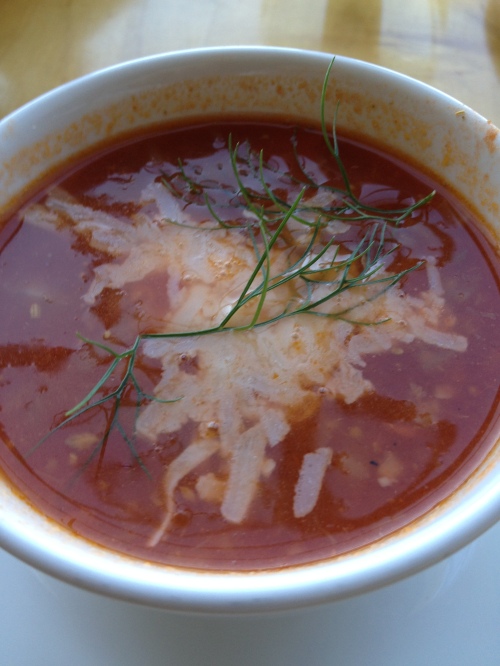
The day we were there, Susan ordered the soup of the day. It was roasted tomato and fennel with a sprinkle of cheese on top. I ordered the Yellow Finn (potatoes) griddle cakes that came with crème fraîche and a spicy root vegetable puree on the side. Susan ordered spring rolls with peanut sauce. When they were served, they were beautifully round and elegantly presented. The peanut sauce was delicious. I ordered the Indian sampler which came with a well-seasoned dal, chilled steamed vegetables, dipping sauces, and some of the best pappadams either Susan or I had ever had.

Slice of watermelon radish with black sesame "watermelon seeds"

Slice of watermelon radish with black sesame “watermelon seeds”

One clever touch was a slice of watermelon radish topped with black sesame seeds which made it look like a tiny slice of watermelon.

Spring rolls with peanut sauce

Spring rolls with peanut sauce

Roasted tomato and fennel soup

Roasted tomato and fennel soup

Yellow Finn potato griddle cakes

Yellow Finn potato griddle cakes

Indian sampler

Indian sampler

We couldn’t resist dessert. For me it was a mocha pot de crème with tasty little sablés. Susan ordered the vegan German chocolate cake. The pot de crème was delicious. The cake was a little disappointing. In fairness, anyone trying to make a vegan chocolate cake deserves a star. Without the eggs, milk, and butter, the caked turned out a little dry and flavorless. Mercifully, they did not try to make it gluten-free as well.

Mocha pot de creme with sables

Mocha pot de creme with sables

Vegan German chocolate cake

Vegan German chocolate cake

With that minor little negative, we had an outstanding lunch and a wonderful time. Afterward we strolled in the Fort Mason warehouses converted into interesting shops. One that should not be missed is the bookstore operated by the San Francisco Public Library, selling donated used books from library patrons. You could easily browse all day and buy an armload of books for just a few dollars.

It is easy to see why Greens is on the list of outstanding restaurants in the USA.

3 Comments

Filed under Food, Photography, Restaurants, Travel