Monthly Archives: August 2015

NATIVE AMERICAN VINEYARD DINNER

Yesterday evening we drove north of Santa Fé to the Estrella del Norte Vineyard located just outside of Nambé Pueblo. The weather was delightfully cool, and the drive was beautiful. The purpose of our trip was to participate in a dinner sponsored by the vineyard.

They have al fresco dinners throughout the summer, but this one was of special interest to us. The guest chef was Lois Ellen Frank. She lives in Santa Fé, but she is internationally known as a chef and cookbook author.

Like most of us, Chef Frank traces a broad heritage, but she is part Kiowa. Possibly because of that, she has had a long-standing interest in the foods of the New World and in the rich and varied cuisines of the Native American peoples. Not only is she a professionally trained photographer and chef, but she also holds a PhD in cultural anthropology with an emphasis in Native American foods and plants. She has travelled extensively throughout North, Central, and South America collecting plants, tracking down traditional recipes, and preparing food with native cooks.

Lois Ellen Frank has been a prodigious cookbook author, and her Foods of the Southwest Indian Nations, (Ten Speed Press, Berkeley, 2002) received the James Beard Kitchenaid Book Award. It is a beautifully illustrated volume that contains many new and original recipes using traditional foods like yucca blossoms, posole, chicos, cactus, and many others. A copy of the book should definitely be on your shelf if you are interested in beautiful photography and/or foods of the Southwest.

The evening turned out to be special. We arrived early so we took a quick tour of the vineyards and grounds. Grapes were ripening on the vine. There were interesting sculptures all around, and a glass of chilled white wine was awaiting us when we arrived in the reception area.

Here’s the menu. Unfortunately none of the recipes are included in the cookbook. That’s ok, because there are similar ingredients and dishes described.

Hors d’oeuvres included chipotlé shrimp with a sweet mango dipping sauce and empanaditas stuffed with either lamb or a vegetarian filling and served with guajillo chile and tomato sauce. These were accompanied by the winery’s vino de manzanas.

Everyone was summoned to dinner at a very long table set under a portal. The first course was caprese made from heirloom tomatoes and fresh basil from the Santa Fé farmers market and a locally-made mozzarella. The accompanying bread was freshly made, and the wine was the vineyard’s Seyval blanc.

Grilled quails were perfectly prepared and served with a red chile honey glaze along with hand-harvested wild rice, yellow corn, mushrooms, chard, roasted beets, and carrots. The wine was the vineyard’s Montepulciano

Dessert was a crisp of local berries served with a choke cherry syrup hand-harvested by the chef and her helpers, topped with whipped cream flavored with canela (Mexico’s “cinnamon”) This beautiful and delicious dessert was complemented by the vineyard’s Luna Rosa Especial port-style dessert wine.

It turned out to be a great evening in a lovely setting with delicious food and lively conversation. I am absolutely certain that Native Americans from earlier times never dined as wonderfully. We will definitely do this again.

2 Comments

Filed under Food, Recipes

BOUILLI (BOILED BEEF)

When I wrote recently about Julia Child’s recipe for ratatouille, I reported that she suggested serving it with pot au feu. I was looking for something simple, but the recipe in Mastering the Art of French Cooking served twelve to sixteen people and called for 4 pounds of beef, 4 pounds of pork, 4 pounds of chicken, 2 pounds of sausage, and vegetables. That was more than I wanted to tackle.

I had more in mind boiled beef, which sounded fairly simple and something that would not overpower the ratatouille. There is a traditional Creole dish, known as bouilli. It has been served for decades in most of the old-line restaurants of New Orleans. Perhaps the best known version is served at Tujague’s, which was established in 1856 and claims to be the second oldest restaurant in New Orleans. (The famous Antoine’s Restaurant dates to 1840.) Tujague’s sits on Decatur at the corner of Madison, a block from Jackson Square. Like the rest of the French Quarter, the restaurant survived Hurricane Katrina. It is still serving bouilli. I first enjoyed it in 1962. At the time, I thought it was pretty ordinary – stringy beef served in a watery broth. Since then, I guess my taste buds have matured, or at least changed.  Bouilli was exactly what I was looking for to serve with ratatouille.

This is not Tujague’s authentic version of boiled beef. For one thing, theirs is made with brisket. I am also certain that they use some secret herbs and spices that I don’t know about. Still, I think that my version makes a good, if a bit bland, foil for the Mediterranean flavors of ratatouille.

Beef and vegetables in broth starting the slow boil

Beef and vegetables in broth starting the slow boil

Bouilli with vegetables and ratatouille

Bouilli with vegetables and ratatouille

RECIPE

Bouilli (Boiled Beef)

Ingredients

  • 2 pounds beef pot roast (chuck or round)
  • 1 quart beef stock
  • water as needed
  • 1 large carrot, peeled and cut in half crosswise
  • 2 ribs celery cut in thirds
  • 1 medium onion, peeled and quartered
  • 2 medium turnips, peeled and quartered
  • bouquet garni of whole cloves, parsley, bay leaf, fresh thyme, garlic
  • 12 whole black peppercorns
  • salt to taste

Method

  1. Place beef in a soup pot and add broth and enough water to cover the meat.
  2. Add the remaining ingredients and bring to the boil. Cover and reduce to the simmer for 3 to 4 hours or until the beef is tender.
  3. Remove the beef rom the broth, slice, and serve with some of the broth and the vegetables, if desired. Serve horseradish on the side.
  4. Strain and reserve, chilled, remaining broth for other uses.

Leave a comment

Filed under Food, Photography, Recipes, Restaurants

RATATOUILLE

When our grandchildren visit us they often wind up watching our DVD of the Disney-Pixar movie, Ratatouille. Sometimes the grownups watch, too. It’s a charming story, and besides who doesn’t enjoy the fantasy of a rat winning three Michelin stars in a previously failing Paris restaurant? Even though it is a cartoon, the ratatouille served in the picture is a work of art. My friend, Jim Hastings, has tried to re-create it, and if you google images of ratatouille you will find that a lot of other folks have also created things of beauty.

Not me. I have relied on Julia Child’s recipe for over forty years. Even though it is an appealing dish, it is no competition for the rat’s over-the-top composition.

This is clearly the time of year for ratatouille. The essential ingredients are all at their peak.  The fresh vegetables are where the real beauty of the dish lies. Eggplants (aka aubergine in the UK and brinjal in India) are displayed in a mosaic of colors and shapes. There are the traditional dark purple giants and the slender variegated Japanese varieties. I chose some cream and purple striped globes that were just the right size for cooking without peeling. As for tomatoes, if you are not lucky enough to have your own backyard supply, the farmers market is brimming with them, along with zucchini of just the right size, bell peppers, and beautiful onions.

Everyone knows how versatile tomatoes, zucchini, and bell peppers are. Most home cooks have pages and pages of recipes for them. Eggplant is also versatile, but many cooks don’t seem to know that. My grandmother grew her own eggplants, but she only did one thing with them. She cut them is slices, unpeeled. Dipped them in egg and flour and fried them . They were delicious, but they could get to be boring. In Louisiana, eggplants et stuffed with spicy seafood.  A memorable dinner from years ago featured eggplant casings stuffed with shrimp and served as a beautiful turban mold. . Our host struggled over that for hours. Eggplant instead of pasta in lasagna is common, and eggplant Parmigiano is a classic. Chef Brucia in Shreveport did a delicious variation with eggplant rounds topped with chicken breast supremes, tomato sauce and Parmigiano and then baked.

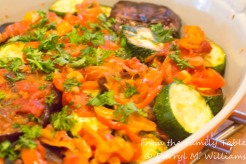
With all of that, my favorite way to cook eggplant remains Julia Child’s ratatouille. I won’t repeat her recipe. You can find it in Mastering the Art of French Cooking, Volume I, page 503.  I will add a few cooking tips that I have learned. Just be advised that although it is not difficult to make, ratatouille is time-consuming. Don’t try to make it at the last minute.  After you’ve made it, you have to decide how to serve it. It is good enough to stand on its own, but Julia suggests pot au feu if you want to go to all that trouble. I served it with a slice of ham, and was a combination to my liking.

Suggestions

  • There’s no need to peel and cut the eggplant into strips, as cooking will soften the peel, and slices will hold their shape better.
  • Cut a little cross in the ends of the tomatoes before you blanch them. They will peel more easily.
  • Avoid oversized zucchini as they will wind up being waterlogged.
  • The new “snacking peppers” – red, yellow, orange – make a good substitute for green bell peppers.
  • Leeks make a good substitute for onions.
  • Use good olive oil for the essence of Provence.
  • As Julia Child suggests, letting the dish sit overnight seems to improve the flavor.


7 Comments

Filed under Food, Photography, Recipes

MUSHROOM PESTO STUFFED ZUCCHINI

This was an experiment that turned out to be tasty but fairly unattractive on the plate. It all came about from another attempt to clear out the refrigerator and use up leftovers.

The zucchini came from the farmers market, again from one of my favorite vendors. We both look forward to having a little conversation in Spanish before my purchases. The conversation is short because of my very limited vocabulary, but we both enjoy it.

Why, you ask, would I ever buy zucchini at the farmers market when the neighbors will soon start bringing over an endless stream of  gargantuan specimens from their garden. Therein lies the answer to your question. The vendor’s zucchini were lined up in rows, uniform in size, perfect size for cooking, and all the same shining green with perfect skin.

I bought enough zucchini to go into a ratatouille with some beautiful eggplants that I got from my other favorite vendor. And, there was enough to stuff a couple for another meal.

Then to the refrigerator and leftovers: pesto from a couple of nights ago, cooked rice, a few leftover crimini mushrooms, a white onion, a sliver of cheddar cheese. I was set. I split the zucchini in half, hollowed them out with a spoon, stuffed them with a mixture of mushrooms, rice, pesto, egg, and some seasonings., topped them with a béchamel enriched with the cheddar cheese, and baked them for a half hour. I should have worked harder to get the water out of the zucchini I added to the stuffing, but otherwise it turned out ok.

RECIPE

Mushroom Pesto Stuffed Zucchini

Ingredients

  • 2 medium zucchini, split in half lengthwise
  • 2 tablespoons olive oil
  • ½ small white onion, chopped finely
  • 2 medium crimini mushrooms, chopped finely
  • 1 teaspoon Pernod
  • salt and pepper
  • ½ cup pesto
  • ½ cup cooked rice
  • 1 egg
  • 2 tablespoons unsalted butter
  • 2 tablespoons all-purpose flour
  • 1 cup milk
  • 1 ounce cheddar cheese, grated
  • salt and pepper

Method

  1. With a spoon or small paring knife, remove the flesh from the zucchini, leaving about a ¼ inch rim and being careful not to pierce the skin.
  2. Chop the zucchini flesh finely. Squeeze out as much excess water as you can using your hands or a fine sieve and spoon. Set aside.
  3. Heat the olive oil in a small saucepan over medium heat. Add the chopped onions and sauté lightly until the onions are translucent but not browned. Stir in the mushrooms and chopped zucchini flesh. Stir frequently until the mushrooms are lightly browned and the mixture has given up its liquid and nearly completely evaporated. Add the Pernod and stir for just a few seconds until it has evaporated.
  4. Transfer the mixture to a small bowl. Stir in the pesto, rice, and egg until well combined.
  5. Fill the hollowed zucchini with the mixture and arrange in a well-greased ovenproof dish.
  6. Meanwhile prepare the sauce by melting the butter in a small saucepan over medium heat. Add the flour and stir for a minute or so to remove raw flavor. Stir in the milk and continue to heat until the mixture comes to a slow boil and has thickened. Stir frequently to prevent burning on the bottom. Sit in the grated cheese. Remove from the heat and adjust the seasoning with salt and pepper.
  7. Pour the sauce over the zucchini and bake in the middle of an oven preheated to 350°F for 30 minutes or until the zucchini are tender and the sauce is melted and lightly browned. Serve while still warm.

10 Comments

Filed under Food, Photography, Recipes

TABBOULEH AND OPERA APPRENTICES

The Santa Fe Opera is in full swing. It is one of the biggest events in the city and attracts visitors from all over the world. As the season gets closer to the end, apprentices are given a chance to show off their skills. The apprentices are accomplished young singers and technical specialists, usually finishing up their graduate studies, who work hard during the season as choristers, walk-ons,  understudies, and production assistants. Many of them will be future stars. Right now they are eager young people who are thrilled to perform. In August there are two apprentice programs where they perform scenes from the standard repertoire in ensemble with costumes, bare-bone sets, and only a piano for accompaniment. But they give it their all.

This last weekend we went to the first apprentice program of the season. It was filled with music and a lot of fun. Besides that, it provided us another chance to enjoy the beauty of the opera house and its lovely setting. People-watching is fun, and it is pleasant to wander the grounds, have a glass of wine, and wait for the sun to set so that the performance can begin.

We usually tail-gate. Yes, that is one of the traditions of the Santa Fe Opera, with many patrons in tuxedos or long gowns sitting in the parking lot at folding tables  decked out with white linen, candles, china, wine glasses, and good silverware.

For this event we didn’t participate in the tail-gate ritual. Instead, we had appetizers and a good glass of wine at one of the restaurants on the Plaza we often visit. We ordered a mezze platter that arrived at our table with beautifully composed ramekins filled with hummus, olives, carrot salad, and – of course – tabbouleh. None was spicy or even well salted. The biggest disappointment was the tabbouleh.

This refreshing salad is one of my summer favorites ever since the first time I ever had it nearly 40 years ago. A young woman from a Lebanese family brought it to an office potluck.

Tabbouleh is not hard to make (It is hard to spell), but it is easy to mess up. It needs enough lemon to have zing, enough mint and parsley to have a fresh crispness, and tomato and olive oil to round out the flavors. Sadly, our restaurant’s version had none of those things. Here’s my effort to please your palate, but the beauty of tabbouleh is that you can adjust the recipe to your taste. If you don’t like bulgur, use less. If you like parsley and mint, use more. Adjust the lemon juice, salt, and olive oil to please you. Whatever you do, you will find that the cook will be sneaking tastes – to make adjustments, of course – before the salad is served.

RECIPE

Tabbouleh

Ingredients

  • 1 cup bulgur
  • boiling water, enough to cover the tabbouleh with about 2 inches more
  • 1 large tomato, peeled, seeded, juiced, and diced
  • 1 cup finely minced parsley
  • 1/3 cup finely chopped fresh mint
  • 3 scallions, chopped finely
  • 2 snacking cucumbers, peeled, seeded, and coarsely chopped
  • juice of 1 fresh lemon (about 2 tablespoons)
  • 6 tablespoons extra virgin olive oil
  • 2 teaspoons salt
  • ½ teaspoon freshly ground black pepper or to taste

Method

  1. Pour the bulgur into a large bowl. Cover with enough boiling water to cover with an extra 2 inches. Set aside for at least 1 hour.
  2. In the meantime, combine all of the remaining ingredients in a small bowl.
  3. When the bulgur has absorbed most of the water and is softened, drain in a fine-meshed sieve. Squeeze out as much water as you can with your hands. Return the bulgur to the bowl.
  4. Stir in the remaining ingredients. Adjust to taste with salt, pepper, and more lemon juice if desired. Let rest for 30 minutes to allow the bulgur to absorb the lemon juice and for the flavors to meld.
  5. Serve on a bed of lettuce leaves at room temperature.

4 Comments

Filed under Food, Photography, Recipes

SHAVED FENNEL AND HARICOT VERT VINAIGRETTE

Fennel is beginning to appear at the farmers market. It is unlike  that in the supermarkets. The bulbs are big, and the tops are left on so that you may have four feet of vegetable, including the fronds.

I think fennel is beautiful. The fronds are lacy and brilliant green. The bulbs have the interlocked leaf bases that remind me of a nautilus shell. The perfume is that exotic, unforgettable odor, not quite of licorice or anise, but wonderful. And it’s all edible.

When I bought my farmers market fennel, the woman behind me wondered aloud what you can do with it. The vendor said that she puts it in salads. I said, “Braise it’,” thinking of quartered bulb braised with a juicy pork chop. But you can turn both bulb and fronds into soup, a boiled vegetable, and even a desert.

The large-bulbed (not actually a bulb but the thickened ends of the stems of the fronds) variety is sometimes called Florence fennel or finocchio to distinguish it from common fennel that has no bulb and grows wild in abundance in Northern California. In the past, I’ve written about using the “pollen” from wild fennel to flavor bread, as they do at Rich Table, or to add to soups and custards.

I also bought some haricots verts from one of my favorite vendors at the market. I like his products because he has fingerling potatoes in several colors, squash blossoms, petit pan squash, and heirloom tomatoes that are not as popular with other vendors. That made me think that a fresh salad of fennel and haricot vert would be a perfect summer accompaniment to seared ahi tuna.

RECIPE

Shaved Fennel and Haricot Vert Vinaigrette

Ingredients

  • 2 tablespoons fresh lemon juice
  • 1 tablespoon Dijon mustard
  • 6 tablespoons extra virgin olive oil (Use your best stuff)
  • ½ teaspoon Pernod
  • salt and pepper
  • good pinch of sugar
  • 1 good-sized fennel bulb, trimmed and washed
  • haricots verts (about two good handfuls), trimmed and cut into 2 inch pieces
  • lettuce leaves

Method

  1. Using a dinner fork or small whisk, combine the lemon juice and mustard in a two-cup glass measuring cup
  2. Beating vigorously, gradually add the olive oil, one tablespoonful at a time, making sure it is completely incorporated.
  3. Beat in the Pernod, salt and pepper to taste, and sugar. Set aside.
  4. Using a mandolin, slice the fennel bulb into paper-thin slices.
  5. Bring a medium pot of well-salted water to the boil. Stir in the trimmed green beans and return to the boil. Boil for 3 minutes after the pot has returned to the boil. Drain and plunge the cooked beans into a bowl of ice and water that you have prepared ahead.
  6. When the beans have cooled, drain and combine with the shaved fennel. Dress with the vinaigrette, toss, and cover with plastic wrap. Reserve any remaining vinaigrette for another use.  Refrigerate for 2 hours until ready to serve on lettuce leaves.


Leave a comment

Filed under Food, Photography, Recipes, Restaurants

CHURROS

If you have ever lived in the American Southwest, and if you have ever gone to an outdoor event like a baseball game, there is a good chance you have eaten a churro. There is also a good chance that you have never made them at home.

Street vendors sell them from carts, and folks line up at concession stands to get the freshly made confections straight out of the deep fryer, messy with cinnamon sugar.

Fancy restaurants have taken to serving them a little more elegantly.

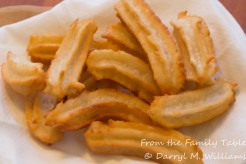
One reason you may have never made them is because they look complicated with their delicate flutes, crispy outsides, and creamy insides. Actually, they are easy to make. The dough contains as few ingredients as water, flour, and salt though there are recipes that call for eggs and what is really choux paste. Simple is still good. You do need a cookie press with a star-shaped disc or a special churrera made of gleaming plastic.  A sturdy pastry sleeve fitted with a large star-shaped tip may work, but the dough is firm and could tear a flimsy one. Churros have their origin as a street food of Madrid, but they are now very much a part of Mexico and the American Southwest. The churrera that I own was made in Spain by a large cookware company, Bernar, S.A. They even make an industrial-size churrera if you want to go into the business.  It was easy to find in our local cooking supply stores.  (Of course, this is New Mexico). I guess that you could even drop spoonfuls of the dough into hot frying oil, but then I don’t think you could legitimately call them churros.

Churros are a bit like doughnuts and a close cousin to the funnel cakes sold at county fairs and the beignets of New Orleans. They should definitely be eaten warm. They lend themselves to creative variations:  You can smother them in powdered sugar. You can dip them in chocolate sauce. You can put them on top of ice cream. You can top them with a fruit compote. You can drizzle them with cajeta, the Mexican caramel sauce made from goat’s milk, probably maple syrup, or just about whatever comes to mind. However you decide to serve them, folks of all ages, but especially the kids,  will be clamoring for more.

RECIPE

Churros

Ingredients

  • 1 cup water
  • 1 tablespoon sugar
  • ½ teaspoon salt
  • 2 tablespoons vegetable oil
  • 1 cup all-purpose flour
  • oil for frying
  • cinnamon sugar (optional)

Method

  1. Combine the water, sugar, salt, and vegetable oil in a medium saucepan and bring to the boil
  2. Remove from the heat and stir in the flour all at once, stirring vigorously until a smooth dough is formed. Cool in the pan
  3. Transfer the dough to a churrera fitted with the largest opening, or a cookie press, or a pastry bag fitted with a 3/8 inch star tip.
  4. Place about 2 inches o frying oil in a deep, heavy pan and heat over a medium flame to 375°F.
  5. Press out about 5 inches of the dough into the hot oil, cutting it off with a table knife or your finger. Repeat until the pan is filled but not overcrowded.
  6. Turn the churros frequently until golden brown on all sides. Transfer to several layers of paper towel to drain. Roll in cinnamon sugar if desired. Serve while still warm.


2 Comments

Filed under Food, Photography, Recipes

FRICO – CHEESE CRISPS

Cheese crisps, those incredibly lacy, crisp, and tasty wafers that some restaurants tuck into a bread basket, use to decorate a salad, or sit beside a bowl of soup look so hard to make, but are actually simple.

The hard part is figuring out what to call them and what their origin might be. Some people call them frico, and some people call them parmesan crisps.  Some sources say that “frico” comes from the Friulian language spoken in Friuli Venezia Giulia, an autonomous region in northeast Italy. Its capital is Trieste, and it stretches from the sea to some of the most beautiful mountains in Italy.  It is the part of Italy where Italian, Slavic, and Austrian cultures have bumped against one another for centuries. Some say that “frico” means little trifle in Italian, but there is no such entry in my Italian-English dictionary.

Some sources say that frico is similar to the Swiss rösti, a crisp, savory dish made of potatoes and cheese. In particular the cheese is supposed to be Montasio or Asiago cheese. Lidia Bastianich has a recipe on her website, lidiasitaly.com.

There are several recipes for frico/parmesan crisp on the web by various celebrity cooks, and Martha Stewart has one for cheddar crisps. Some cooks add chopped herbs, seeds, and other flavorings, so you can do just about whatever you want to and still call it a frico (Shouldn’t the plural be frici? That is more fun to say.)

To add to the complication, Montasio may be hard to find where you live. Our cheese monger didn’t have any. And even then you have to make a decision because Montasio comes in three versions depending upon its age. The cheese is made from raw cow’s milk, and that  may explain why it is hard to find in this country. Younger cheeses have a soft paste that doesn’t lend itself to crisping. The middle-aged cheese is firmer and might work, but you really want the fully aged cheese.

Undoubtedly availability is one of the reasons that most American recipes call for freshly grated Parmesan. At first, I was a bit dismayed by Martha Stewart’s suggestion to use cheddar. Then I started to play around with various cheeses in my stocks. I had some leftover Mexican cheese that I had used for my green chicken chilaquiles. I was surprised and pleased to learn that it made a very acceptable frico.

Another source of disagreement is whether to mix the grated cheese with a little bit of flour. Some think the flour makes the crisp too doughy and soft. I think it helps to absorb the fat that is released when the cheese melts. Do whatever you want.

Finally, there is the bake-them-in-the-oven school of thought and the cook-them-on-a-hot-skillet persuasion. I favor the latter because I think it gives me more control of the process, but again, choose your own pathway.

In view of the short list of ingredients and the even shorter process, all of this is probably a lot more than you want to know about fricos (Or is it frici?) Whatever, you are bound to enjoy these crispy trifles; guaranteed they will disappear quickly from a buffet table.

RECIPE

Frico

Ingredients

  • 1 cup grated Parmesan cheese (coarse or fine depending on the texture you desire)
  • 1 tablespoon all-purpose flour

Method

  1. Combine the grated cheese and flour
  2. If you are making the fricos on a skillet, heat a dry, heavy-bottomed skillet over medium heat. Spread about one tablespoonful of the cheese mixture in a circle about 3-4 inches across. Press down. Heat until the frico is lightly browned on the bottom. Turn over and brown the other side. Remove to paper towelling to cool.
  3. If you are baking the fricos in the oven, preheat the oven to 400°F. Spread tablespoonful-sized circles of the cheese mixture on a silicone-lined baking sheet. Do not crown. Press down. Bake for 3 to 5 minutes or until the fricos are lightly browned and crisp. Cool on paper towelling.


Leave a comment

Filed under Food, Photography, Recipes

GREEN CHICKEN CHILAQUILES

Chilaquiles are a dish that you make with leftovers. The basic recipe calls for three ingredients: stale corn tortillas, salsa (either red or green), and cheese. It is perfect for breakfast. The first time I ever had it was when a community health worker brought  a hot casserole to a staff breakfast in our clinic in the colonias southeast of El Paso. Since then, I have had chilaquiles many times in Saltillo, Mexico, gatherings in many small towns, and in Santa Fe.

The beauty of the dish is that you can dress it up as much as you wish with lots of other ingredients. That way you can turn it into a party dish. In fact, Texans have done just that. The famous Texas buffet dish, King Ranch Chicken, is basically chilaquiles made with canned mushroom, chicken, and celery soups instead of salsa.

Chilaquiles are perfect for cleaning out the refrigerator (It seems like I am always cleaning out the refrigerator). That is exactly what I did in anticipation of “Senior Day” at the local grocery store when the elderly (me) get a 10% discount on their grocery bill. I had a big can of El Pato brand green enchilada sauce (The Duck, hecho in México) that had been sitting in the pantry for months if not years. I also had a lot of stale corn tortillas. Of course I always have a bunch of stale corn tortillas. As to the enchilada sauce, it was way too vinegary for my taste. You would be better off to make your own. But then this would no longer be a recipe that you can toss together after you get home from work. I also had some cooked chicken, scallions, and snacking peppers that needed to be used. The only other ingredient I needed was cheese. For this dish I cheated and got shredded Mexican cheese from the grocery store. This is a combination of Cheddar, Monterrey jack, queso de quesadilla, and asadero that they sell for tacos and enchiladas. Again, you can just grate your own. Mozzarella works for asadero. Mushrooms would be a good addition. Just let your imagination and what needs to be used up be your guides. Here’s the recipe.

RECIPE

Green Chicken Chilaquiles

Ingredients

  • stale corn tortillas, about 1 dozen
  • vegetable oil
  • 28 ounces (one large can) green enchilada sauce
  • snacking peppers, about 10, sliced thinly
  • 6 scallions, cleaned and sliced, including the green tops
  • 1 chicken breast, cooked and shredded
  • Mexican shredded cheese, about ¾ pound
  • sour cream
  • fried eggs, preferably sunny-side up (optional)

Method

  1. Cut the tortillas into eighths and fry in the vegetable oil until lightly crisp. Drain and set aside.
  2. Lightly oil a 12 x 8 inch glass baking pan and place a thin layer of the enchilada sauce on the bottom.
  3. Arrange 1/3 of the tortilla pieces over the sauce so that it is completely covered.
  4. Arrange ½ of the sliced snacking peppers on top. Then a layer of ½ of the sliced scallions, ½ of the shredded chicken, and 1/3 of the grated cheese.  Dot with generous dabs of sour cream. Top with 1/3 of the remaining enchilada sauce.
  5. Arrange another layer of tortilla pieces on top. Then repeat the peppers, scallions, chicken, cheese, sour cream, and half of the remaining enchilada sauce.
  6. Arrange the final layer of tortilla pieces on top and cover with the remaining enchilada sauce. Generously sprinkle grated cheese over the top.
  7. Bake in the middle of an oven preheated to 350°F for one hour. Remove from the oven, and let rest for 10 minutes. Cut into squares and serve, topped with the optional fried eggs if desired.

4 Comments

Filed under Food, Photography, Recipes

GRISSINI

Everyone I know loves bread sticks – the kind that sit on the table at your favorite Italian restaurant, daring you to resist them. The Italians call them grissini. The crisp, flavorful restaurant version is delicious. The ones wrapped in cellophane or boxed at the grocery store are usually stale and loaded with preservatives. Then why not make your own? They are very easy to whip up, and the only downside – at least for me – is that I can eat the whole batch by myself before anyone else gets a chance.

This recipe comes from the King Arthur Flour Baker’s Companion (The Countryman Press, Woodstock, Vermont).  It may be the only book you will ever need for bread baking. It tells you all about flour, other ingredients, and baking utensils, along with easy-to-follow, well-tested recipes for bread and baked goods. If you don’t have a copy, you should consider getting one. At least thumb through one in the cookbook section of your local book store. You can order it online for $29.95.

RECIPE

Grissini

Ingredients

  • 2½ cups all-purpose flour
  • 1½ teaspoons dry yeast
  • 1 teaspoon salt
  • 3 tablespoons non-fat dry milk
  • 3 tablespoons olive oil
  • 7/8 to 1 1/8 cup water*
  • 1 egg white whisked with 1 tablespoon water
  • poppy seeds
  • kosher salt (optional)

Method

  1. In a very large bowl, combine the flour, yeast, salt, dry milk, oil, and water. Stir with a large wooden spoon until the mixture is well combined. Then knead in the bowl using your hands until the dough is soft and smooth. If it is sticky, sprinkle in a tablespoon of flour. If it is too stiff, add more water by teaspoonfuls, kneading after each addition. Clean the bowl with water and dry. Return the dough to the bowl, cover with plastic wrap, and let rise until doubled in volume, about 1 to 1½ hours.
  2. Transfer the risen dough to a lightly oiled work surface and roll it into a square  about 14 x 14 inches. Brush the top of the dough with the egg mixture and lightly sprinkle with poppy sees and, if desired, the optional kosher salt. Press the seeds into the dough by lightly rolling with the rolling pin.
  3. Using a pizza wheel, cut the dough into ½ inch strips. Transfer the strips to parchment-lined cookie sheets. Lift the strips from both ends as they will stretch as you lift them. Cover with a kitchen towel and let rest for 30 minutes.
  4. Place the cookie sheets in the middle of an oven preheated to 425°F. Bake for 10 minutes or until golden brown. Watch carefully during the baking, as the grissini burn easily. Transfer to a cooling rack. Serve or store in an air-tight container when the grissini are completely cool.

4 Comments

Filed under Food, Photography, Recipes