Monthly Archives: February 2013

BISCUITS – A FAMILY SECRET REVEALED

My son enjoys cooking, and is very good at it, but  his scientist training attracts him to difficult recipes or those with a lot of instructions.   This is the edited version of Peter’s biscuits.  As I was collecting biscuit recipes from all of the good bakers in the family, I asked Peter for his version.  He sent me some copious notes in addition to the recipe: [1] Don’t use rancid shortening. Probably the voice of experience. [2] Use a pastry blender, although a large spoon works fine. [3]  Biscuits mix better on wood than Formica because the wood grain holds the flour. [4] To re-heat a day-old biscuit, put it inside a plastic bag and warm it for a few seconds in the microwave; then put it in the toaster oven for the final warm-up to remove the sogginess of the microwave. All useful suggestions either for the neophyte or experienced biscuit baker.

Other suggestions include: [1] the shortening in this recipe is on the low end of most recipes which go all the way up to 6 tablespoons of fat. The lower amounts of shortening produce flakier biscuits, the larger amounts produce soft biscuits. It’s only a matter of preference. Butter has more water content than vegetable shortening, so the finished biscuit is softer. Bacon grease is a good substitute, but it ought to be solid – not melted. [2] The less manipulation of the dough after you have added liquid the better. Folding is better than kneading so you get flaky layers. [3] Cold is better than warm. Be sure to chill the flour mixture before you add the liquid to get the flakiest biscuits. [4] Biscuits squeezed together in a cake pan will rise higher than those spread out on a baking sheet.

Peter learned the original, non-scientific version of his recipe from his maternal grandmother and then passed it on to his younger sister, who is a professional chef. She has worked in well-known restaurants in New York City and San Francisco. A common tradition in all of these places is the “family meal”. Chefs and cooks take turns preparing a meal for cooks and wait staff before evening service begins. The kitchen crews in all of those places are used to complex meals  with expensive ingredients. Yet in every single one of them, when Sarah cooks “family meal”,  cheers inevitably go up for her biscuits and barbecued brisket. There is never a single biscuit left when service starts.

In fact, the biscuits are so popular with restaurant staff that they will go to great lengths to get their share. One time a baking sheet of hot biscuits had just come out of the oven, ready to be passed around the table. Before anyone knew what was happening, the pan crashed to the floor, and the biscuits spilled out. Next stop for the biscuits was the trash barrel in spite of the cries of the hungry staff. One frustrated cook leaped up and went head down into the trash barrel to retrieve those precious gems.


PETER AND SARAH’S FAMILY MEAL BISCUITS

Ingredients

  • 2 cups flour
  • 1 teaspoon  salt
  • 2½ teaspoons baking powder
  • 2 tablespoons shortening (Crisco much preferred)
  • ¾ cup  whole milk

Method

  1. Preheat oven to 450º.
  2. In a large mixing bowl, sift together the flour, salt, and baking powder.
  3. Using a pastry blender, cut in the shortening until the mixture is consistent and the size of small peas.
  4. The biscuits will be flakier if you chill the dry mixture in the refrigerator for 30-45 minutes.
  5. Add the milk, and mix with a fork, being careful not to over-mix.
  6. Turn the dough onto a heavily floured surface. Knead the dough gently by pressing and folding. Don’t overdo it!  Four foldings should be enough, and more than six is too many.  Coat the dough with flour before the final folding to make splitting the biscuits easier.
  7. Pat the dough into a flat rectangle about ¼ to ½ inches thick. Using a two-inch biscuit cutter, cut out biscuits and place them on an ungreased baking sheet. Gather up the scraps, pat them together and flatten them, cutting biscuits until the dough is used up.
  8. Bake in the middle of the preheated oven for about 15 minutes, or until done.

Yield: Between 12 and 24 biscuits depending on size and thickness

13 Comments

Filed under Food, Photography, Recipes

THE PARTHENON AND BAKLAVA

The Acropolis in Athens must certainly be on most people’s list of places they want to visit. It has been on my list since grade school, so it was a thrill to go there during our recent cruise. At the time of our visit, Athens was a worrisome place. The city is a teeming metropolis of more than three million people and there were demonstrations outside our hotel on Syntagma  Square (also called  Parliament Square) which caused the management to lower metal screens to protect the windows. The changing of the guard in front of the Parliament building went on schedule , but we had to walk past a cordon of police buses and armed military to get to our hotel.

Visiting the Acropolis was as if none of this was happening.  We got off our tour bus across from the entrance and began the long walk up the paths cut into the steep, rocky base of hill. Even though we were “off-season”, there were thousands of other tourists making the same pilgrimage, some racing up the steep stairs while others like me took it more slowly. Marble steps and paths were polished smooth, and one could only reflect on the thousands of years and millions of footprints that produced the patina. Even at that, there were flowers pushing up through the cracks.

As we climbed higher and higher, we could see some of the great landmarks. First was the Odeon of Herodes Atticus. The ruins of this enormous theater, built in the second century are set against the Athens skyline. At one time this was one of the largest covered theaters in the world. Now it is an open air setting where Athens frequently stages modern musical and theatrical productions.

Beyond was a wonderful view of the Olympieion, an enormous temple to Zeus begun in the sixth century BCE but not completed until the reign of the Roman Emperor Hadrian more than 600 years later. Only a few columns remain standing, but it is clear how huge it once was.

We reached the steps of the Propylaea. This served as the ancient entrance to the complex on the Acropolis. Apparently the purpose of the structure was to serve as a barrier to individuals who were not qualified to visit the holy sites.

Off to the left we saw the Temple of Athena Nike with its beautiful columns and lovely symmetry.

Then the centerpiece of the Acropolis: the Parthenon. Construction equipment, scaffolds, and cranes were all over the place obscuring views that were not already obscured by tourists. Even at that, the building is an impressive sight and the ruins are beautiful. The building has been much abused over the centuries. The famous statuary of the friezes was taken by the Scottish Lord Elgin and now resides in the British Museum.  The building has been a Christian church, a Muslim mosque, and a Turkish munitions warehouse at which time it was it was destroyed by the Venetians. It is truly amazing that such a lovely ruin has survived so much abuse and neglect.

The Erechtheion sits off to the side with its famous Porch of the Caryatids. The pillars supporting the roof of the porch are marble maidens – both sculptural and engineering marvels in that their thin necks provide support for the heavy marble roof. Unfortunately, Lord Elgin  took one of the maidens for his estate, and one was seriously damaged, but the others have been moved to the Museum of the Acropolis. Still the replicas capture the marvel of the originals.

Too soon our visit to the Acropolis ended and we rushed back to the bus. It is clear that one could spend a lifetime visiting and studying this magic place.

RECIPE

Baklava

When I think of Greece I think of baklava even though it is apparently originally a Turkish creation. That should not be too surprising since the histories and traditions of Greece and Anatolia have been intertwined for thousands of years (Think Trojan War.) In Greece, baklava is a traditional Easter confection, and apparently it is often made with 40 leaves of phyllo to honor the 40 days of Lent.

In this version, I have used only one of the two packages of dough that come in a one-pound box. There are 20 leaves in the package, so if you are able to fold them over on themselves, you will have the 40 requisite layers. I used an 8 x 8 inch pan, so that wouldn’t quite work, but I think you’ll find it close enough for an amateur try at the real thing.


Ingredients

  • 2 sticks (½ pound) unsalted butter
  • 3 cups mixed walnuts and unsalted pistachios, toasted in a dry sauté pan and coarsely chopped
  • ¼ cup sugar
  • 1 teaspoon powdered lemon peel
  • ½ teaspoon ground cinnamon
  • 1 cup sugar
  • 1 cup water
  • 1/3 cup honey (preferably orange blossom)
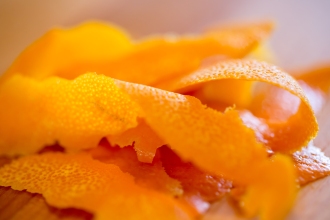
  • peel from 1 orange without pith
  • 1 tablespoon fresh lemon juice
  • 2 tablespoons orange liqueur
  • ¼ teaspoon orange flower water
  • ½ pound (one packet from one pound box) frozen phyllo dough, wrapped but thawed for 2 hours

Method

  • Prepare clarified butter by melting in an ovenproof measuring cup in the microwave. Skim off foam and pour off carefully without the solids that settle to the bottom. You should have about 180 mL. Set aside
  • Combine the chopped nuts, sugar, powdered lemon rind, and cinnamon in a small bowl. Set aside.
  • In a small saucepan, combine the sugar, water, orange peel, and lemon juice. Bring to the boil and then reduce heat to the simmer for 15 minutes. Remove from the heat and stir in the liqueur and orange flower water. Strain and set aside. Reheat when ready to pour over the baked baklava
  • On a clean, dry work surface, open the package of phyllo dough.The leaves will probably measure about 9 x 15 inches.  Spread out, cover with a sheet of plastic film, and a damp kitchen towel to prevent it from drying out while you work. Work as quickly as you can.
  • With a pastry brush, paint the bottom and sides of an 8 x 8 inch baking pan. Then take one leaf of dough and fit in the bottom, folding over as much as you can. Brush on some of the clarified butter. Repeat with 4 additional leaves of dough.Then sprinkle the top with 1/3 of the nut mixture.
  • Repeat the layering process twice more. You should have three layers of dough and nuts.
  • Top with the remaining leaves of dough, buttering each one as you go. That should use up all of the phyllo.
  • Score the finished stack into 1½ to 2 inch diamonds with a sharp knife. It is important to do this before you bake the baklava; otherwise the pastry will shatter when you cut it.
  • Bake in the middle of an oven preheated to 325°F for 30 minutes. Reduce the heat to 300°F and bake for 6o minutes more.
  • Meanwhile, reheat the flavored syrup.
  • When the top of the baklava is a golden brown, remove from the oven and cover with the syrup while it is still warm.
  • Let cool completely for at least 4 hours so that the syrup is completely absorbed.
  • Serve by cutting through each score.

Leave a comment

Filed under Food, Photography, Recipes, Travel

CITRUS SALAD WITH POPPY SEED DRESSING

It is high season for citrus crops. During our recent visit to the San Francisco area, we saw many citrus trees planted in front yards as ornamentals that were drooped to the ground with big crops of oranges, lemons, limes, and tangerines. Driving through the Central Valley we saw miles of citrus groves with ripening fruit. In spite of cold weather, I believe that most of the farmers were able to avoid serious frost damage. In our local grocery store, the bins are full of oranges and tangerines, and the prices are good. No better time for a fresh citrus salad.

Of course, there are other places beside California with big crops of citrus fruits, so there is no point in restricting your sources. Florida and Arizona are producers in this country while Spain, Israel, and other Mediterranean countries also have famous crops.

Ruby red grapefruit from Texas are sweet and juicy.  Pomelos can substitute for grapefruits, and there may be other choices you might wish to try.

Avocados don’t count as citrus, but they just seem to be a perfect match for fresh oranges and grapefruit, so consider including them in your salad.

Poppy seed dressing, a sweet vinaigrette, seems to have been invented by the well-known Texas cook and cookbook writer, Helen Corbitt. She was wooed away from academic nutrition science and Cornell University to take charge of a series of fancy dining establishments in Texas, ending at the Neiman-Marcus dining rooms in Texas. In the 1950’s, her food was famous throughout Texas, and nearly every housewife had a copy of her cookbook reserved for parties and special events. It was the era of Betty Crocker and Better Homes and Gardens, so Corbitt’s recipes provided something unique and decidedly “Texas”.

Perhaps Helen Corbitt’s most famous recipe was for poppy seed dressing. For many years, especially in Texas, it was extremely popular. Like so many foods of the ’50s, though, it fell out of favor. That’s too bad because it is the perfect foil for fruits salads, especially of the citrus variety. As with so many foods out of favor, it is hard to find a current recipe, so here is one adapted from the original in the 1957 classic, “Helen Corbitt’s Cookbook” (Houghton Mifflin, Cambridge, MA, p.47).


RECIPES

Poppy Seed Dressing (about 1½ cups)

Ingredients

  • ¾ cup sugar
  • 1 teaspoon mustard
  • 1 teaspoon salt
  • 1/3 cup white wine vinegar
  • 1½ teaspoons white onion pulp
  • 1 cup salad oil (your choice: vegetable, canola, walnut, other but NOT olive oil)
  • 1½ tablespoons poppy seeds

Method

  • Place the sugar, mustard, salt, and vinegar in the jar of a blender
  • Prepare the onion pulp by grating a white onion with a micro-plane. Add to the other ingredients
  • Cover the blender jar, turn on the blender, and pour in the oil slowly to blend
  • Blend in the poppy seeds, transfer to a storage container, and refrigerate until ready for use

Citrus Salad (serves two)

Ingredients

  • 1 grapefruit
  • 2 large navel oranges
  • 1 ripe avocado
  • spring mix salad greens
  • poppy seed dressing

Method

  • With a very sharp knife, remove the skin and any white membrane from the grapefruit and oranges
  • Cut between the sections of the citrus to make membrane-free pieces of fruit
  • Halve and slice the avocado
  • Arrange the grapefruit, orange, and avocado slices on a mound of salad greens
  • Dress with the poppy seed dressing and serve immediately

Leave a comment

Filed under Food, Photography, Recipes

SANTORINI AND SPANAKOPITA

The ship sailed into the harbor at Santorini just as the dawn broke over the Aegean Sea. We were surrounded by mountaintops glistening a blazing white. Snow, I thought. In the Mediterranean? Impossible. And then I realized that the villages of Santorini were perched on the peaks surrounding us, washed an incredible white, and glued to the impossibly steep slopes all the way to the harbor below. No wonder so many tour guides call Santorini the best island escape in the world.

The islands have been populated for thousands of years, but they have also been the scene of unthinkable human disasters. Even from a ship, it is clear that the villages have been built upon the remaining walls of an ancient volcano, and that the harbor nestled in the ring of islands is the caldera of that volcano.

Minoan culture once thrived on the islands, not that of the capital in Crete, but clearly more than just an outpost. Ancient ruins have been excavated showing vivid wall paintings, impressive buildings, and a thriving population center. All of that came to an abrupt end in about 1600 BCE when the volcano exploded with one of the largest flows of smoke, lava, and ash during historical times. Crops failed in China because of the explosion, and the civilization on Santorini was annihilated. The islands remained uninhabited for hundreds of years. Some believe that the disaster is the source of the legend of Atlantis.

There have been other eruptions over the centuries, and seismic and volcanic activities have been recorded in recent years. Still the inhabitants seem oblivious to all of this, and the visitor is soon caught up in the apparent tranquility of the scene.

The sands of the popular beaches may be red or black or white depending upon the color of the volcanic layer from which they come. The environment is that of a desert with desert plants and no natural sources of water except the rains. Some of the buildings are painted in pastel shades, but the great majority are whitewashed with bold blue trim. Churches are everywhere, and their vivid blue roofs meet the clear blue of the cloudless skies. Narrow streets weave along the crests of the hills. Everyone seems to relax in a casual stroll.

Our  visit ended with a ride down the cable car with a panoramic view of the harbor down below. It is easy to see why many Greeks as well as celebrities have chosen Santorini as a quiet getaway.


SPANAKOPITA

More than forty years ago when we lived in Salt Lake City, Susan was well-known amongst our friends for one of her hors d’oeuvres which she served with drinks. The recipe came from the local Junior League’s Heritage Cookbook and was called “crab triangles”. The dish was equally popular when we moved to Shreveport. It called for flaked crab meat, cream cheese, phyllo dough, and butter. At the time, neither of us knew that the triangles were a riff on the Greek treats, tyropitas (phyllo triangles filled with cheese) or spanakopita (phyllo triangles filled with spinach and cheese)

The following recipe is not necessarily authentic (every Greek family has its own recipe so, what, after all, is really “authentic”?) But it’s pretty close to the real thing, and it is good enough that you probably will not have any leftovers. It uses frozen phyllo dough which usually comes in a 1 pound box containing two separate rolls of 20 leaves of dough in each roll. Be sure to read the label.

Ingredients

  • 2 sticks (½ pound) unsalted butter
  • 1 roll (½ pound) phyllo dough thawed according to instructions
  • 3 tablespoons olive oil
  • 2 medium shallots, minced
  • 9 ounce package of pre-washed spinach, chopped
  • ½ cup dry white wine
  • ½ teaspoon Pernod
  • 4 ounces feta cheese, crumbled
  • 2 eggs, beaten
  • 2 ounces Parmesan cheese, grated
  • salt and pepper

Method

  • Prepare clarified butter by melting butter in a small saucepan over low heat. Skim off the foam that rises to the top. Let milk solids settle to the bottom of the pan. Then pour the skimmed butter slowly into a glass measuring cup, being careful not to pour the milk solids into the cup. Set aside the clarified butter in a warm, not hot, place.
  • Heat a medium frying pan over a medium-low flame. Add the olive oil. When the oil is hot, stir in the shallots and cook until wilted and translucent. Do not brown.
  • Add the chopped spinach, cover, and cook until the spinach is wilted. Add the wine and Pernod. Cook until the mixture has given up most of its moisture and is dry. Do not brown or allow to burn. Cool for 5 minutes.
  • Combine spinach mixture, feta cheese, eggs, and Parmesan. Adjust seasoning with salt and pepper. Set aside.
 

10 Comments

Filed under Food, Photography, Recipes, Travel