Tag Archives: parsley

CHIMICHURRI AND VITAMIX

Recently I celebrated my birthday. I was surprised when a big box came from my family. It turned out to be a gleaming Vitamix food machine. I can hear some of you asking, “What will the old goat do with that?”  It seems akin to buying $2000 skis for a duffer who only skis greens or a Sunday driver receiving a Ferrari. Still others are thinking that, after all,  its only a blender.  A Vitamix is way more than a blender – it has a full 2 horsepower motor with speeds up to 37,000 rpm and variable speeds between 12,000 and 24,000 rpm. It will grind up just about anything without a single whine. It  sounds like those are specs straight out of a Ferrari ad. Now if I can only learn to drive it like a Ferrari.

I spent the first day reading all of the manuals and recipe books. I definitely did not want to destroy the machine during its first outing in the kitchen. Then, I had to think of something to make. Creamed soups prepared in a Vitamix are supposed to be so smooth that they don’t require  straining through a sieve or chinois. Soups are definitely on my list of things to make, but I wanted something to go with the meal I had already planned: pot roast and roasted potatoes. Some sort of sauce seemed like a good choice. Salsa verde and romesco came to mind. One of my food blogger friends , writing with the title of Back Road Journal, had provided a great recipe for the Dominican sauce, wasakaka (Isn’t that a great word to say?). That struck me as very similar to one of my favorites, the Argentinian chimichurri that goes so well with roasted beef.

The Vitamix cook book didn’t have the recipe, but I found one to modify in the Joy of Cooking. For a first pass, the chimichurri turned out to be easy and flavorful, but I will probably add some tweaks for my next effort. If you don’t have a Vitamix, you can use a food processor fitted with a metal blade. Pulse until you get the right consistency, and be careful not to blend for too long.  Of course, you can always chop things by hand. You’ll just have to do it more finely. Also, there is a severe sensitivity to chiles in our household, so I usually omit them, but you can definitely mince some jalapeño or add some cayenne.

Finally, a big THANKS to all my family for such a thoughtful gift.

RECIPE

Chimichurri

Ingredients

  • ¼ cup red wine vinegar (If you don’t have red wine vinegar, another vinegar will do.)
  • ½ cup extra virgin olive oil
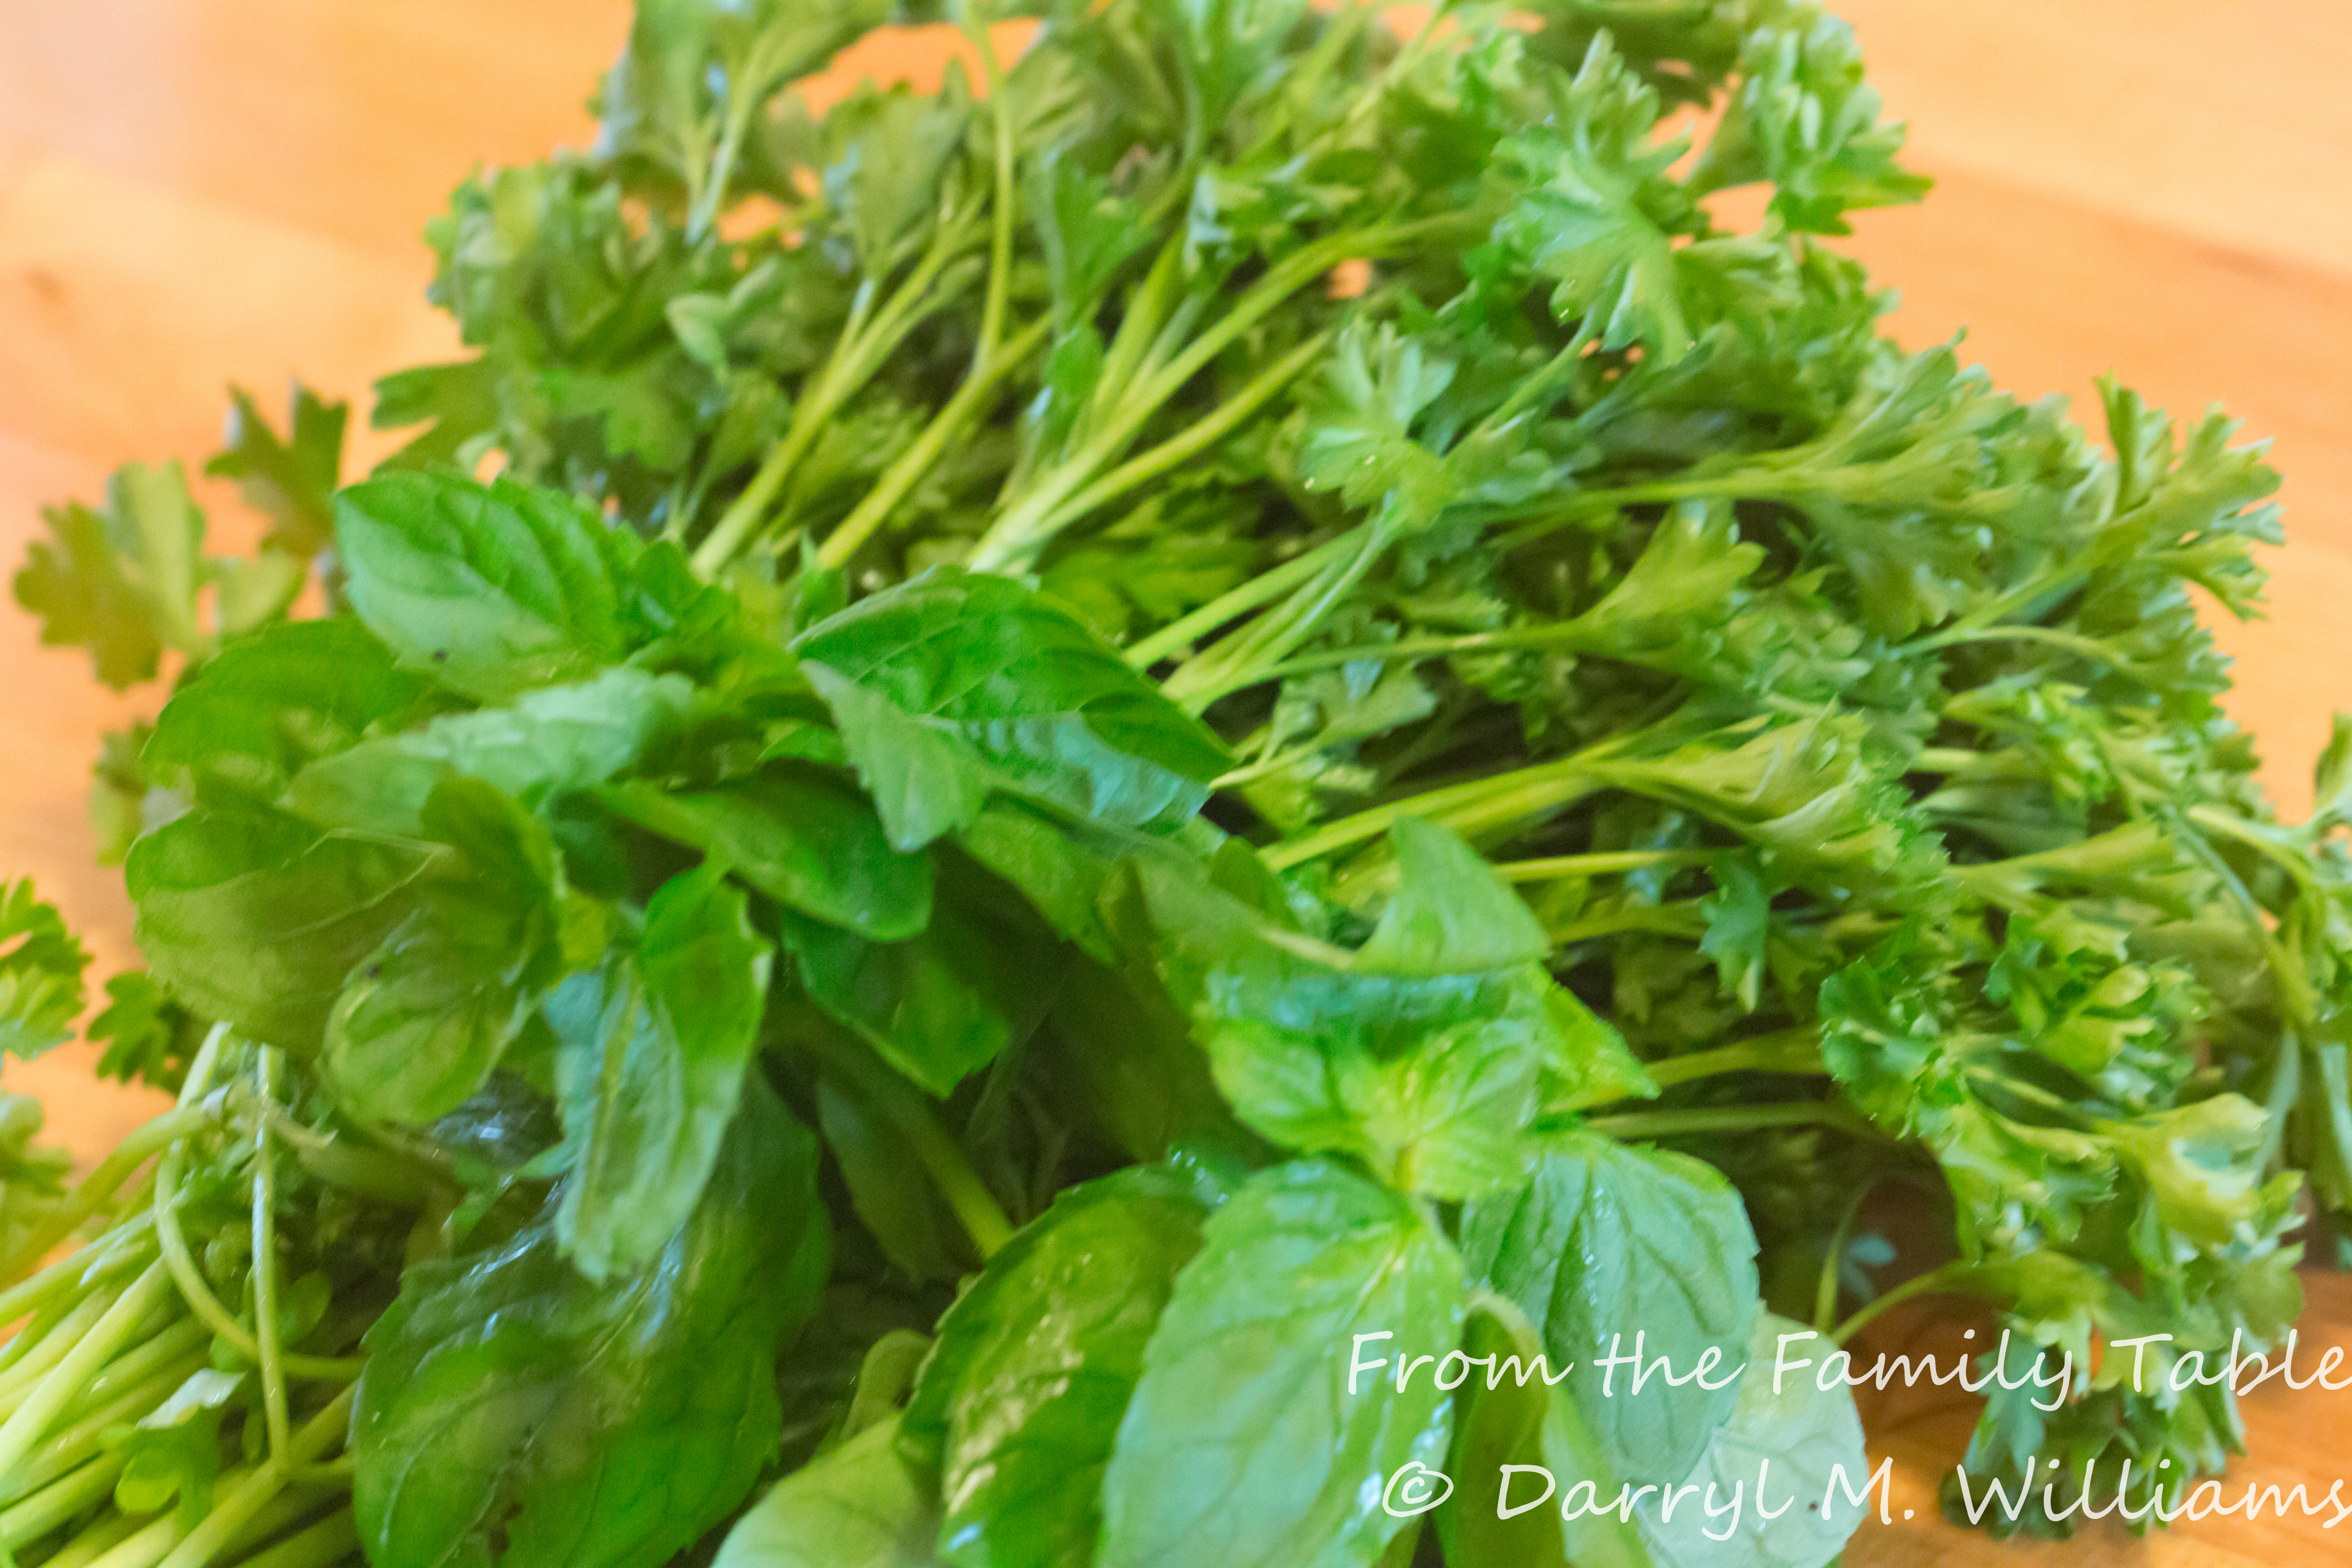
  • ½ cup parsley leaves, washed and stems removed
  • 3 cloves garlic, chopped coarsely
  • 1 medium onion, chopped coarsely
  • 2 tablespoons fresh oregano leaves OR 1 tablespoon dry Mexican oregano.
  • salt and pepper to taste
  • 1/8 teaspoon cayenne pepper (optional or to taste)

Method

  1. Pour the vinegar and olive oil into the Vitamix container. Make sure the cover is in place. Set the speed indicator to High. Turn the machine on and process for about 15 seconds or until the vinegar-oil mixture is emulsified. Turn off the machine.
  2. Add the parsley, garlic, onion, oregano, salt, pepper, and optional cayenne pepper. Set the speed indicator to Variable and Variable knob to 3. Make sure the cover is in place, turn on the machine and as you process gradually turn up the rate to 6. Process for 20 seconds or until the mixture is the desired consistency. Be careful not to over-process. Turn off the machine. Transfer the chimichurri to a bowl, adjust the seasoning if needed, and let stand at room temperature for at least 30 minutes before serving.


Advertisement

14 Comments

Filed under Food, Photography, Recipes

SANTA FE STYLE COQUILLES ST. JACQUES

The pressure started on Thanksgiving and will extend into January. The pressure, of course, is to keep the weight off in the face of food, food, food. Because of that, we have been trying to eat wisely, including a lot of seafood. I found some frozen scallops at the local Sprouts, and thought they would be tasty even though I wasn’t sure how I would prepare them.  Scallops are delicious grilled over an open flame, but I have already abandoned the outdoor grill for the winter. Besides, that approach is reserved for big diver scallops, and the frozen ones were smaller – about 36 to the pound.

My other favorite ways to do scallops are the two recipes for coquilles St. Jacques in the first volume of Mastering the Art of French Cooking. One of the recipes is in the Parisian style with a thick cream sauce. The other is in the Provençale style with herbs. I decided to meld the recipes and add some touches that would be reminiscent of Santa Fe. That would mean ground chiles, cilantro,  and perhaps a few pine nuts.

Along with the scallops, I decided to use up some leftover grits from the refrigerator. (Grits are definitely not Santa Fe.) To give them some added flavor, I added egg and chopped parsley.

RECIPES

Santa Fe Style Coquilles St. Jacques

Ingredients

  • ½ pound (about 18-20 medium) scallops
  • 2 tablespoons unsalted butter + more for topping
  • 5 medium cremini mushrooms, sliced
  • 2 scallions, minced
  • 1 cup white wine
  • water to cover
  • 2 tablespoons flour
  • ½ cup milk
  • 2 egg yolks
  • ½ cup cream
  • 1-2 teaspoons ground Chimayó red chile (to taste)
  • ¼ cup pine nuts (optional)
  • ¼ cup chopped cilantro
  • salt and pepper
  • ¼ cup asadero cheese, grated (Use Swiss cheese if you can’t find asadero)

Method

  1. Heat the butter over medium-high heat in a small sauté pan. When it has stopped foaming, add the scallops and brown them lightly. Remove from the heat, reserving the browned butter.
  2. In the same pan with the reserved browned butter, combine the browned scallops, mushrooms, scallions, and wine. Add enough water to just cover the mixture. Bring to the boil and then simmer for 5 minutes. Remove the scallops and mushrooms. Return the liquid to the boil and reduce to about one-half. Remove from the heat and stir in the flour and milk.
  3. In a bowl, beat the eggs lightly and stir in the cream. Beat in the still-hot wine and milk mixture. Return to the heat set at low, stirring constantly until the mixture has just thickened. Do not let it get too hot or the eggs will scramble. Remove from the heat, and stir in the chile, cilantro,  and optional pine nuts.
  4. Mix the sauce with the scallops and mushrooms. Transfer to 2 well-buttered ramekins. Top with grated cheese, dot with butter, and heat under a pre-warmed broiler until the top is browned and bubbling. Serve immediately.

Fried Grits Cakes

Ingredients

  • 1½  cups leftover cooked grits
  • 1 large egg
  • ½ cup chopped parsley
  • salt and pepper

Method

  1. Combine the grits, egg, and parsley until well mixed.
  2. Adjust the seasoning with salt and pepper.
  3. Divide into two cakes and fry in about ¼ inch of peanut oil over a medium flame until the cakes are browned on both sides. Serve while still warm.


7 Comments

Filed under Food, Photography, Recipes

LAMB MEATBALLS, MINT-PARSLEY PESTO, POTATO GNOCCHI

Every Friday evening, our village market holds a wine tasting which has become a neighborhood gathering. The market owners use the event as an opportunity to introduce new products. One that caught my eye recently was a package of potato gnocchi imported from Italy and made by Del Destino Foods with the advantage that they required no refrigeration and could be stored in the pantry.

I very much like well-made gnocchi, although they are somewhat hard to find, even in good restaurants. They are often too leaden or else disintegrate rather than being the fluffy cloud like pillows that they can be. I’ve tried to make my own, but they take a bit of work and mine have really been no better than others. I was inspired to buy a package of cellophane-wrapped gnocchi for a trial at home. I could have just opted to cook them according to directions and  top them with olive oil and grated Parmesan.

Instead, I decided to combine them with lamb in the form of meatballs along with mint pesto. (What’s a better combination than lamb and mint, right?)

To make the meatballs I used a #60 scoop. I didn’t know what that meant, so when I looked up scoops, I learned that they are assigned a number according to size, the number referring to how many scoops it takes to make a quart. So a #60 scoop holds about ½ ounce, level, and more when heaping. In this recipe, you should expect about 30 meatballs.

I liked the way everything turned out, and the gnocchi were good, not great. At least they were not sinkers, they had a good taste, and they were fast. In fact, they were good enough that I will try them again. However, I’ve also made a plan to make my own soon.

RECIPES

Lamb Meatballs

Ingredients

  • ½ cup bread crumbs
  • ½ cup milk
  • 1 pound ground lamb
  • 1 egg, lightly beaten
  • ¼ cup finely chopped shallots
  • 3 tablespoons finely chopped green bell pepper
  • salt and pepper
  • Italian seasoning to taste (optional)
  • pure olive oil

Method

  1. In a small bowl, combine the bread crumbs and milk. Stir to mix thoroughly and set aside.
  2. In a larger bowl, combine the ground lamb and egg. Stir in the milk-bread crumb mixture, shallots, and pepper. You may need to use your hands to get the meatball mixture well combined.
  3. Adjust the seasoning with salt, pepper, and, if desired, Italian seasoning.
  4. Form the meatballs to the size you desire. I think smaller is better.
  5. In a saucepan over a medium flame, heat the olive oil until it shimmers. Add the meatballs in batches, turning them until they are completely browned. Continue to sauté for an additional 5 minutes until they are cooked through. Keep warm until you are ready to compose the serving bowls.

Mint-Parsley Pesto

Mint and parsley for the pesto

Mint and parsley for the pesto

Ingredients

  • 1 bunch parsley, stems removed
  • 1 package mint, stems removed
  • 3 garlic cloves, peeled and stem and any green shoots removed
  • ½ cup grated fresh Parmesan cheese
  • 1 cup extra virgin olive oil
  • ¼ cup English walnuts
  • salt and pepper

Method

  1. Place the parsley, mint, garlic, and Parmesan cheese in the beaker of a food processor.
  2. Pulse, gradually adding olive oil and stopping occasionally to push down the sides with a spatula.
  3. When the pesto has reached the desired consistency, add the walnuts, pulse briefly, and adjust seasoning with salt and pepper.

Lamb Meatballs, Mint-Parsley Pesto, Potato Gnocchi

Ingredients

  • 1 package gnocchi cooked according to instructions
  • 1 batch mint-parsley pesto (see above)
  • 1 batch lamb meatballs (see above)
  • freshly grated Parmesan cheese

Method

  1. Boil and drain the packaged gnocchi according to instructions. Distribute among 4 pasta bowls
  2. Top with a desired amount of pesto. You may need to dilute it with a bit of the water reserved from boiling the gnocchi
  3. Arrange meatballs on top of the pesto. Serve immediately. Pass the grated Parmesan separately.

Leave a comment

Filed under Food, Photography, Recipes

STUFFED SQUASH BLOSSOMS REDUX

It’s the time of year again when squash blossoms make their appearance at the local farmers market. When that happens, I always buy a dozen for stuffing. Of course, if you have your own zucchini patch, you can harvest your own squash blossoms. Choose the male flowers without the swelling at the bottom that will ultimately become the mature squash.

It is surprising how many things you can do with these delicate flowers. There is a lovely soup, sopa de flor de calabazas, and you can use them in quesadillas, pancakes, etc., etc., but I always wind up stuffing them.  Whatever you do with them, use them the day you buy or pick them because they fade very quickly. If the blossoms have stems, you can keep them fresh in ice water in the refrigerator with a plastic bag over them, just as you keep parsley and other herbs. Even then, you should try to use them the same day you buy or pick them.

Exactly three years ago, I posted a recipe for stuffed squash blossoms which I liked a lot (still do), but the batter was a little heavy. The mushrooms I used to stuff them were tasty, but there are so many other options, that I thought you might like this version which has a lighter tempura batter and a stuffing of local ingredients. You can even fry squash blossoms with no stuffing and no batter at all. In truth, whatever you do with the flowers, they almost always turn out delicious.

One step that is often overlooked is the removal of the stamen. You can stuff the blossoms with the stamen still in, but it may make things a little bitter, and besides you want there to be as much room for the stuffing as possible. To perform that little surgical task, you can use a pair of long tweezers. I use a surgical hemostat. Scissors might work, and if your fingers are not too fat, they might work, as well. An important caution with this step is not to tear the sides of the blossom cup or the leaves. If you do that you run the risk of having all the filling run out while frying, even with a patch job. Some images on the internet show part of the flower cut away. If you are just going to stuff the flowers, that will work, but if you plan to fry them, the stuffing needs to be hidden away.

Stuffed squash blossoms sound a bit complicated. They aren’t really, and they are certainly worth the effort.

RECIPE

Fried Squash Blossoms Stuffed with Goat Cheese and Pine Nuts

Ingredients

  • 8 ounces chèvre-style goat cheese softened at room temperature
  • 1 tablespoon fresh lemon juice
  • 2 tablespoons shallot very finely chopped
  • ¼ cup parsley, finely chopped
  • ½ cup pine nuts
  • salt and pepper
  • 12 fresh, large squash blossoms
  • 2 cups all-purpose flour, divided
  • 1 large egg yolk
  • 1½ cups ice water
  • peanut oil for frying

Method

  1. In a small bowl, combine the softened goat cheese and lemon juice to form a smooth paste. Stir in the shallot and parsley.
  2. In a small dry skillet over medium heat, roast the pine nuts for a few minutes, stirring them frequently, so that they brown slightly and release their oils. Be very careful not to burn. Remove from the heat. Cool. Chop coarsely if you like, and stir them into the cheese mixture. Adjust the seasoning with salt and pepper. Set aside.
  3. Prepare the blossoms by removing the stamens, being careful not to tear the petals of the flowers. If the flowers are dusty, you may rinse them, although they do best with as little handling as possible.
  4. With a spoon, pastry sleeve, or your fingers, fill each blossom with stuffing. I have found the greatest success using my fingers. Fill only to the base of the petals so that you can fold them over one another and seal them with a dab of the cheese mixture. Arrange on a plate and chill for the few minutes needed to prepare the batter and heat the cooking oil.
  5. Place one cup of flour in a pie plate.
  6. In a small bowl that is big enough to dip the blossoms individually, beat the egg yolk and ice water together and then stir in the remaining cup of flour. The batter should be smooth, but it is not essential to get out all of the lumps as long as they are not too big.
  7. Fill a deep heavy-bottomed pot with 2 inches of cooking oil and heat to 375°. It’s a good idea to use a thermometer if you have one. Temperature will plunge when you start to fry, so you will need to regulate the flame.
  8. Remove the filled squash blossoms from the refrigerator, and one at a time, dip them into the flour, shaking off any extra. Then dip them into the batter, drain for a minute, and transfer to the hot cooking oil. Working in batches of no more than three or four, fry the blossoms, turning them frequently until they are lightly browned and crisp on all sides.
  9. Drain on multiple layers of paper towel and transfer to a plate in the oven at 200° until they are all fried. Serve immediately.
  10. Three to six individual blossoms make a good appetizer-sized serving for one person. You can gild the lily, so to speak, with a dipping sauce or salsa, but the stuffed flowers can easily stand on their own.


6 Comments

Filed under Food, Photography, Recipes

USING THE LYTRO LIGHT FIELD CAMERA – SHRIMP, ARTICHOKE AND MUSHROOM MAC AND CHEESE

My son recently gave me an amazing new camera. It’s called a Lytro light field camera, and it operates on an entirely different principle than regular cameras. Peter is a techie who lives and works in Silicon Valley, so he is always up to date with the latest gadgets. This camera captures light in such a way that you can focus on any part of your image, and change the focus with the touch of a finger. You can also take close-up images from only a few centimeters away from the subject, so he thought that I would find it useful in making images of food. In spite of the instruction manual, using the camera is not intuitive – at least not for someone of my age.  With practice, though, I think I have caught the hang of it. Also, you need a computer with a fairly recent operating system to take advantage of the focusing feature. Unfortunately, when you publish the images you have to convert them to jpegs so that the focusing is lost.  Thus,  you won’t be able to get a full appreciation of how unique the camera is, and how much fun it is to use. Except for the images of the Lytro camera, which I made with my iPhone, the images in this post are made with the Lytro. Let me know what you think of them.

(Roll over image for legend, click to see gallery)

I know. I know. You are not supposed to mix fish and cheese. But I was looking for something to photograph with my new camera and decided to use what I was cooking, macaroni and cheese, as the test . But how can a person put plain old mac and cheese on a food blog? So I added a few twists to make me feel better. One of those twists is the use of Old Bay seasoning which adds just a little bit of pep to shellfish. Be careful, though, or you can over-do it. You can also omit the seasoning if you like. Here it is, then, shrimp, artichoke, and mushroom mac and cheese shot with a Lytro light field camera.

RECIPE

Shrimp, Artichoke and Mushroom Macaroni and Cheese

Ingredients

  • 5 tablespoons butter, divided + more to butter the baking dish
  • 3 tablespoons all-purpose flour
  • 1½ cups milk
  • salt and pepper
  • 1 ounce Cheddar cheese, grated
  • 1 ounce mozzarella cheese, grated
  • 2 ounces Swiss cheese, grated
  • ½ teaspoon Old Bay seasoning (optional)
  • salt and pepper
  • 2 quarts of salted water
  • 2 cups dry macaroni
  • ½ pound (31/40) shrimp, peeled, deveined, and rinsed
  • 6 medium crimini mushrooms, rinsed and broken into pieces
  • 1 cup marinated, quartered mushroom hearts, drained
  • ¾ cup panko
  • ½ cup Parmesan cheese, finely grated

Method

  1. In a medium saucepan, melt 3 tablespoons of butter over medium heat.
  2. add the flour and stir in the flour cooking for a few minutes to remove the raw flour taste.
  3. Add the milk and bring to a boil, stirring constantly to remove any lumps and to avoid scorching until thickened.
  4. Turn the heat to low and stir in the Cheddar, mozzarella, and Swiss cheeses. Adjust the seasoning with salt and pepper. Add optional Old Bay seasoning. When the cheese is melted and the sauce is smooth, remove from the heat and set aside.
  5. In a large pot, bring the salted water to a boil. Add the macaroni and cook at the boil, stirring occasionally, until the macaroni is al dente. Drain.
  6. In the large pot, combine the cheese sauce and cooked macaroni.
  7. Stir in the shrimp, mushrooms, and artichokes
  8. Prepare the baking dish  by heavily greasing the inside with butter. Then coat the butter layer with panko crumbs. Pour in the macaroni mixture.
  9. In a small saucepan, melt the remaining 2 tablespoons of butter over medium heat. Add the remaining panko and brown it lightly, stirring frequently to prevent burning. Remove from the heat
  10. Combine the toasted panko and grated Parmesan cheese. Sprinkle the mixture over the top of the macaroni mixture.
  11. Bake for 45 minutes in the middle of an oven pre-heated to 350°F. If the top becomes too brown, cover with aluminum foil and continue baking.

(Roll over image for legend, click to see gallery)

11 Comments

Filed under Food, Photography, Recipes

HEART OF PALM PUFFS – A GALLERY OPENING

A few weeks ago I had what I thought was a wonderful opportunity. I was invited to show some of my photographs in a nearby artists’ cooperative gallery. I put together about  half a dozen of my favorite images, framed, and matted them. Along with oils, watercolors, pottery, and jewelry from other artists, the photos were arranged for a show.

As is the local tradition, the new show was inaugurated with a Friday evening opening complete with sparking water, wine, and appetizers. Each artist was asked to bring some kind of food, so that set off a perpetual struggle in my mind – what to serve? I found a recipe for chorizo tapas that sounded delicious, but I worried that gallery visitors might get grease on one of the oil paintings. Then I thought of empanadas filled with hearts of palm. I had first tasted them forty years ago at a party held by one of our Brazilian friends.

The bonus that moved me toward this option  was that I had a can of hearts of palm in the pantry. At the same time, making the dough for empanadas seemed like more effort than I wanted so I decided to use frozen puff pastry. The end result turned out to be these heart of palm puffs.

Heart of palm, also called palm heart or palmito, can be harvested from the growing tips of nearly all palms, but  this may destroy the palm. The commercial variety comes from the peach palm, a plant from the Amazon that now is grown throughout Central and South America. It is sustainable without destroying the palm for future growth.  Supposedly you can find fresh palm hearts in gourmet grocery stores, but I have only seen the canned variety.

The gallery opening was crowded, and the puffs disappeared. So did the gallery. What the reader needs to know is that nearly every person who lives in Santa Fe considers himself/herself to be an artist. The other factor is that there may be more galleries than residents. That is a certain formula to assure that many galleries disappear quickly amidst the competition. That was the fate of our co-operative, and my first show did not survive for this post.

RECIPE

Heart of Palm Puffs

Ingredients

  • 1 can (14 ounces) hearts of palm
  • Old Bay seasoning
  • salt and pepper
  • 1/3 cup parsley, minced
  • 1/3 cup Parmesan cheese, grated
  • 1 sheet frozen puff pastry, thawed
  • 1 egg yolk, beaten with 1 tablespoon water
  • 1 egg white beaten with 1 tablespoon water

Method

  1. Drain the hearts of palm, slice them into ½ inch coins, and marinate them, covered, in the refrigerator, with a little of the liquid from the can, a good sprinkle of Old Bay seasoning, salt, and pepper
  2. Combine the parsley and Parmesan cheese. Set aside.
  3. Thaw the puff pastry according to package instructions. Then on a lightly floured surface, roll out the dough so that it is about 1/16 inch thick. It should be large enough that you can cut 40 2 inch squares.
  4. Working quickly so that the pastry does not dry out, place a heart of palm disc in the middle of half of the pastry squares. Top with a ¼ teaspoon of parsley and Parmesan cheese mixture.
  5. Dab the edges of the square with the egg yolk mixture, top with another square, and press the edges together with a fork.
  6. Place the puffs on a Silpat-lined baking tray. Brush the tops with the egg white mixture.
  7. Bake for 15 minutes in the middle of an oven preheated to 400° F.
  8. When golden brown, remove the puffs from the oven, and cool them on a cooling rack.

2 Comments

Filed under Food, Photography, Recipes

MEATLOAF! – OR – CLEARING OUT THE FREEZER

I have been doing almost all of our grocery shopping for over five years. In fact, my wife says that she no longer remembers her way around the aisles of our local supermarket.  My buying habits are different from those of my wife – not so different that she wants to resume the chore of shopping – but a little idiosyncratic. It may have come from our days of living in Utah, but I try to make sure that we have enough extras of just about everything so that we won’t run out in case of a natural disaster or the unannounced visit of all of our relatives.

On top of that, being a thrifty shopper, I take advantage of bargains, so when there is a toofer- one, or even better a three-for-one sale I can’t resist. One result of this practice is that our freezer has become packed with packages of meat, poultry, and fish.

Periodically my wife stacks all of the frozen goods on the kitchen counter and issues an ultimatum, “Get rid of all of this before you buy any more.” I am currently working under one of those early warning messages. Today’s recipe is the result of my efforts and is based upon my wondering about what to do with a package of ground turkey that has been languishing at the bottom of the freezer compartment for months. Part of the reason for that is that I am not a big fan of ground turkey. Another reason is that I can’t think of anything to make with it.

So, with some frozen ground beef that was also in the freezer, I decided to make meatloaf. Now I know that everyone who reads this blog is likely to have his or her own favorite meatloaf recipe, and I also know that most readers are looking for ways to make something fancy, exotic, complicated, or all of those things.

Sorry, I hope that you will bear with me on this one, because the meatloaf turned out pretty good – that meaning you couldn’t taste the ground turkey. The best part was that there was enough left over for cold meatloaf and ketchup sandwiches the next day. And after all, that’s the reason most folks make meatloaf in the first place.

RECIPE

Turkey/Beef Meatloaf

Ingredients

  • 2 thick slices French bread
  • 1 cup milk
  • 2 jumbo eggs, lightly beaten
  • 2 tablespoons ketchup
  • 1 tablespoon sriracha hot chili sauce
  • ½ medium yellow onion, chopped
  • ¼ cup finely minced parsley leaves
  • 1 tablespoon salt
  • 1 teaspoon ground black pepper
  • ½ teaspoon garlic powder
  • ¼ teaspoon ground thyme
  • 1/8 teaspoon ground bay leaf
  • juice of ½ lemon
  • 1 pound ground turkey
  • 1 pound ground beef (85% fat)
  • 4 strips thick cut bacon

Method

  1. Tear the French bread into pieces and put in the bowl of a food processor. Process into coarse crumbs and then transfer to a large bowl.
  2. Add the milk to the bread crumbs and let stand for 5 minutes until the milk is completely absorbed.
  3. Stir in the eggs, ketchup, chili sauce,  onion, parsley, salt, pepper, garlic powder, thyme, bay leaf, and lemon juice.
  4. Then add the ground turkey and ground beef. With a large spoon or, better, your freshly washed and dried hands, mix the ingredients until they are well combined.
  5. If you are a perfectionist, brown a small ball of the mixture in a small hot skillet, taste, and correct the seasonings. If you are more casual, like me, pack the meatloaf mixture into a large (9x5x2½ inch) greased bread pan.
  6. Arrange the bacon strips on top of the meatloaf so that it is completely covered. You may have to cut the bacon strips into pieces to do that.
  7. Cover with foil and bake in the middle of an oven preheated to 300°F (150°C) for 1 hour. Remove the foil and bake for another 15 minutes. Remove the foil and place the loaf under the broiler until the bacon is brown and crisp.
  8. Remove from the oven, cool for 5 minutes, cut into ½ inch slices, and serve.

6 Comments

Filed under Food, Photography, Recipes