Tag Archives: Evan Rich

RICH TABLE UPDATE

We just got back from a week-long visit to San Francisco where we tended our grandson while my daughter and her husband worked overtime to get their new restaurant – Rich Table – open by July 19.

The dining room before any renovations

First-day restaurant owner thinking, “What have I gotten into?”

To my wife and me it seemed impossible to believe that they had signed the lease and accepted the keys on May 1 and were planning to be open by July 19. Part of our disbelief was grounded in having been there the day they walked into the space. The previous owner occupied the space for 12 years, and so much of the clutter of over a decade was still around. The restaurant had only shut its doors for the last time the night before, so there were also the leftovers of last-minute meals and unwashed dishes.

Wonder what else is in that scary basement?

The space is in a very good part of the city, close to the performing arts centers as well as the city hall. Still, the space was in  desperate need of a major redo. And that’s exactly what Sarah and Evan did. Walls were torn out, the restroom was relocated so that it was ADA compliant and no longer opened into the middle of dining room, banquettes were tron out, and major cooking equipment, including the range led together with duct tape,  was either replaced or sent out for a total refurbishment. Carpet was pulled up, and lurking beneath was a beautiful hardwood floor just begging to be refinished and polished.  Other discoveries included beautiful wooden pillars hidden behind drywall covers and a great red support beam for the ceiling. An image of the red beam has become a part of the web site home page for Rich Table. Old furniture was out and natural wood tables with classic chairs were brought in.

“The Beam”

After the demolition was completed. the new construction began. Evan went to an old saw mill which was being torn down in Petaluma. He bought several hundred square feet of old barn wood to be used on the walls of the dining room. With the help of their designer, Sarah and Evan put together a new space with soft-colored wooden walls, a gleaming cherry-stained hardwood floor, complementary curtains, and interesting lighting.  The roughness of the wood was softened by welcoming throw pillows at the back of the banquette.

Finishing touches on the community table

The new corner of the banquette

In the meantime, the two remained busy cooking for private parties, trying out some of the dishes they plan to offer on their menu. Their goal is to provide creative, well-prepared high-end food in a relaxed atmosphere without all of the fuss and with affordable prices. A couple of the dishes which will make their menu are shown here.

Grilled artichoke and crab bouillabase with ramps

Braised oxtail with foraged spring things and flatbread

They still have lots of finishing touches to put in place, but the restaurant is close enough to being ready that we wound up having a sort of family picnic. Sarah cooked some of the food at home, then brought it to the restaurant to be finished. Our son joined us from his home in Silicon Valley. After a sparkling wine toast (New Mexico Gruet, what else?) we wound up having a  feast – nothing fancy: roasted chicken, giblet sauce, fresh-baked biscuits, ears of  corn seared on the restaurant plancha, sautéed shaved Brussels sprouts, and a delicious dessert  leftover from a private party: sort of a deconstructed Black Forest cake with rich chocolate cream served between wafers of a crisp chocolate panade and topped with macerated fresh sweet cherries and whipped cream.

The big push now begins. The reservation program is not yet set up, but the plan is for Rich Table, 199 Gough, San Francisco, to be open by the end of the month.

Ready for a toast

RECIPE

Jacques Pepin says that one of the marks of a good chef is to be able to cook a perfect omelet. The other mark is the ability to roast a perfect chicken. Here is Sarah’s recipe.

Oven-Roasted Chicken

Ingredients

  • 1 fresh four-pound baking chicken
  • salt and pepper
  • 6 cloves of garlic, coarsely chopped
  • 1 lemon, halved
  • good handful of your choice of fresh herbs – thyme, rosemary, sage, or tarragon are all good choices
  • ½ cup melted butter (about)

Method

  • Thoroughly clean the chicken, inside and out, with running water
  • Salt and pepper generously inside and out
  • Stuff the cavity with the chopped garlic, cut lemon, and herbs
  • Brush the chicken all over with the melted butter and place in the middle of a heavy, oven-proof pan (cast iron works the best) over a hot flame.
  • Turning frequently and basting as needed, brown the chicken on all sides
  • Move the chicken in the skillet to the middle of an oven preheated to 425º F
  • As it bakes, turn the chicken frequently and baste it with pan juices and remaining melted butter.
  • Bake for about 1 hour or less  or until the temperature of the thigh muscle reaches 165° F using an instant read thermometer
  • Remove from the oven, let rest for about 5 minutes, and then slice into serving pieces while the skin remains crisp.

Grilling corn and Brussels sprouts on the plancha

7 Comments

Filed under Food, Photography, Recipes, Restaurants, Travel

LEFTOVER LAMB SHANKS

The day after our farmers market feast, Sarah went off to the restaurant where she was working. Evan slept in after his last night cooking at the restaurant where he worked. Around noon, he volunteered to make lunch and headed out to the kitchen. There were lots of leftovers from the night before, but when he had finished you would not have recognized at all that they were leftovers.

He whipped up a fragrant pasta dish which included the leftover lamb shanks, a reduction of the cooking liquid,  freshly cooked pasta, mushrooms, and some wilted baby salad greens.

Uncooked campanelle pasta

The pasta he chose was campanelle which  with its bell shape and fluting was a perfect choice to hold the sauce. This unusual pasta shape was listed in a catalog of Sicilian pastas at the end of the nineteenth century. You can read more about it in an interesting book,  Encyclopedia of Pasta, written by Oretta Zanini de Vita and translated by Maureen B. Fant (University of California Press, Berkeley, 2009), which describes the history and  making of Italian pasta.

Lamb shanks, campanelle pasta, mushrooms and wilted greens

RECIPE

Ingredients

  • 2 cups leftover lamb braising liquid, strained and de-greased
  • 1 cup campanelle pasta
  • 1 cup leftover lamb shanks, cut into bite-sized pieces
  • 2 tablespoons olive oil
  • 1 cup mushrooms, trimmed and cut into bite-sized pieces
  • 1 cup baby salad greens
  • salt and pepper

Method

  • Bring the braising liquid to a boil and add the campanelle. Boil until the pasta is al dente.
  • Add the lamb  and warm over low heat until heated through.
  • While the pasta is boiling, heat the olive oil in a small sauté pan over medium heat. Add the mushrooms and sauté for 3 minutes.
  • Stir the mushrooms into the lamb and pasta.
  • Add the salad greens, toss lightly, correct the seasoning and serve immediately.

3 Comments

Filed under Food, Photography, Recipes

CUCUMBER-NORI-SESAME SALAD AND SAUTÉED ROYAL TRUMPET MUSHROOMS: THE FINISHING TOUCHES

Just two more dishes to finish the description of the celebratory meal we had from foods we collected at the Ferry Building Farmers Market. Both are easy to make but surprisingly unique.

Cucumber-nori-sesame salad

The first was a refreshing salad made with amazingly crunchy and green baby cucumbers and fresh salad greens accented with bits of nori and toasted white sesame seeds.

Royal trumpet mushrooms

The second was a delicate sauté of royal trumpet mushrooms with scallions.

Scallions

Sautéed mushrooms and scallions ready to serve

As a bonus not from the farmers market we had a fresh loaf of home-baked Tartine basic country bread made from the recipe in Chad Robertson’s elegant and detailed cookbook, Tartine Bread, Chronicle Books, Ltd, San Francisco, 2010, pages 41-79. (Yes, that’s a long recipe. I plan to post an abbreviated version soon. That should enable you to reproduce the absolutely best home-made bread I have ever tasted).

Fresh loaf of Tartine-style bread

RECIPES

Cucumber-Nori-Sesame Salad

Ingredients

  • 4 small, firm baby cucumbers cut crosswise into ½ inch slices
  • 2 Cups mixed baby salad greens
  • ½ 7 inch sheet of nori cut into ½ inch squares
  • vinaigrette (home-made is the best, but use your favorite)
  • ½ teaspoon sesame oil (optional)
  • salt and pepper to taste
  • 2 Tablespoons white sesame seeds, lightly toasted

Procedure

  • Combine the cucumbers, greens, and nori in a serving bowl.
  • Dress lightly with your favorite vinaigrette. If you like, add the optional sesame oil. Toss.
  • Adjust seasoning with salt and pepper.
  • Sprinkle with sesame seeds and serve immediately.

Should serve four

Sautéed Royal Trumpet Mushrooms with Scallions

Ingredients

  • 2 Tablespoons unsalted butter
  • 2 Tablespoons olive oil (use EVOO – extra virgin olive oil – if you like)
  • 1 small basket (about 2 Cups) fresh royal trumpet mushrooms, cleaned and trimmed
  • 1 bunch (6 to 8) scallions, trimmed and cut crosswise into ½ inch pieces, including the green tops
  • salt and pepper

Procedure

  • Heat the butter and olive oil in a medium sauté pan over medium-high heat.
  • Add the mushrooms and scallions and sauté until cooked through.
  • Correct seasonings with salt and pepper.
  • Serve immediately.

Table set with sweet peas

We set the table with the bouquet of multi-colored sweet peas bought from the flower stall, plated up the feast, and enjoyed it while Evan finished his last day at the restaurant.

Ready to eat

2 Comments

Filed under Food, Photography, Recipes

FERRY BUILDING FEAST: OYSTERS WITH CUCUMBER-DILL MIGNONETTE

Our trip to the Ferry Building Farmers Market coincided with the day that Sarah and Evan got the keys for their new restaurant space, so we were in a celebratory mood. Never mind that Evan had one last night at his current restaurant, Susan, Sarah, and I were going to have a party.

Selecting the best oysters

And what better way to begin the celebration than champagne and oysters on the half shell. Two dozen oysters sounded just about right for the three of us, and the oysters from Hog Island Oyster Company were fresh and just the right size. We brought home a mesh bag iced down for the short journey home.

Opening the oysters with an oyster knife

At dinner time, Sarah brought out her oyster knife and made short work of the shucking. Of course, she is a professional, so she knew what she was doing. She wrapped each shell in a kitchen towel and grabbed it firmly with one hand. Using an oyster knife, she slipped the point of the knife into the hinge of the shell, twisted the knife firmly, and popped open the innocent oyster. She cut the muscles holding the oyster in the shell, removed the top shell, and placed the fresh oyster on a bed of ice.

Opening the oysters with an oyster knife

If you have never opened an oyster on your own. There are a few important pointers. First, be sure to use a good-quality oyster knife. Regular knives can bend and break, and you can wind up plunging the blade into your hand. Serious injuries to blood vessels and tendons can result. Second, the towel is supposed to provide some protection so it should not be flimsy. If you are  a little nervous, Kevlar gloves are available and provide more safety. If you are still anxious, have your fish monger shuck the oysters before you bring them home.

Oysters on the half shell with lemon

You can eat raw oysters with no dressing. That’s the way real aficionados do it so they can taste the brine of the sea. For me, a little lemon juice brightens the taste. In Louisiana they douse with hot sauce. The classic accompaniment is a fresh mignonette sauce. The following recipe is for Sarah’s version based upon ingredients from the farmers market.

RECIPE

Cucumber-dill mignonette

Ingredients

  • ½ cup champagne vinegar
  • 4 teaspoons finely chopped shallots
  • 4 teaspoons finely diced cucumber
  • 2 teaspoons finely minced fennel fronds
  • 2 teaspoons finely minced dill weed
  • 2 teaspoons coarsely ground black pepper
  • salt to taste

Method

  1. In a small bowl, combine all of the ingredients with a wire whisk
  2. Serve immediately or chill until ready to serve

Oysters, mignonette, and sparkling wine ready for the celebration

We opened a bottle of California sparkling white wine, toasted the new restaurant, and enjoyed our raw oysters with cucumber-dill mignonette.

Toasting the new restaurant

2 Comments

Filed under Food, Photography, Recipes

THE FERRY BUILDING FARMERS MARKET

Susan and I have been making the Great California Loop away from a computer for over two weeks, child tending in all of our children’s houses. That doesn’t mean that we have not had some good food adventures along the way. Over the next several posts, I will describe some of those experiences.

Chefs chatting in front of the Ferry Building

And what better place to begin than San Francisco’s famous Ferry Building Farmers Market? The Saturday edition is the most popular and crowded. It is a big-city street fair with buskers a-plenty, kids on skate boards, families with babies in strollers, and lots of tourists. If you watch carefully you can see some of the best known chefs in the city shopping for their weekend menus and visiting with one another. The main reason for the market’s popularity is the amazing cornucopia of the freshest Northern California food products, and this time of the year the choices are simply amazing.

Sweet peas

Sweet Williams

We  were in a celebratory mood because Sarah and Evan finalized the contract for their new restaurant space just before we headed to the market. Sarah thought we needed to be festive so our first stop was in the bank of flower stalls at the front of the building. The fragrance of the sweet peas attracted us, and Sarah bought an armful of blossoms of all hues.

Asian pears

We passed up the Asian pears and other fresh fruits because we had already opted for fresh-churned ice cream for dessert.

Choose your asparagus

Next stop was the asparagus stall. There were bundles of thick, medium, and thin stalks arranged in orderly rows. The abundance made it hard to choose, but we finally settled on three bundles of beautiful, thick, fresh stalks before moving down the row of vendors.  Fresh dill, thyme, and oregano all made it to our shopping bag.

Beautiful vegetables

Mushrooms! Baskets filled with all varieties of the tasty fungi. Criminis, whites, Portobellos, oysters, shitakes, and my favorites – lion’s manes. There were some giant royal trumpets, but we chose a basket of the most beautiful small-size trumpets.

New potatoes

New potatoes in all colors, sizes, and shapes – a good choice for smashed potatoes.

Hog Island Oyster Company

Hog Island Oyster Company  http://www.hogislandoysters.com is one of the landmarks of the market. We often go to their restaurant for fresh oysters or clam chowder, but today we went to their food stall. They had choices of small and large local sweet oysters-in-the-shell and some crenelated beauties from British Columbia. Sarah got a dozen each of the small sweets and the BCs.

Sarah at the Prather Ranch shop

Then we went inside the Ferry Building to the Prather Ranch stall   http://www.pratherranch.com where we found some juicy lamb shanks.

Chilaquiles

A little more shopping for green garlic to braise with the lamb shanks and some baby cucumbers to turn into a salad. Then, with shopping finished we stopped off for an early lunch. There were all sorts of choices including fried chicken, porchetta sandwiches, and lots of Mexican food. We settled on plates of freshly made chilaquiles to eat al fresco on a make-do seat along a planter wall. Evan loaded up his supply for the restaurant, and Sarah and I packed ours up for what looked like a feast that evening.

Leave a comment

Filed under Food, Photography

FORAGING ALONG THE SAN FRANCISCO BAY

Urban foraging in dumpsters has become a popular way to augment food sources for many hipsters, but that is not the kind of urban foraging my daughter and son-in-law, both professional chefs, do.  Cooking with wild plants has become popular in adventurous restaurants all along the Pacific Coast, from Seattle into California. These new-old discoveries, along with inventive methods of preparation,  provide interesting tastes and new beauty to food. They also  move us away from the over-manufactured and bio-engineered food products that have become so common in modern life. Wild plants also remind us of the sources of all we eat and of the need to conserve and to worry about sustainability

Selecting only the freshest flowers

The San Francisco Bay area  is a wonderful place to find wild edibles while enjoying a casual walk along the shoreline or in the hills and meadows of the surrounding countryside.  My young ones forage every day, because of their cooking which uses wild plants in most of its dishes and  requires a steady supply of fresh produce.

Perfect greens for a perfect salad

The novice forager may not be aware that those with more experience usually subscribe to a number of common-sense  rules:

Know what’s safe and what is not.  It is best to read as much as you can or follow a knowledgeable mentor before you strike out on your own. The bible for many foragers is Euell Gibbons’ s classic, Stalking the Wild Asparagus, first published nearly fifty years ago and still in print. Now there are numerous field guides, books and pamphlets as well as authoritative websites. There are also  guided tours and tutorials to give the beginner some guidance. These are available in the Bay Area as well as many other cities. A good local field guide with pictures and descriptions of the local plants and where they grow is indispensable, especially when you are first beginning to forage. Your local book store will have a wide and appropriate selection for your region. Take time to compare before you select the one or ones you will take with you on your foraging walks.

Never forage on government property, especially national  parks or preserves.  Although in some instances foraging may be permitted on government property, in general it is not. Moreover, there is a popular notion that foraging on such preserves detracts from the notion that such lands are for all to enjoy in a state that is as natural as possible

Don’t forage on private property without permission. Often, it is easy to obtain permission from  land owners to forage what they believe to be noxious weeds or invasive pests. But ask them first, and be sure to explain what you are doing.

Be aware of potentially hazardous places like landfills or shifting terrain. Plants, whether they are wild or domesticated, can incorporate toxic substances from the ground in which they grow. Landfills may be contaminated years after they have grown over.  It may be tempting to forage a choice specimen from an unstable or steep hillside. In those cases, the forager may risk injury or even death in an unexpected landslide.

Don’t dig up anything. A cardinal principle of foraging is sustainability of the environment. While a particular root or tuber may be tempting, digging may disrupt the environment enough that future growth cannot be sustained.

Avoid foraging near the road. Although the plants are often luxuriant and the foraging is easy, fumes and other potentially toxic materials from passing autos could taint your harvest.

It’s ok to keep your favorite places secret. Every forager knows what he or she is looking for, and with experience will learn the ideal places to find those treasures. You are not obliged to tell others where you found a particular plant, especially if it is uncommon. Again, sustainability should be a consideration.

If someone shares a secret spot with you it becomes your shared secret. it’s not ok to tell others. Sometimes an especially good friend will let you in on a particularly choice spot to find a particular edible. Just remember that at that point, your friend’s secret becomes your shared secret. Violation of this rule is a guaranteed way to lose a good friend.

Know what’s in season and where it grows.  It should go without saying that it is a fool’s errand to hunt for fir tips along the beach or to look for sea beans on a mountain trail. Knowing the patterns of the seasons is just as important. Textbooks, field guides, web sites, and guided tours are essential to learn these variations.

Below is a brief list of some of the edibles Sarah and Evan have collected over the time that they have been about this. The actual list of all locally available edible wild plants is much longer. How you develop your own foraging list will depend upon how you want to use the plants, how much time you have to devote to the activity, where you live, and how accessible the mountains, trails, fields, and shores  are to you.

Dandelion blossoms

Dandelion is known by nearly everyone by its bright yellow flowers that brighten lawns and the cliff meadows along the ocean. The tender green leaves should be harvested early in the season because they become more bitter as the season goes on. Collect only the youngest leaves and use them in salads or treat them like spinach. This is nothing like the big, coarse dandelions that you often see in supermarkets.

Wild radish is widespread throughout the region, growing in disturbed soil along the roadside or in neglected fields and orchards.  Foragers go after the attractive flowers of white to pink to purple which are most visible from April to July. The four-petal  flowers add a peppery taste to salads or an attractive garnish to other dishes.

Wild mustard is also widespread, and there are many varieties found throughout Northern California. The most common is black mustard.  The flowers make a beautiful addition to a salad or as a highlight to other plates. The greens, especially when young, can be used in a salad or as a potherb.

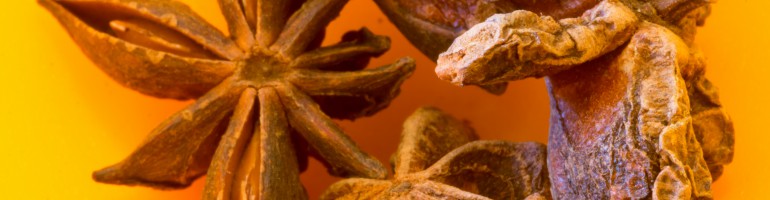
Wild fennel grows abundantly along Northern California roadsides, in neglected fields, and open patches all the way down to the beaches. It is different from the fennel that you find in grocery stores and farmers markets because it has no bulb. In the spring, the green fronds can be harvested and chopped for garnish, seasoning for roasted meats, or salads. It can also be cooked as a potherb. In mid-summer when the flowers are in bloom, the pollen can be gathered to sprinkle as a seasoning or incorporated into pasta, pastries and breads, or sauces. Later, the seeds can be eaten raw or used, whether whole or ground, as an anise-like seasoning for sauces, soups, roasted meats, or sweets.

Sea beans, also known by a number of other common names including  sea asparagus, sea pickle,  pickleweed, and glasswort are  not beans at all, but their bright green color, thick stem and no leaves produce an appearance similar to green beans. They are often found in clumps in tidal areas near beaches. They have a crunchy, salty flavor and can be eaten raw in salads or cooked in numerous ways. . Their vivid green stalks, which grow on salt marshes and beaches, have a crunchy texture and a briny flavor with a vegetal aftertaste that’s been likened to asparagus. They are found year around, but best from the early spring to fall.

Douglas fir is a tree that grows in the transition zone between the lower junipers and pines and the higher alpine firs and pines. Douglas firs are common along the hiking trails in the mountains of the Bay Area. In spring, as with other conifers, the Douglas fir branches send out tips of new growth. These tips can be harvested in the early spring when they are particularly tender and aromatic. Although they can be used as domestic  herbs might be used, they are most commonly used to infuse a woodsy essence to spirits, mixed drinks, teas, and oils. They make an aromatic rub for roasted meats as well.

Asparagus is not really wild at all, but it is distributed widely because cultivated asparagus seeds are easily spread by hungry birds and wind currents. Asparagus can be found in many disturbed areas, especially fence lines where there is sandy, moist, but well-drained soil. Like its domestic counterpart, it is best harvested in the spring and early summer.

Wood Sorrel grows throughout the region and can be harvested spring through autumn. The lance-shaped leaves are good in salads and the classic sorrel soup,  but can also be used as a potherb. The rather sharp, acid taste is due to a high content of oxalic acid which in large amounts can cause abdominal pain. Long-term heavy ingestion can even cause kidney stones. Moderate amounts are totally safe, and there are no poisonous look-alikes.

Miner’s lettuce grows in moist areas of lower terrain and mountain slopes throughout the Northwest and most of California. Best harvested in the spring when the leaves are young, it can be harvested in the summer and autumn, too. Use the leaves and flowers in salads or as garnish for other foods.

Purslane, also called Portulaca,  grows at all elevations. Gardeners consider it a pest, and it is found in all sorts of disturbed soils.  It is best in the spring, but can be harvested all year along the coast if you are careful to select the youngest, most tender shoots. That method allows you to harvest the same planting all season long. Much more flavorful than that found at farmers markets, it can be used in salads or boiled as a potherb.

Lamb’s  quarters, like many other so-called wild plants, was introduced from Europe and now is distributed widely throughout the United States. It is found in yards, along the roadside, and in areas of disturbed soil.  It is best harvested in the spring, but can also be harvested in the fall.  The leaves are a distinctive triangular shape; young ones are delicious in salads, but they can also be cooked

Stinging nettle is widespread in moist, disturbed soil along stream beds, mountain trails, the forest edge, or vacant lots. Best harvested late in the fall or in the spring when the leaves are tender, the plant has tiny hairs which contain formic acid and histamine. For this reason, use gloves and a long-sleeved shirt when you harvest, and inactivate the toxins with steaming, boiling, or otherwise heating. Nettle soup is famous.

There are a number of reference materials that both novices and experienced foragers will find useful

Edible Wild Plants  by Thomas S. Elias and Peter Dykeman, Sterling Publishing – a handy field guide with brief descriptions, poisonous look-alikes, and excellent color photos

Weeds of the West  edited by Tom D. Whitson,  The Western Society of Weed Science – an extremely well-illustrated book of plants called weeds, many of which are edible

Feasting Free on Wild Edibles by Bradford Angier, Stackpole Books – divides wild edible plants into useful  categories

Just Weeds: History, Myths, and Uses by Pamela Jones, Chapters Publishing, Ltd. – elegant descriptions of useful plants along with beautiful hand painted illustrations

Identifying and Harvesting Edible and Medicinal Plants in Wild (and Not So Wild) Places by “Wildman” Steve Brill with Evelyn Dean, Hearst Books – although focused on New York City and the East Coast, this is exhaustive and describes seasonal expectations for foraging

Statewide Integrated Pest Management Program University of California  IPM Online. http://www.cal-ipc.org/ip/inventory/weedlist.php – a terrific online resource with excellent pictures of plants that are considered invasive, many of which are edible and perfect for foraging.


5 Comments

Filed under Food, Photography

CORRECTION ABOUT SARAH AND EVAN’S KICKSTARTER

Mea culpa!!

I gave you the wrong URL for checking out Sarah and Evan’s Kickstarter page. Here’s the right information directly from Sarah and Evan:

If you haven’t heard already…we’ve signed a lease for our restaurant at 199 Gough St! We’ve been working hard for this for many years now and are so excited that it’s this close!

We thank you for all of the support you’ve given us, we wouldn’t be where we are now without it.

We’ve opened a Kickstarter project, so if you or your friends are interested in being contributors to our new restaurant you can find us at http://www.kickstarter.com/projects/1777795794/rich-table We’d love to get our supporters involved, and we’re offering great rewards.

We will be planning a future pop-up prior to opening and will let you all know more about that soon.

Thank you again,

Sarah and Evan Rich

Leave a comment

Filed under Recipes

WEST TEXAS COWBOY SOURDOUGH BISCUITS

A few months ago I wrote about Carol’s favorite biscuit recipe, the Southern classic “Touch of Grace Biscuits”.  This post is about sourdough biscuits. When we lived in West Texas, for several years I attended an annual all-male overnight fishing trip held by some rancher friends  on the banks of one of the branches of the Brazos River running through a parcel of one of the legendary West Texas cattle ranches. Menus included classic ranch fare – grilled steaks, beans, fish (if we caught enough), hamburgers,  barbecue of all sorts, and of course lots of beer. The highlight, though, was a chuck wagon breakfast. The cooks would arise before everyone else, stir up the fires that had been stoked for the night, and begin to cook huge slabs of sliced bacon and scrambled eggs in surplus Army ammunition cans set over the open fires. They also stirred up the dough for sourdough biscuits to be baked in old-fashioned spiders (three-legged Dutch ovens with flat lids) that would be buried in the coals of the campfires. This was a feast for a king, or at least some satisfied West Texas cowmen.

Three-legged spider Dutch oven

Sourdough biscuits need to be started the night before you serve them at a cowboy breakfast out on the range, so be sure to get things going before the libations and campfire stories move into full pace. Hopefully you will have a sourdough starter that you have been treasuring and “feeding” for a long time, but don’t despair if you don’t. You can start your own in a week or two before the cookout. Yeast is a fall back, but it is definitely not viewed with favor out on the ranch. Depending upon how many mouths there are to feed, you will need to increase the recipe. Allow for at least three apiece, because even modern cowboys are hungry.  If you want to bake these at home, you don’t need to dig a fire pit, you can just use your oven. However, the instructions change a bit.

A pan full of biscuits about to go into the oven

A pan full of biscuits about to go into the oven

Cowboy Sourdough Biscuits

Sourdough biscuits fresh out of the oven

Ingredients

½ Cup                    sourdough starter

1 Cup                     milk

2 ½ Cups              all-purpose flour

¾ teaspoon         salt

1 Tablespoon      sugar

1 teaspoon          baking powder

½ teaspoon         baking soda

                             bacon grease from bacon cooked earlier (or 2 tablespoons of salad oil and 2 tablespoons of melted butter)

  1. The night before, dissolve the starter thoroughly in the milk. Be sure to use a large metal container that can be covered securely to keep out any varmints – human or otherwise – during the night.
  2. Thoroughly stir in one cup of flour, cover securely, and set in a warm place: not too close to the fire, but also not out in the cold night air.
  3. In the morning, combine the remaining 1½ cups of flour, salt, sugar, baking powder, and soda.  Then add to the starter mixture from the night before, and using clean hands (!?), combine into a soft dough. Knead in the metal container for a few minutes and let rest.
  4. In the meantime, prepare the fire: quench any active flames and with a hoe or shovel pull the coals to the edge of the fire pit so that your spider or Dutch oven will fit easily into the hole.
  5. On a flat, lightly floured surface, pat the dough into a round about ½ inch thick. Then cut individual biscuits. If this is a high-class cookout use a 2½ inch biscuit cutter. Otherwise use your cleanest knife to cut 2 inch squares.
  6. Dip each biscuit in bacon grease and place it in the bottom of the cast iron pot until the pot is completely full. Put the lid on the pot and lower the whole thing into the prepared cooking pit using the bale attached to the pot and a hook or hoe.
  7. With the hoe or shovel, layer some of the coals on the top of the cast iron pot – enough to evenly cover the lid.
  8. Bake for about 30 to 35 minutes.  It is very hard to check the baking, but you can try to remove the coals from the lid to check. Just remember to put them back on top if you bake some more. It is more likely that you will just have to take pot luck (so to speak), but my observation is that the usual crowd is just happy to get something to eat.
  9. If you are baking at home, dip each biscuit in melted bacon grease or a combination of oil and melted butter (bacon grease may be too strong a flavor for a home meal). Arrange the biscuits in a 10 inch cast iron frying pan. Bake in a preheated oven at 375° for 30 to 35 minutes.
  10. Serve immediately. Cold cowboy sourdough biscuits get as hard as a rock.

Yield: About 10 to 15 biscuits

Hot sourdough biscuits ready to eat

SOURDOUGH STARTER

Sourdough starter bubbling and ready to use

Sourdough starter can last a long time if it is properly cared for. We got one from a neighbor in Utah nearly forty years ago. That starter subsequently traveled to Texas, back to Utah, on to Louisiana, back to Texas again, and now New Mexico. Starter can be easily kept out-of-the-way in a closed jar in the back of the refrigerator for years. If you haven’t used it for several months it will have to be revived before using it.  If you can’t revive it, never mind. It is easy enough to start a new one. But don’t expect your friends to help.  Years ago we gave a starter to my brother and his wife.  They enjoyed it for some time and even gave some to their friends. Calamity struck and their jar of starter got thrown out when an unknowing individual cleaned out the refrigerator.  When my sister-in-law asked her friend for a new starter batch, the “friend” refused! It’s always better to be independent of others. Sourdough is slower than commercial yeast so breads made with it often do not rise as much. For that reason, breads made with sourdough alone require a long rise or fermentation, but starter can still be used for flavoring.  The most successful recipes are for biscuits, cornbread, pancakes, traditional country loaves, and French bread.

TRADITIONAL METHOD I

Ingredients

2 Cups   milk

2 Cups   all-purpose flour

  1. Mix the milk and flour together in a large ceramic bowl until smooth. Set uncovered in a warm kitchen for 2 to 5 days, stirring occasionally.  When the mixture is bubbly and has a yeasty, sour smell, the starter is ready.
  2. Store well covered in a glass or ceramic container on the counter or in the middle of the refrigerator.  Keep at least 3 cups on hand.
  3. Replenish by stirring in equal portions of milk and flour


TRADITIONAL METHOD II

Ingredients

1 Cup                     all-purpose flour

1 Cup                     water

  1. In a 4 cup or larger clear glass jar, mix the flour and water into a smooth paste. Set uncovered in a warm place. The kitchen is usually the best choice.
  2. Every day, check the mixture for bubbles, remove any tough skin that has formed on the top, pour off about half of the mixture, and add an additional ½ cup of flour and ½  cup of water, stirring to form a smooth paste.
  3. Repeat this process each day until the mixture is covered with bubbles and expands to double size or so. You should observe frequently during the day and evening because a good starter will eventually collapse from its own weight and lose volume.
  4. You will probably need to repeat the process for a week or more before you have established a good starter.
  5. After that, you should repeat the replenishment process for at least a couple of days before you plan to bake.
  6. You may store the starter in the refrigerator, but that is not necessary and even encourages less desirable things to grow and discolor the mix. If that happens, pour off the discolored top part, keeping just a few tablespoons of the starter to rejuvenate your stock.


NEW METHOD

Ingredients

2 Cups                   all-purpose flour

2 Cups                   water or milk

1 Tbsp                   sugar

½ pkg                    dry yeast

  1. Mix the flour, milk and sugar together into a smooth batter. Sprinkle the yeast over the surface and stir in. Allow to stand uncovered in a warm kitchen until the mixture is bubbly and with good aroma. The starter is ready.
  2. Store and replenish as above.
  3. If you have not used the starter for a long time, you may need to add milk and flour in equal amounts with a tablespoon of sugar, and let the mixture stand overnight before using.

 A LITTLE SOMETHING EXTRA (IN LOUISIANA IT’S LAGNIAPPE)

Sarah and Evan cooking at one of their popular pop-up dinners

For those of you who have been wondering about Sarah and Evan’s restaurant, it is moving closer to reality. They have signed a lease on space at 199 Gough in San Francisco’s Hayes Valley. Now they are waiting on the liquor license before they start renovation and moving in. You can read all about the venture on Kickstarter and at the same time have an opportunity to participate in the project. http://www.kickstarter.com/projects/1777795794/rich-table

1 Comment

Filed under Food, Photography, Recipes

SARAH COOKS IN SANTA FE

This last week, our daughter Sarah and her 10 month old son, Van, visited us from San Francisco. Since she is a chef, we spent a lot of time eating at some of our favorite restaurants as well as doing a lot of home cooking. Without doubt, the food highlight of the week was the dinner which Sarah cooked for us. The menu was designed to feature the foods that Susan and I especially like, but they were all done with a restaurant-quality twist.

The feature of the main course was halibut. Sarah brined thick slices of the beautiful fish for just a few minutes to remove the extra moisture that you often see when a fish like halibut is cooked. Then she sautéed serving-sized fillets in butter to just underdone, finishing off by topping each piece with herb panade (more butter along with bread crumbs, garlic, salt, and herbs) and broiling for just a couple of minutes until the fish was perfectly cooked and the panade was golden brown.

Sautéing halibut filets

The starch was a delicate purée of smoked parsnips. First, Sarah smoked the parsnips along with cream in our handy Cameron stove-top smoker. She chose hickory chips to give the parsnips a definite but subtle smoky taste. Then she simmered the parsnips until they were fork tender, puréed them with a hand-held blender, and combined them with the cream and more butter until they were smooth and silky.

Cooking the smoked parsnip purée

The vegetable was carrot stew: baby carrots simmered in fresh carrot juice that was then reduced to make a thick sauce. The sugar of the carrots and the carrot juice made the dish sweet – but not too sweet – without the addition of any sugar.

Carrot stew

As an added touch, “melted” leeks were chopped finely and cooked into a smooth, savory dish which could be shaped into quenelles to top the vegetables. Then everything came together into a beautiful presentation.

The final plate with halibut, parsnips, carrot stew and melted leeks

For Sarah, probably the best part of the week was the news she had been anxiously awaiting for months. She and her chef husband, Evan, had been working on securing space for their own restaurant in San Francisco. The contract finally was settled, so she spent time at the kitchen table reviewing and signing the documents before faxing them back to Evan. We had a celebratory dinner at Terra (I’ll say more about that in another post).

Sarah signing the lease

Later in the week, Sarah returned to San Francisco to help post the sign in the window of the new place.

Sarah and Evan getting ready to post the sign

If you want to read more about their new restaurant, check it out at the following link:

http://insidescoopsf.sfgate.com/blog/2012/02/05/sarah-and-evan-rich-ink-a-deal-for-a-hayes-valley-restaurant/

1 Comment

Filed under Food, Photography, Recipes

CHEFS’ NIGHT OFF

I just got back from San Francisco where Susan and I took care of our grandson so that my daughter and son-in-law could prepare and serve their latest pop-up dinner. During the dinner Susan took care of the baby, so I got to enjoy the meal.

 This time the dinner was held at Coi, the Michelin two-star restaurant where Evan is the chef de cuisine and where Sarah worked for a short while early in her recent pregnancy. The dinner turned out to be a big success with a waiting list for reservations.  The kitchen crew was experienced, so the food came out on time and with a beautiful presentation. Most of the servers were recruited from the regular staff of Coi, so service was unobtrusively attentive. The wine and beer selections were small but very well-chosen to complement the meal.

Wild-Fennel-Pollen-Dusted Kettle Corn

Popcorn is the classic American snack food for movies and with drinks. Kettle corn raises it to a new level with a light sugary accent to the salty tang. This version, dusted with wild fennel pollen raises the bar one notch. In Northern California, wild fennel grows everywhere, so it is easy for foragers to gather the pollen from the golden flowers when they are in full bloom. The aroma and taste are subtle reflections of the stronger accents of fennel seed or cooked fennel. This is rapidly becoming a standard dish for the Chefs’ Night Off pop-ups because it is so popular and so perfect with cocktails, beer, or wine before dinner. One group of guests worked their way through six bowls.

Sun-Dried Tomato Fritter with Shiso

Fritters may be one of the signature dishes for Chefs’ Night Off. This version showed off sun-dried tomatoes folded into a stiff béchamel, crusted with cornmeal, and fried. Shiso, also called perilla or Japanese basil, is an aromatic leafy green.

Dungeness Crab Louie with Little Gems and “Saltine Crackers”

This is the season for Dungeness crab in San Francisco, and it is found on many menus prepared in many different ways. This version called for the pink, sweet morsels of crab to be combined with apples, celery, and house-preserved pickles, seasoned with a light, siphoned sauce Louis, garnished with a chiffonade of little gem lettuce, and hidden beneath a tuile made of saltine crackers in the style of an Italian frico.

Avocado, Little Gems, and “Saltine Crackers”

For vegetarians, this dish imitated the Dungeness crab Louie, substituting avocado ribbons and avocado balls stuffed with avocado mousse.

Plancha Bread with Roasted Squash, Smoked Pancetta, and Burrata

This complex dish used rectangles of flat bread baked on a plancha (iron griddle) and topped with roasted squash purée, crisp smoked pancetta, a siphon of burrata ( the creamy, earthy cousin of mozzarella) and herbs. For the vegetarians, the pancetta was replaced by smoked onions.

Chicory Salad with Date Vinaigrette and Persimmons

A beautiful and interesting break from the main courses, a leaf of chicory was dressed with a date vinaigrette siphon, grilled chicory chiffonade, and diced persimmons.

Roasted Chicken with Chestnuts, Pomegranate,  and Pine

Chicken legs were deboned and prepared pressée, stuffed with truffle and seaweed mousse. Chicken breast was stuffed, under the skin, with truffles and seaweed. The dish was served with chestnut purée, seaweed salad, frisée, pomegranate seeds, and seaweed chips.

Gnocchi with Chestnuts, Pomegranate, and Pine

For vegetarians, gnocchi poached and seared in brown butter were substituted for the chicken with the addition of shaved white truffles.

Chocolate Cremeaux with Coconut Whipped Cream, Rice Ice Cream, Fried Puffed Rice, and Yuba Strips

Not quite mousse and not quite ganache, the chocolate cremeaux anchored dessert, but there were lots of flavor surprises. Who would have thought of fried puffed rice? But it definitely fit in. Yuba, the skin that forms when tofu is heated, finished the dish.

Black Pepper and Blood Orange Marshmallows

These were definitely not the marshmallows you put in s’mores. The spiciness of the black pepper played off the blood orange and made this a fine end to a special meal.

2 Comments

Filed under Food, Photography, Restaurants