MOM’S SPAGHETTI AND MEATBALLS

We had a chance to help my son celebrate his birthday this year. I agreed to cook, and I wrestled with the menu. We often have steaks when we visit the family, and while they are not vegetarians, they do try to limit their meat intake. On top of that the girls are in the finicky stage of growing up so there are lots of foods they won’t eat, even with encouragement from their mom and dad.

That challenge made me think of spaghetti and meatballs. That way, if someone didn’t want meat – for whatever reason – he or she could forego the meatballs. Similarly, if the girls wanted only plain pasta, that would work, too. I thought of my mother’s homemade spaghetti sauce and meatballs. I guess the sauce could be called a marinara, but to me it is much richer than marinaras at restaurants or in stores. Mom learned to make the sauce at my father’s pleading when we were living in a basement apartment within a compound of a big Italian family. I remember Mom going upstairs to take daily cooking lessons – there was always a pot of spaghetti sauce on the stove – until she thought that she had mastered the recipe. Over the years, she and I have cut corners (no longer fresh tomatoes, carrots, etc.), but I think the recipe is still a good one.

The meatballs are another matter. I am not particularly fond of most meatballs. They are usually dry and not, IMHO, very flavorful. I think this recipe has cracked the code, and the recipe makes enough for lots of leftovers. After the birthday party in Silicon Valley, I brought some sauce and meatballs back to San Francisco so that my daughter and son-in-law could have a midnight snack when they got back home on the late flight from New York City. There was nothing left in the morning but the dirty dishes.

RECIPES

Spaghetti Sauce

Ingredients

  • 3 tablespoons olive oil
  • 1 medium onion, diced
  • 3 cloves garlic, peeled, trimmed and mashed
  • 1 28 ounce can whole tomatoes with juice
  • 1 6 ounce can tomato paste
  • 1 cup beef broth
  • 1 cup red wine
  • 1 teaspoon salt
  • ½ teaspoon ground black pepper
  • 6 to 8 cremino mushrooms, cleaned, trimmed, and sliced
  • 1 tablespoon Italian herb seasoning
  • 2 teaspoons sugar
  • juice of ½ fresh lemon
  • more salt and pepper as needed

Method

  1. Over a medium flame, heat the olive oil and stir in the onions. Cover to sweat the onions until they are soft and translucent. Be careful not to let them brown.
  2. Add the garlic and stir for another minute or so, being careful not to brown the garlic.
  3. Stir in the canned tomatoes, tomato paste, beef broth and red wine. Bring to the boil and then reduce to the simmer.
  4. Cook, covered, for an hour, stirring occasionally to avoid burning. Add water if the sauce become too thick.
  5. Stir in the sliced mushrooms and herb seasoning. Simmer for another hour, uncovered, stirring and adding water as needed.
  6. Add the sugar and lemon.
  7. Correct the seasoning with salt and pepper as needed.
  8. Add the browned meatballs (see below)  and simmer for another hour or until the meatballs are cooked through.

Meatballs

Ingredients

  • 1 pound ground beef (85% lean)
  • 1 pound Italian sausage (sweet or hot according to your taste)
  • 2 extra-large eggs
  • 1 tablespoon Italian herb seasoning
  • 2 teaspoons salt
  • 1 teaspoon ground black pepper
  • 3/4 cup (about) fresh bread crumbs

Method

  1. In a large bowl, combine the ground beef, sausage, and eggs. Use your hands (freshly washed of course) to mix the ingredients thoroughly
  2. Mix in the herb seasoning, salt, and pepper . Make sure they are thoroughly combined
  3. Stir in the bread crumbs. Hold back a few to make sure the mixture is not too dry. Then add them if needed. Add more bread crumbs if the mixture is still too moist.
  4. Let the mixture sit for about 15 minutes so that the bread crumbs absorb moisture from the eggs. Then roll a bit of the mixture – slightly larger than a golf ball –  between your palms until it forms a round, smooth meatball. Repeat the process until you have used up all of the meat mixture. You should be able to make about two dozen meatballs
  5. Working in batches, brown the meatballs on all sides in 1-2 tablespoons of olive oil in a medium skillet. When all of the meatballs are browned, add them to the spaghetti sauce and cook everything over medium low heat for another hour.
  6. Serve over cooked spaghetti or other pasta of your choice with freshly grated Parmesan cheese on top.

3 Comments

Filed under Food, Photography, Recipes

TWO YEARS OF FUN AND FRIENDS

Just the other day I received a notice from WordPress that my blog had just passed its second anniversary. I was a little surprised with the event, but it caused me to reflect on my writing over the past two years. So far I have published 113 posts which works out to a few more than one a week. Honestly, that has kept me busy with cooking, recipe development, photography and editing. But once a week is not very prolific. There are lots of bloggers who make a point of posting at least once a day. I don’t know how they do it, though why they do it – at least one of the reasons – is to improve their ranking in internet searches.

That is really not one of my motivations, though I enjoy seeing my list of followers increase over time. The main reasons I started this blog were to try to polish my writing style, learn how to write a coherent recipe, improve my photography skills, especially with food, and to communicate with family and friends.  I think I have accomplished these goals although I need to let my readers be the judge of that.

One unexpected benefit of the blog has been the development of friendships with folks whom I have never met from all over the world . I look forward to reading and seeing their blogs; I look forward to their comments about my posts.  In many ways they have become friends. I even imagine that someday I might have the opportunity to meet these cyberspace friends in real life.

I guess I will keep on writing as long as I think I have something to say along with posting images that I think folks might find a little unique.

This time I’m not going to write anything about food, just thank all of you have participated in one way or another with this blog. I will share some images from my home town – Santa Fe, New Mexico. In particular, the images are of sculpture, architecture, and flowers along Canyon Road, Santa Fe’s famous art district.

3 Comments

Filed under Photography, Travel

CHICKEN LASAGNA WITH PUMPKIN AND GREENS – SAN FRANCISCO BAY AREA RISING STAR CHEFS

A while back we spent some time in the Bay Area baby sitting while our kids were involved in out-of-town business trips. One of the payoffs for our efforts was that we got to attend the Silicon Valley crawfish boil I wrote about. Another bonus was the chance to attend the San Francisco Rising Stars celebration sponsored by Starchefs, an organization that publishes magazines and websites catering to food professionals. Once a year, in a different city, Starchefs throws a big event to recognize rising star chefs from that community. This year it was San Francisco’s turn. Sarah and Evan were fortunate enough to be selected among the eight Rising Star chefs, along with outstanding pastry chefs, artisans, restaurateurs, brewers, and mixologists.

The event was held at AT&T Park, the home of the San Francisco Giants. There is a lot of excitement just with the prospect of seeing a huge major league baseball park all spiffed up and without the crowds.

Still, there was a different crowd: for a select few (actually willing to pay a lot more for their tickets) there was a VIP reception in the main-floor restaurant and lounge. “Free” drinks, appetizers when you could intercept the servers, and some women in long gowns – in a baseball park.

After the reception, everyone headed to the seats behind home plate to watch the awards ceremony. One by one the winners were called out of the dugout to run to home base for an introduction, award, and photos.

Next, everyone rode elevators up to the Club level, complete with spectacular views of the stadium and San Francisco Bay behind it. There the winners had all prepared some of their signature dishes and served them from tables set up around the lobby, interspersed with tables of wine paired with each of the dishes.

There was some pretty spectacular food, and this is just a sampler:

  • Nick Balla, Bar Tartine                            Fisherman’s stew with green chile
  • Richie Nakan, Hapa Ramen                   Crispy ramen noodle cake
  • Jessica Largey, Manresa                         Verbena- and chamomile-poached sea bream collar
  • Jason Fox, Commonwealth                    Scallop, hearts of palm, popcorn puree
  • Brett Cooper, Outerlands                       Fish sauce-glazed Berkshire pork belly
  • Duncan Holmes, Sons & Daughters     Squab with marcona almond butter
  • Mark Liberman, AQ                                 Australian beef short ribs with black garlic

Of course, we were partial to Sarah and Evan’s offering from Rich Table, chicken lasagna with pumpkin and greens

All in all, it was a great evening in a great setting in a great city.  My only concern was getting out of the parking lot with all of those other revelers.

2 Comments

Filed under Food, Photography, Restaurants, Travel

EGG ROLLS

Continue reading

10 Comments

Filed under Food, Photography, Recipes

HEART OF PALM PUFFS – A GALLERY OPENING

A few weeks ago I had what I thought was a wonderful opportunity. I was invited to show some of my photographs in a nearby artists’ cooperative gallery. I put together about  half a dozen of my favorite images, framed, and matted them. Along with oils, watercolors, pottery, and jewelry from other artists, the photos were arranged for a show.

As is the local tradition, the new show was inaugurated with a Friday evening opening complete with sparking water, wine, and appetizers. Each artist was asked to bring some kind of food, so that set off a perpetual struggle in my mind – what to serve? I found a recipe for chorizo tapas that sounded delicious, but I worried that gallery visitors might get grease on one of the oil paintings. Then I thought of empanadas filled with hearts of palm. I had first tasted them forty years ago at a party held by one of our Brazilian friends.

The bonus that moved me toward this option  was that I had a can of hearts of palm in the pantry. At the same time, making the dough for empanadas seemed like more effort than I wanted so I decided to use frozen puff pastry. The end result turned out to be these heart of palm puffs.

Heart of palm, also called palm heart or palmito, can be harvested from the growing tips of nearly all palms, but  this may destroy the palm. The commercial variety comes from the peach palm, a plant from the Amazon that now is grown throughout Central and South America. It is sustainable without destroying the palm for future growth.  Supposedly you can find fresh palm hearts in gourmet grocery stores, but I have only seen the canned variety.

The gallery opening was crowded, and the puffs disappeared. So did the gallery. What the reader needs to know is that nearly every person who lives in Santa Fe considers himself/herself to be an artist. The other factor is that there may be more galleries than residents. That is a certain formula to assure that many galleries disappear quickly amidst the competition. That was the fate of our co-operative, and my first show did not survive for this post.

RECIPE

Heart of Palm Puffs

Ingredients

  • 1 can (14 ounces) hearts of palm
  • Old Bay seasoning
  • salt and pepper
  • 1/3 cup parsley, minced
  • 1/3 cup Parmesan cheese, grated
  • 1 sheet frozen puff pastry, thawed
  • 1 egg yolk, beaten with 1 tablespoon water
  • 1 egg white beaten with 1 tablespoon water

Method

  1. Drain the hearts of palm, slice them into ½ inch coins, and marinate them, covered, in the refrigerator, with a little of the liquid from the can, a good sprinkle of Old Bay seasoning, salt, and pepper
  2. Combine the parsley and Parmesan cheese. Set aside.
  3. Thaw the puff pastry according to package instructions. Then on a lightly floured surface, roll out the dough so that it is about 1/16 inch thick. It should be large enough that you can cut 40 2 inch squares.
  4. Working quickly so that the pastry does not dry out, place a heart of palm disc in the middle of half of the pastry squares. Top with a ¼ teaspoon of parsley and Parmesan cheese mixture.
  5. Dab the edges of the square with the egg yolk mixture, top with another square, and press the edges together with a fork.
  6. Place the puffs on a Silpat-lined baking tray. Brush the tops with the egg white mixture.
  7. Bake for 15 minutes in the middle of an oven preheated to 400° F.
  8. When golden brown, remove the puffs from the oven, and cool them on a cooling rack.

2 Comments

Filed under Food, Photography, Recipes

COLE SLAW – MY CONTRIBUTION TO THE CRAWFISH BOIL

A week or so ago my post provided the details of a crawfish boil in Silicon Valley. For that great event, my daughter-in-law asked me to make coleslaw. I call her the “Salad Queen” because she whips up the most delicious salads on a moment’s notice, but she claimed that coleslaw was not something she liked to make. I confess that I’m not a big fan of most coleslaw, either. That’s because they often contain the core of the cabbage head, the cabbage is in big chunks with the heavy taste of cabbage, and the salad is swimming in runny mayonnaise.

Years ago I learned the first important lesson for coleslaw from my younger daughter when she was only about ten years old. She was assigned to do the cabbage chopping for a family gathering. We thought she would be finished in just a few minutes, but a half hour later she was still chopping and the cabbage was as fine as I had ever seen it. She had also removed the core of the cabbage before she started the project. Everyone loved one of her first cooking projects.

The second lesson comes from a consideration of the origins of the word, coleslaw. It is derived from the Danish word, koolsla, meaning cabbage (cole) salad ( sla, a contraction of salade). The point of all that is you can use any kind of cabbage or even cabbage relatives you want (especially shredded Brussels sprouts, but also broccoli, rabe, or cauliflower) , and you can put anything else that catches your fancy in the salad.  Apples, carrots, celery, and chopped nuts are among the most common additives.

The third lesson for me is that a little mayonnaise goes a long way – much farther than you think. In recent times, I always add less mayonnaise than I think the dish needs. That includes tuna salad, sandwiches, and coleslaw In every instance what I have learned is that less is better, and you can always add more. Of course, homemade mayonnaise is better than bottled, and it doesn’t take too much extra time to make. Another option is not to use mayonnaise at all; freshly made vinaigrette is a refreshing substitute.

For the crawfish boil, I decided to use napa (Chinese) cabbage and red cabbage along with red onion, carrot, bell pepper, and celery for the basic salad. I used vinaigrette with a shot of sesame oil for the dressing. Here is the recipe.

RECIPE

Coleslaw

Ingredients

  •  1 large head, napa cabbage, cored, sliced and chopped very finely
  • 1 small head red cabbage, cored, sliced and chopped very finely
  • 1 medium red onion, diced
  • 1 large carrot, peeled, grated, and chopped finely
  • 1 bell pepper, seeded, ribs removed, and diced
  • 3 stalks celery, diced
  • 2 teaspoons celery seed
  • salt and pepper to taste

Method

  1. In a large bowl, combine all of the ingredients

Vinaigrette

Ingredients

  • 2 tablespoons fresh lemon juice
  • 1 tablespoon prepared mustard, preferably Dijon
  • ¼ teaspoon garlic powder
  • ½ teaspoon granulated sugar
  • 6 tablespoons extra virgin olive oil
  • ½ teaspoon sesame oil
  • salt and pepper to taste

Method

  1. In a small bowl, combine the lemon juice, mustard, garlic powder, and sugar.
  2. While whisking continuously, drizzle in the olive oil until completely incorporated.
  3. Stir in the sesame oil, and correct seasonings with salt and pepper

Dressing the Salad

  1. Pour only about half of the vinaigrette onto the coleslaw and gently stir in until the salad is completely dressed
  2. Add more dressing as needed, being especially careful not to use too much. The coleslaw should be moistened but not damp with dressing
  3. Refrigerate until ready to serve.
Napa cabbage

Napa cabbage

Red cabbage

Red cabbage

Red onion

Red onion

Carrots

Carrots

Celery

Celery

Green bell pepper

Green bell pepper

Chopped vegetables

Chopped vegetables

Finished coleslaw

Finished coleslaw

1 Comment

Filed under Food, Photography, Recipes

SUPER MOON IN SANTA FE

Last evening we decided to walk across the arroyo in our back yard up to a hill where we could get a good view of “Super Moon” rising above the Sangre de Cristo Mountains.

Unfortunately, we got a great view of the plume of smoke from a forest fire that has been burning uncontrolled in the Pecos Wilderness for two weeks. No houses are threatened, but the Pecos is a beautiful and wild place that will undoubtedly be forever changed – at least for my lifetime – by this devastating fire. Our severe drought conditions make it likely that we will experience more forest fires this season.

The sunset over the Jemez Mountains was spectacular, so it was hard to figure how great the moon view would be. We took cameras, binoculars, ground cloth, tripod, and – thanks to my wife’s forethought – two glasses of port to toast the evening. We also had headlamps for the return walk across the arroyo.

9 Comments

Filed under Photography

CAJUN CRAWFISH BOIL – IN SILICON VALLEY??

Our children grew up in Louisiana, and now they all live in California.They still love authentic Creole and Cajun cooking, but it is definitely hard to come by in the Golden State. For the last several years, my son and his wife have tried to change that. Every spring – crawfish season – they have a backyard crawfish boil for their friends, neighbors, co-workers, and their families. As is usual with crawfish boils, it has become a bigger and bigger production each year.

As an aside, there is a strict Louisiana terminology for the crustaceans: crayfish are what you dissect in high school biology classes; crawdads are what you catch for fishing expeditions; crawfish are what you eat. Often the experience of the boil participants becomes evident depending upon what they call the main dish. In Louisiana, mudbug is a perfectly acceptable alternative term, but in other places, the name causes a bit of squeamishness.

In preparation for the party, my son has consulted  one of friends from Louisiana known for his crawfish cooking skills. Peter has read lots of recipes in cookbooks and online. Most importantly, he has identified a reputable and reliable source for authentic Louisiana mudbugs. Then, there is the ordering process to make certain that the crawfish are shipped at the right time and arrive as scheduled so that they are still lively. Crawfish season starts during the winter months. Then, the critters are small but with soft shells. By now, almost the end of the season, the crawfish are much bigger, but their shells are often hard enough that novice eaters have problems getting to the succulent tail meat.

When the date of the party is set, my son places his order with Louisiana Crawfish Company in Natchitoches, LA.  The crawfish cost from $3.50 to $6.00 a pound depending upon size and quality and how many you order.  (Crawfish cost 89 cents a pound for our first crawfish boil 40 years ago.)  At this point, the key question is always how many should you order? For a novice crowd, allow 1 pound per person. For crawfish fans, allow 2 pounds per person. For aficionados (just about everyone in Louisiana) allow 5 pounds per person. Remember, if there are leftovers – unlikely – you can harvest the tail meat and freeze it for crawfish étoufée at some later time.  Of course, there are overnight shipment expenses, so the cost for crawfish for an average-sized party will run to close to $300.

The next step is to plan the rest of the menu. There are some absolutely necessary items: ice-cold beer, corn on the cob, new potatoes, onions, ice-cold beer, and ice-cold beer. Then there are optionals: something to eat while you wait for the crawfish to cook, bread or corn bread, coleslaw, watermelon, and desserts. Guests usually volunteer to bring a dessert. By all means, take them up on their offer.

There are certain equipment requirements for  a successful boil. You will need a large plastic or galvanized tub to purge the crawfish before you cook them. A high temperature propane burner will get the water boiling as quickly as possible. You also need to have a very sturdy stand that will hold a very heavy pot of water. The largest cooking pot and lid that you can find – 50 gallons is common – will let you cook a good-sized batch at one time. Find a canoe paddle for stirring the pot. You will need a large strainer with handle in order to scoop out the crawfish and vegetables when they are cooked.  A table covered with newspapers  will hold a batch of food for guests to get to. With a genteel group, paper plates should be in abundance. For serious crawfish eaters, cardboard flats of the sort you get with cases of beer work better.


STARTING THE BOIL

Remember, it takes a lot of heat and a long time to bring 30-40 gallons of water to the boil, so start this step several hours before you plan on eating. If the water boils too soon, you can always turn the temperature down for a time. Light the fire on the burner and adjust it to a hot flame. Be sure to have enough propane. There is nothing worse than running out of propane in the midst of a boil.  Fill the cooking pot with water from your garden hose. You will probably need two people to lift the pot; one gallon of water weighs 8.35 pounds. Season the water with enough salt to taste briny – a cup or two should be enough. Add two lemons cut in half. Drop in two bags of Zatarain’s Crawfish and Crab Boil. If you can’t find the bags, a bottle of the liquid variety should be enough. If you want, you can add some paprika and chile powder.  With most orders, Louisiana Crawfish Company will include a container of their Creole seasoning. It is really not necessary to add any more seasoning to the water, because you’ll be sprinkling on the cooked crawfish.

PURGING THE CRAWFISH

The crawfish will arrive in large sacks with lots of ice packed around them. Since they are cold-blooded, the crawfish will be alive but not very lively. You need to wake them up in a tub of water to which you have added a goodly amount of salt – half a box should be enough. The salt will cause the crawfish to empty their alimentary tract, so the water will become very dirty looking. You can drain the water and do a second treatment until the water clears, but be sure to drain the water as the crawfish will die if left in the water. Pick out any crawfish that float to the surface of the water, as they have most likely died in transit. Alton Brown declares that there are better ways to accomplish this step, but hey, he’s from Georgia and not a real Cajun.

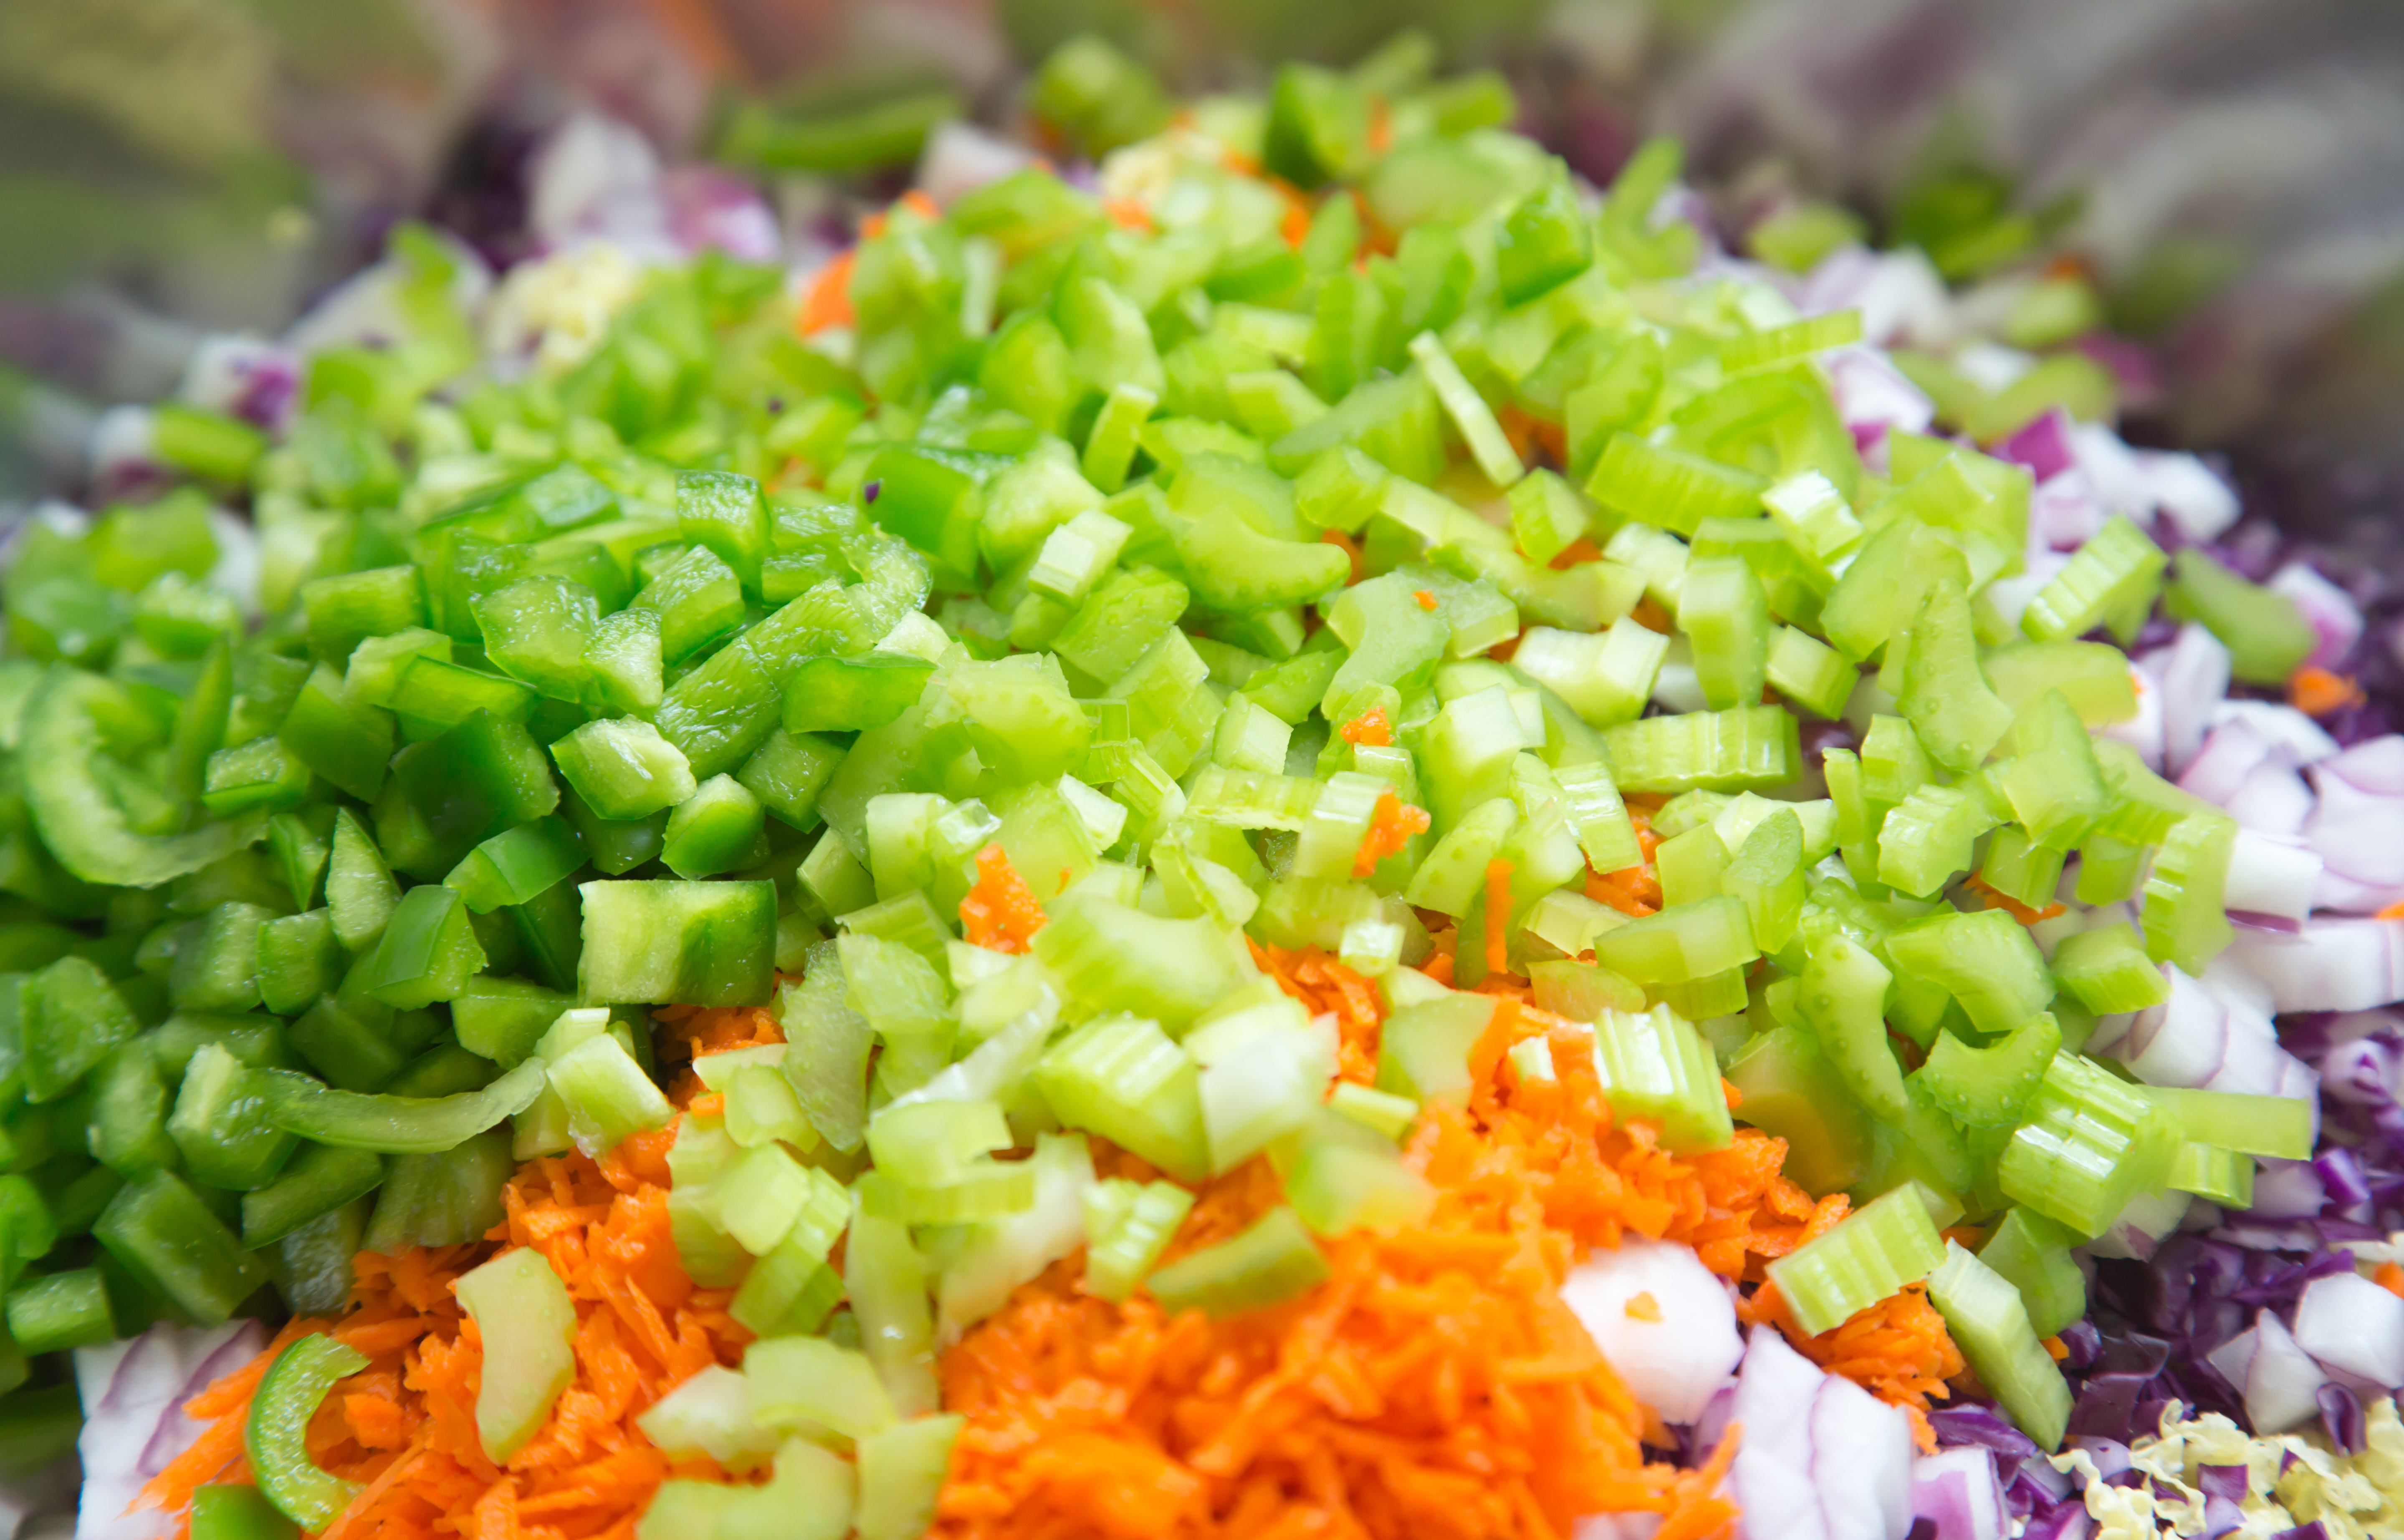
PREPARING VEGETABLES

While the water is heating and crawfish are purging, prepare the vegetables that will cook with the crawfish. Remove the husks  and silks of fresh ears of corn. Break each ear in half. Allow 1 to 2 ears per guest. If necessary, scrub baseball-sized red potatoes. If you can only find larger potatoes, cut them in half. Allow 1 to 3 potatoes for each guest. Remove the outer husk from golf ball to baseball sized onions.  Allow 1 to 2 onions for each guest.

COOKING

The water must be at a full boil when you are ready to cook. Add the onions and potatoes first, as they will take the longest to cook. After about 15 minutes, add crawfish and corn. Add enough that the guests already in line can get several. From time to time, stir the pot with your paddle. When you think the crawfish are done, around 15 minutes (just to be sure, the cook usually samples from time to time), snag one and test for doneness. When everything is cooked, use your strainer to retrieve everything and dup  it out on the newspaper-covered table. Sprinkle with chile powder or Creole seasoning. Then encourage folks to help themselves while you get ready for your next batch. If you want, you can increase the spiciness of subsequent batches by adding  chile powder or Creole seasoning as you start each batch. This is often a good idea if not everyone likes spicy crawfish, so by this technique, the first batches are not as spicy, and they get spicier as time goes on, to go with the ice-cold beer.

HOW TO EAT A CRAWFISH

Eating your first crawfish is a little intimidating, especially if you have never had instruction. It’s actually very easy: just pull the crawfish apart at the joint between the body and the tail; then pry open the first ring of the tail shell with your thumbnail, squeeze  the tail fan firmly between the thumb and index finger of your other hand; and the tail meat will slide into your waiting mouth. The process is not always that easy and smooth, but with a little practice you will be eating crawfish as fast as you can pull them apart,

More advanced eaters relish the little morsel of fat that stays in the thorax shell and will “suck the head” to extract the tasty treat.

CLEANING UP

In preparing a crawfish boil, you will wind up using a lot of heavily salted water. Never empty the leftover water on the lawn or in your flower beds or you will wind up with a yellow spot in the grass or dead peonies.

As to the shells, it is a good idea to station plastic-lined garbage cans around the yard.  Then, when the party is over, you can just tie up the bags and dispose of them. Be aware that there is nothing that smells as bad as day-old crawfish bodies, so dispose of them as quickly as you can. They do not make good compost.

11 Comments

Filed under Food, Photography, Recipes

CHIPOTLE CULTIVATE SAN FRANCISCO

We just returned from a week in the San Francisco Bay area. Our trip was primarily a baby-sitting junket, but we wound up experiencing a non-stop rush of food events. The main reason for our trip was so that our daughter and son-in-law could go to New York City to cook in a charity event in Rockefeller Center for CityMeals on Wheels, but we wound up baby-sitting while they cooked at their restaurant, Rich Table, for visiting chefs attending the Chipotle Cultivate Festival in Golden Gate Park. Then there was the NYC event itself, and while the offspring were out of town, we helped my son and his family with their annual crawfish boil in Silicon Valley, and then cooked a birthday dinner for my son.  In between all of this we had a spectacular all-holds-barred dinner at Rich Table and a late lunch at the Presidio Social Club, a lovely little place on the Presidio grounds. Finally we attended the awards ceremony for San Francisco’s Rising Star Chefs held in the Giants’ AT&T Park. Sarah and Evan cooked again, and the reception was a real food blowout.

Now we have to work on losing the weight we gained during this food extravaganza.

My first report from the week is about the Chipotle Cultivate Festival, sponsored by the Chipotle Mexican Grill restaurant chain. This started out as an event in Chicago’s Lincoln Park three years ago, spread to Denver’s City Park last year, and now this year moved to include San Francisco’s Golden Gate Park. The event was held in Hellman Hollow with nearby Lloyd Lake. The festival was free with lots of live music, so there were big crowds. Chipotle had food stands around the grounds with some of their specialties for sale. There were lots of other food vendors, but one of the highlights was a series of cooking demonstrations by well-known chefs. Amanda Freitag, perhaps best known as one of the judges on the Food Network’s Chopped, travelled from New York City. So did Douglas Quint and Bryan Petroff, co-owners of Big Gay Ice Cream Trucks, wildly popular in NYC. Ludo Lefebvre, Jon Shook, and Vinny Dotolo came up from Los Angeles. Michael Charello of Bottega in Napa Valley, Richard Blais from Atlanta, corporate chefs from Chipotle, and San Francisco chefs Minh Tsai, Evan Bloom, Led Beckerman, and Sarah and Evan rounded out the list of chefs who did cooking demonstrations throughout the day.

Sarah and Evan chose to prepare Sarah’s popular dessert, caramelized olive oil cake with fresh strawberry sauce and cream cheese ice cream. Oil cakes have been around for years, but recipes in cookbooks are often hard to find. Oil is used as a substitute for butter or shortening. Its liquid state at room temperature makes a moist cake, but that also means it will not support cake loft as much as solid fats. For that reason, the cake is more dependent upon incorporated air in other ingredients so it is important to beat those ingredients enough to give the cake lightness. Olive oil has only recently become a popular ingredient. The 1975 edition of the Joy of Cooking has three recipes for oil cakes but also strong advice to avoid olive oil because of its strong flavor. These days, that strong flavor has made olive oil cakes popular.

An additional step that makes Sarah’s cake special is caramelization. As she says, you can caramelize the top, the top and bottom,or all sides, depending how much time you want to spend. One way to caramelize the cake is to sprinkle it with sugar and use a salamander or torch as you might for a crême brulée, but that may be too tricky, so you can accomplish the same thing in a very hot skillet or griddle. The caramelization step can only be done when you are ready to serve the cake.

The second part of the demonstration dish was a strawberry sauce made from fresh strawberries. California strawberries fresh from the farm are totally unlike the flavorless, cardboardy kinds you get in the supermarket. The farm varieties are red, juicy, sweet, tender, and filled with the strawberry flavor of long ago. Adriana Silva, the owner of   Tomatero Farms near Watsonville and the strawberry purveyor, also participated in the demonstration. She has gone from 2 to 200 acres under cultivation in just a few years, and she raises six different varieties of strawberries which come in at different times during the season. The variety used for the demonstration was “Seascape”, a red, sweet beauty.

The final part of the dish for the demonstration was a generous topping of cream cheese ice cream, churned at Rich Table that morning. It is like eating a bite of cold New York cheesecake except that it melts in your mouth.

RECIPE

Olive Oil Cake

Ingredients

  • 8 large eggs
  • 1½ cups granulated sugar
  • 1 teaspoon salt
  • 1½ lemons, zested
  • 1 1/8 cups whole milk
  • 1½ cups all-purpose flour
  • 1 cup cake flour
  • 1 1/3 cups almond flour
  • ¼ cup baking powder
  • 1½ cups extra virgin olive oil + more to grease the cake pan
  • granulated sugar to caramelize the top

Method

  1. In the bowl of a stand mixture, combine the eggs and sugar. With the mixer set on medium speed, cream the eggs and sugar together for at least five minutes to incorporate as much air into the mixture as possible. It should form a smooth, shining ribbon.
  2. Turn the mixer to low and add the salt and lemon zest
  3. Slowly drizzle in the mil with the mixer still running.
  4. While the eggs and sugar are mixing, sift together the flours and baking powder.
  5. Add the sifted flours to the mixture, continuing to beat on low.
  6. Drizzle in the olive oil very slowly as you would making mayonnaise.
  7. Prepare a half sheet cake pan ( 16 x 12 x 3 inches) by oiling liberally with the extra olive oil
  8. Pour the batter into the prepared pan. Use a spatula to make sure the batter fills the corners of the pan.
  9. Bake in the middle of an oven pre-heated to 325°F for 25 minutes or until the cake springs back to the touch and/or tests clean with a toothpick
  10. Remove from the oven. Cool on a baking rack for five minutes. Then invert onto a flat surface. Gently transfer the cake. You may need to use your fingers or a thin spatula get the cake out in one piece.
  11. When ready to serve, cut the cake into serving-size pieces, sprinkle with sugar, and place sugared-side down on a clean hot griddle or skillet. When the sugar is caramelized (2-3 minutes) serve caramelized side up with sauce, whipped cream, or ice cream.

3 Comments

Filed under Food, Photography, Recipes, Restaurants, Travel

GOODBYE TEXAS – EAST TEXAS CASSEROLE

We recently had a wonderful family gathering with our children (their spouses didn’t attend) and some of our grandchildren. My wife’s family has had a beautiful farm in East Texas for over fifty years. Our children had spent many times during their growing-up years there, enjoying swimming, fishing, hiking. horse riding, and just generally having a good time. Now, because we all lived so far away and because travel to the fairly remote place was difficult and expensive, we decided to sell the farm. After we had accepted an offer on the farm, we needed to make one last visit to load up personal items and to enjoy the place for one last time.

It turned into a great family gathering when all of the kids found a few days to spare in their busy schedules. For nearly a week, people came and went, fished and hiked, laughed, sat in front of a camp fire, and ate some good food.

Our family has been lucky to have excellent cooks in many generations, so one of the best memories for all of us is the good food we have enjoyed on the farm: festive Thanksgiving dinners, fried catfish, fresh vegetables from the once-one-acre garden, and wild blackberries from the surrounding fields and woods. One meal that we all remember was a huge buffet that ladies of the church had prepared for a family gathering many years ago at a time of family sadness. The spread was lovingly prepared, but the most noteworthy dish was made by one of my late mother-in-law’s closest friends. I call it East Texas Casserole, but if you look for the recipe on the internet, you will find it called Redneck Casserole. I have changed the name because I would never call any of the gracious ladies of the church society rednecks. The dish is easy to prepare – one of those open the can and dump creations – and it gets uniformly good reviews on the web. You can prepare it in 30 minutes or so.

Most internet recipes call for grated Cheddar cheese, but to me that is not really authentic. For the real thing you will need to use Velveeta cheese food. I grew up on the stuff, and so did most other kids of that era, including my wife. The product has an interesting history which you can read about in great detail in The Oxford Companion to American Food and Drink edited by Andrew F. Smith (Oxford University Press, New York, 2007)

The short story is that two American cheese companies were looking for ways to prevent cheese from spoiling so rapidly and to store it at room temperature. A process was patented by Joseph L. Kraft in 1916. Tinned cheese was distributed to the troops in World War I (Remember Spam in World War II?) Eventually the two cheese companies agreed to share the patent and Velveeta made its brand-name appearance in 1928. Velveeta must contain at least 51% cheese (that’s why it is called cheese food) and will keep almost for eternity on a shelf at room temperature. These amazing properties are due to sodium citrate and, later, sodium phosphate among other preservatives. Subsequently Kraft brought out boxed macaroni and cheese in 1937, using a dehydrated version of Velveeta. Millions of boxes are sold each day, and it is discouraging to many mothers when their offspring prefer Kraft’s macaroni and cheese dinner to their carefully made from-scratch version.

RECIPE

EAST TEXAS CASSEROLE

Ingredients

  • 1 medium onion, diced
  • 2 tablespoons cooking oil
  • 1 can (22 ounces) Bush’s barbecued beans
  • 1 package (8) hot dogs, sliced into ½inch rounds
  • 1 pound (about 2 cups) frozen tater tots
  • 8 ounces Velveeta cheese food, grated (chill the Velveeta in the refrigerator for about 30 minutes to make it easier to grate)

Method

  1. Preheat oven to 350°F.
  2. Heat a 2 quart cast iron skillet over medium heat.Add the diced onions and oil, stirring until the onions are translucent, but not browned, about 55 minutes. Remove from the heat.
  3. Stir in the canned beans and hot dog slices.
  4. Arrange the frozen tater tots on top of the mixture.
  5. Bake on the middle rack of the preheated oven until the tater tots are golden brown, about 30 to 40 minutes.
  6. Remove the skillet from the oven, sprinkle the top with the grated Velveeta, and return to the oven for about 5 minutes. Then turn the heat off in the oven and continue to bake for a few minutes until the Velveeta is well melted. Serve immediately.

11 Comments

Filed under Food, Photography, Recipes, Travel