CHUNK O’CHEESE BREAD

One of our family’s favorite breads is Chunk o’Cheese.  The original recipe was developed by Mrs. Richard W. Ojakangas from Duluth, Minnesota. With it she won Second Grand Prize in the ninth annual Pillsbury Grand National Bake-Off. The recipe was published in Best of the Bake-Off Collection, Book Publishing Industries, Inc., 1959, page 21. Since then, the recipe has been reprinted numerous times in various cookbooks and recipe collections as well as on the internet.

Chunk o'cheese loaves fresh out of the oven

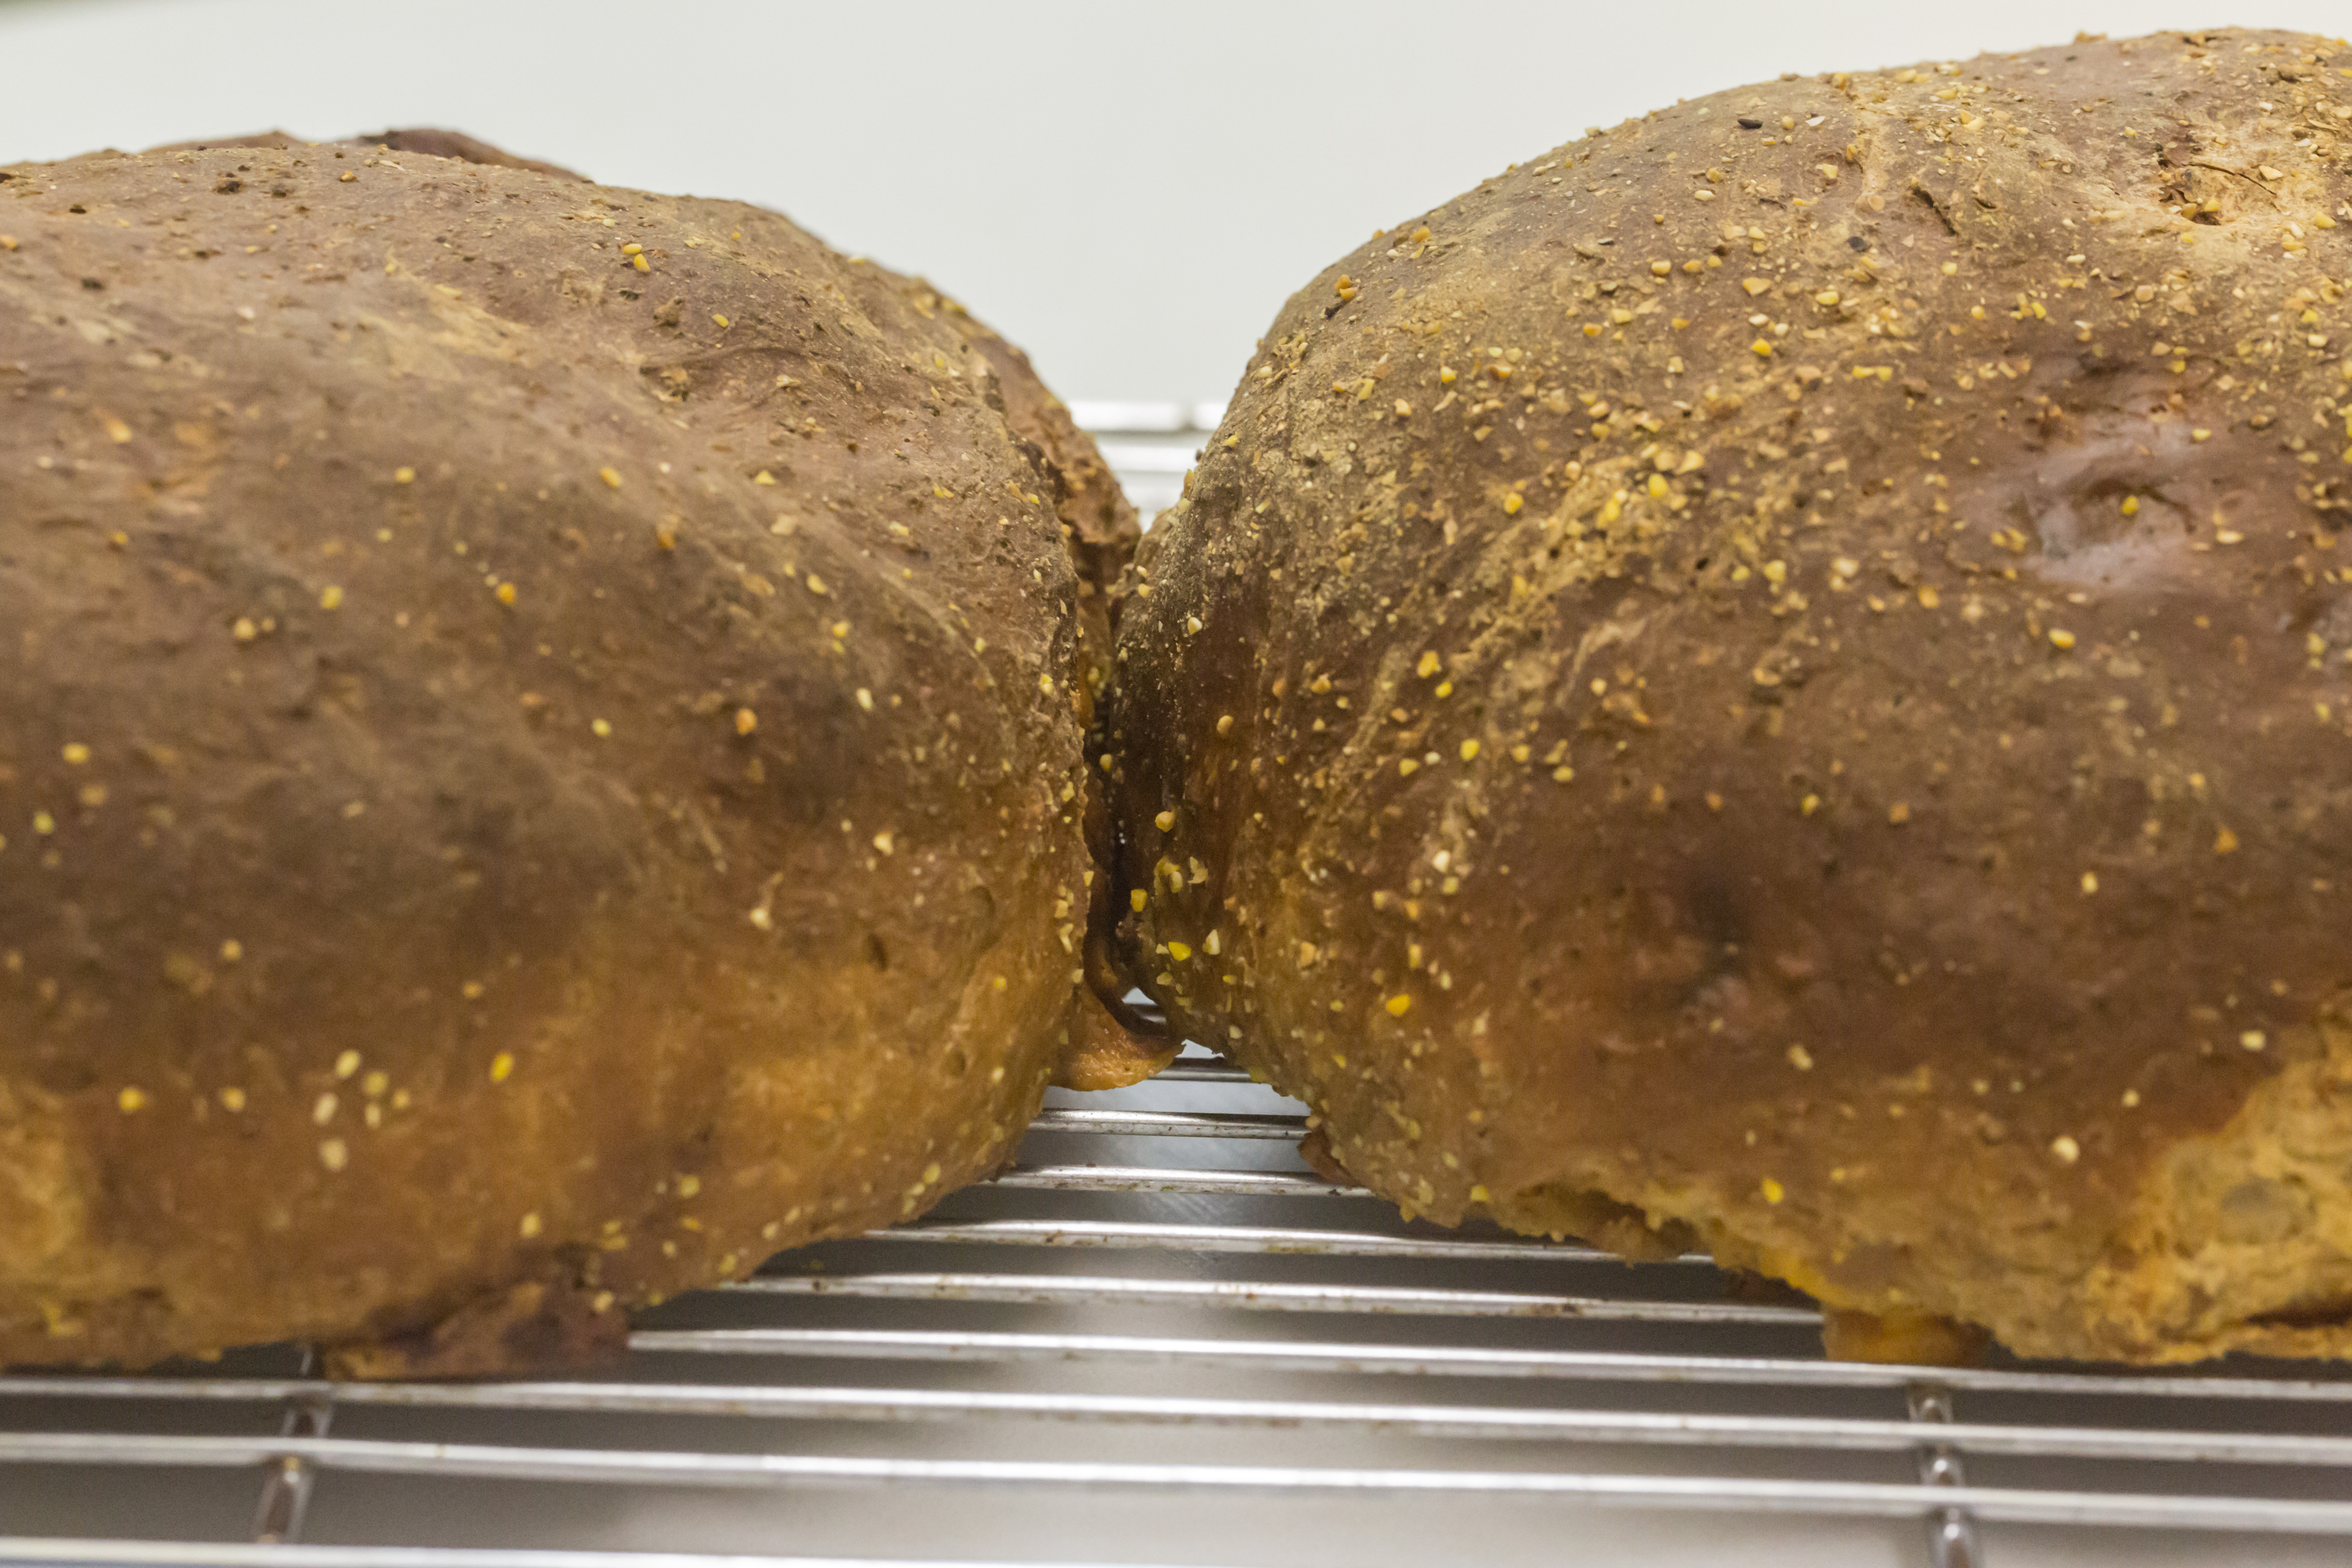
Chunk o’cheese loaves fresh out of the oven

During a recent visit to Los Angeles, I made the bread with my grandson, who had a great time pushing the little chunks of cheese into the dough. That is a very important step, because cheese on the surface of the dough melts in the oven. It can make a big mess. For that reason, be sure to line your baking pans with aluminum foil Also be sure to remove the foil from the finished loaves while they are still cooling. Otherwise you will wind up with pieces of aluminum foil stuck in the cracks of the firmed-up bread.

All it needs is some butter

All it needs is some butter

The basic recipe is really the very old-time American classic, anadama bread, but the cheese sets it apart.  The original recipe called for American cheese. (That and Velveeta were the kinds of cheese found in most American kitchens in the 1950s.) I prefer to use sharp Cheddar, but you can choose your favorite so long as it melts easily. Monterey jack, Muenster, Swiss, mozzarella, or provolone will also work. You can even try a mixture of cheeses. I have also added a little whole wheat flour to make the loaf even more flavorful and crunchy.

RECIPE

Chunk o’Cheese Bread

Ingredients

  • 2¼ cups lukewarm water (110°F)
  • ½ cup cornmeal + more for shaping loaves
  • 2 teaspoons salt
  • ½ cup molasses
  • 2 tablespoons butter or vegetable shortening
  • 1 package dry yeast
  • ½ cup whole wheat flour
  • 4½ cups unbleached all-purpose flour
  • 1 pound cheddar cheese, cut into ¼ to ½ inch cubes

Method

  1. In a 2 quart saucepan, combine 1 3/4 cups of the warm water, cornmeal, and salt. Stir until smooth. Then place over medium heat. Bring to a boil and then reduce to a simmer. Continue to stir until thickened, about 5 minutes after it comes to the boil. Remove from the heat.
  2. Stir in molasses and butter or shortening. Cool to lukewarm.
  3. In a large bowl, dissolve the yeast in the remaining ½ cup of warm water. Add the cornmeal mixture and blend thoroughly.
  4. Stir in the whole wheat flour until well combined. Then, one cup at a time, stir in 3½ cups of the all-purpose flour to form a sticky dough.
  5. Spread the remaining 1 cup of flour onto a clean work surface. Place the dough on the flour and knead until the flour is completely incorporated and the dough is smooth and elastic.
  6. Return the dough to the washed, dried, and greased bowl. Cover with plastic wrap or a clean cloth, and let rise in a warm, draft-free place until the dough has doubled in volume.
  7. Turn the risen dough onto a work surface sprinkled with cornmeal, and work the cheese cubes into the dough by flattening the dough, sprinkling with about ¼ of the cubes, and folding over the dough, then repeating the process until all of the cheese cubes are incorporated.  Make sure that all of the cheese cubes are covered.
  8. Divide the dough into two equal pieces.
  9. Shape into two round loaves. Place in two 8 or 9 inch cake pans tightly lined with well-greased aluminum foil. Make sure the cheese cubes are well covered. Otherwise they will melt during baking and make cleanup difficult.  Cover the shaped loaves with a clean cloth and let rise until doubled.
  10. Bake in a preheated oven at 350°F for 1 hour. Test for doneness.  When the loaves are baked, remove from the oven and cool in the pans for 5 minutes before transferring to a cooling rack. Remove any bits of aluminum foil that cling to the loaves while they are still warm. Otherwise you will have a hard time removing the foil.
  11. Cool completely before slicing. although you will be tempted to try an early sample.

7 Comments

Filed under Food, Photography, Recipes

RED VELVET CAKE AKA WALDORF ASTORIA CAKE

We were in Los Angeles to celebrate Thanksgiving as well as my oldest grand-daughter’s thirteenth birthday. Among her food requests was a red velvet cake for her birthday cake. Red velvet cake is a family favorite, making appearances at weddings, birthdays and other celebrations. It is also a Southern favorite for festive occasions. In our family it is also known as Waldorf Astoria cake, based upon an apocryphal story about one of my wife’s favorite aunts.

Supposedly a friend of this aunt was in New York City and happened to dine at the Waldorf Astoria Hotel where she was served this delicious cake. At the end of the meal, the lady asked the waiter if she might have the recipe for the cake. Bowing deeply, the waiter excused himself and then returned a short time later with a sheet of paper inscribed with the recipe. Thrilled, the woman took the recipe back to her home in Delaware and wowed all of her friends with her new, secret, delicious recipe. A short time later, she received a letter from the hotel. When she opened it she found a bill for some absurd amount to cover the cost of providing the recipe.

Enraged, the woman immediately made copies of the recipe and distributed it to all of her friends. Supposedly, my wife’s aunt was one of the luck recipients of the now-not-so-secret recipe. Not likely to be true, but it makes a good family legend.

To be made properly, the cake requires a large amount of red food coloring. In this day and time, some bakers are worried about potential hazards of food coloring. In the USA, commercial red food colorings are either or both Allura Red AC (US FD&C Red 40) and Erythrosine (US FD&C Red 3). There is some concern about Allura as it is an azo dye made from petroleum. It has been associated with hyperactivity  in children, although data are conflicting. Nevertheless, it is banned in Denmark, Belgium, France, and Switzerland. There are no restrictions on Erythrosine. Early studies suggested that in high doses it might cause cancer in rats, but more recent studies have not shown it to be a mutagen.

Still, some bakers would like to avoid the potential risk of these synthesized dyes. The most commonly used “organic” alternatives are beet juice and carmine (also called Natural Red 4), made from powdered female cochineal, scale insects from Mexico and South America that parasitize prickly pear cactuses and their relatives. A common use for carmine is to color lipstick. There is concern that these “more natural” coloring agents may add an undesirable flavor and even cause allergic reactions. Neglected in much of the discussion is that the extraction process for carmine. The substance producing the red color is extracted from ground insects with either ammonia or sodium carbonate. Then it is precipitated as an aluminum salt by adding alum. Stannous chloride, citric acid, borax, and/or gelatin may be added as stabilizers. This raises the obvious question as to what is “natural”?

One of my daughters wanted red velvet cake for her wedding. The vegetarian baker tried repeatedly to use beet juice, but it just wouldn’t work, so my daughter had to choose another cake flavor.

For all of these reasons, if you are worried about food additives, you may not be able to bake – or eat – this cake. That would be too bad, because it is delicious.

There is a final decision: what do you want to use for icing? The family recipe  uses a simple milk and flour base for the frosting while most Southern cooks insist that the only icing that will do is cream cheese icing. I’ve given you both recipes

RECIPES

Red Velvet Cake

Ingredients

  • ½ cup vegetable shortening
  • 2 eggs
  • 1½ cups sugar
  • 3/4 cup red food coloring
  • 2 tablespoons cocoa
  • 1 teaspoon salt
  • 2¼ cups flour
  • 1 cup buttermilk
  • 1 teaspoon vanilla extract
  • 1 teaspoon baking soda
  • 1 teaspoon white vinegar

Method

  1. Using a stand mixer, cream the shortening and sugar until light and fluffy. Then add the eggs, one at a time, mixing well after each addition
  2. In a small bowl, mix the red food coloring and cocoa together to make a paste. Then add to the shortening, sugar, and egg mixture
  3. Sift together the salt and flour. Add in thirds to the batter, alternating with the buttermilk until all combined. Mix well but do not overbeat. Then stir in the vanilla extract.
  4. In a small bowl, mix together the soda and vinegar. They will foam up. Don’t be alarmed, but make sure you have a big enough bowl so that the foam doesn’t overflow. Stir the mixture into the batter until well combined
  5. Pour into two cake pans prepared with baking parchment, greased, and floured.
  6. Bake in the middle of a preheated oven at 350°F (177°C) for 30 minutes. Test for doneness with a toothpick. If the toothpick comes out clean, remove from the oven, cool in the pans for 5 minutes, and then turn out onto a baking rack to cool completely before frosting.

Waldorf Astoria Frosting

Ingredients

  • 2 tablespoons flour
  • 1 cup milk
  • 1 cup butter
  • 1 cup sugar
  • 1 teaspoon vanilla extract

Method

  • Combine the flour and milk in a heavy saucepan over medium heat. Stir constantly until thick and smooth. Set aside
  • With an electric mixer, cream together the butter and sugar until fluffy. Beat in the cooled milk mixture along with vanilla extract. Refrigerate until ready to ice the cake.

Cream Cheese Icing

Ingredients

  • 8 ounces cream cheese, softened
  • 1 box (16 ounces, 2 cups)  powdered sugar
  • ½ cup butter
  • 1 teaspoon vanilla extract

Method

  1. With an electric mixer, cream together the cream cheese, powdered sugar, butter, and vanilla extract. Beat until smooth and fluffy
  2. Ice the cake, Make certain the cake layers are completely cooled

6 Comments

Filed under Food, Photography, Recipes

BLT+ARO

One of our family traditions – probably a tradition in your family, too – is that for birthdays, the honoree gets to select the menu for the whole day. While we were in Los Angeles, my grand-daughter celebrated her thirteenth birthday. That was a momentous occasion not only for her, but also for her younger brother and her parents. Officially, she became a teenager, but these days that is only semantics. Fortunately, she is not driving yet, but the birthday was a stark reminder that the day for that is not far away.

Included in my grand-daughter’s food selections for the day was bacon, lettuce, and tomato sandwiches for breakfast. Of course, she got to sleep late on a weekend so it was closer to brunch than breakfast. Still, a little odd for my elderly clock, but I freely admit that they were delicious.

These were not your usual BLTs. Challah was the preferred bread. That seemed to be an odd companion to bacon, but nobody blinked.

No one in the family likes mayonnaise, so there was none. How can you have a BLT without mayonnaise?  They allowed me my own. The bacon was crisped in the oven, and the lettuce was the tender butter kind. The tomatoes were beautiful heirlooms, almost purple in color.

Everyone in the family is averse to onion as well, but they accommodated me with thick slices of red onion. They don’t like avocados, either, so they sliced a perfectly ripe avocado just for me.

We gathered around a buffet to assemble our personal creations. Mine was an elaborate BLT+ARO. Then we enjoyed a beautiful Southern California morning on the back patio.  Gifts  were opened, including a new iPhone – every California teenager needs one, I was told.

All in all a great way to start a day of celebration.

BLT+ARO

Ingredients

  • 2 slices challah
  • mayonnaise
  • 3 strips bacon, fried crisp
  • 2 large slices, heirloom tomatoes
  • 2 leaves butter lettuce
  • ½ ripe avocado, sliced
  • 1 slice red onion
  • salt and pepper

Method

  1. Spread the slices of challah with mayonnaise
  2. Arrange the bacon, lettuce, tomatoes,  avocado, and red onion on one slice of bread. You may need extra mayonnaise between layers.
  3. Season with salt and pepper
  4. Top with the remaining slice of bread for a thick sandwich.
  5. Eat with plenty of napkins handy or over the kitchen sink.

3 Comments

Filed under Food, Photography, Recipes

CROQUE MONSIEUR AND CROQUE MADAME

I have been away from my blog for awhile. First, I spent some time with family at Thanksgiving. That was a lot fun. What has not been fun is frustration in uploading my images to Word Press. Over the last several days, I have worked closely with the folks at Word Press. They demonstrated remarkable knowledge and incredible patience. Together, we were unable to solve the problem. Then I changed to an old wireless router I had replaced a while back and everything – well, nearly everything – worked again. Frustration over.

Recently I wrote about baking pain de mie for the express purpose of making croque monsieur and croque madame sandwiches. That is exactly what I did with the bread. If you are a big fan of these sandwiches, you already know that there are many, many recipes  some of them not much more than an American grilled cheese and others very elaborate

There are, however, some absolute essentials: good bread (hence the pain de mie), the best sliced ham you can find, and Gruyère cheese. Of course for the croque madame, you will need a perfectly fried egg.

You can sauté the sandwiches  in a pan, broil them, toast them in a panini press, or use a traditional French sandwich mold that makes them look a bit like a giant madeleine.  Then you have to decide whether or not you want to go to the trouble of making a béchamel to moisten the contents and provide a topping  – with more Gruyère, of course – that can be browned under a broiler.

This, then, is only one version, but it was fun to make. I chose to use the French sandwich press that has been hanging for years on our kitchen wall as a sort of decoration. I also added some béchamel.

RECIPES

Béchamel

Ingredients

  • 2 tablespoons butter
  • 2 tablespoons flour
  • 1 cup whipping cream
  • salt and white pepper

Method

  1. In a small saucepan over medium heat, melt the butter and then stir in the flour. Cook for a few minutes, stirring constantly, to make a light roux. Be careful not to brown.
  2. Stir in the cream and bring to a simmer. Stir until the sauce is thickened. Remove from heat.
  3. Adjust seasoning with slat and white pepper.  Set aside.

Croque monsieur

Ingredients

  • 4 slices pain de mie
  • 4 tablespoons béchamel
  • 4 thin slices ham
  • 2 slices Gruyère
  • 4 tablespoons butter, melted
  • béchamel
  • sliced Gruyère

Method

  1. Spread béchamel on one side of each slice of bread
  2. Arrange one slice of ham on each slice of bread. Then place a slice of Gruyère on two of the slices. Form into two sandwiches.
  3. With a pastry brush, paint both sides of both sandwiches with the melted butter and arrange the sandwiches in the sandwich mold.
  4. Close the sandwich mold and heat over an open flame on your range, turning once or twice until the sandwiches are well-toasted on both sides.
  5. Place the finished sandwiches on oven-proof plates, top with more béchamel and Gruyère, and place briefly under a broiler until the sauce is bubbling and the cheese is lightly browned. Serve immediately.

Croque madame

Ingredients

  • 1 croque monsieur sandwich
  • 1 fried egg

Method

  1. Top the sandwich with the fried egg.
  2. Serve immediately

Leave a comment

Filed under Food, Photography, Recipes

PAIN DE MIE

For some now forgotten reason I decided that I wanted to make croque monsieur and croque madame sandwiches. I realized that I didn’t have the right bread. American white sandwich bread is such a lump of dough that it wouldn’t hold up to the other ingredients. Artisanal breads also didn’t sound right. The only thing that would really work is French sandwich bread – pain de mie (“soft-in-the middle bread”). It also goes by the name of a Pullman loaf in the USA. I grabbed onto that idea, because my pain de mie pan, complete with lid, had been gathering dust. There really is no bread that will substitute for pain de mie: if has a fine crumb, the crust is soft and brown, it cuts so easily that you can turn it into thin Melba toasts,  it toasts beautifully, and it has a delicious flavor not remotely the same as American sandwich bread.

Besides all that, it is a kitchen gadgeteer’s dream because of the special bread pan with a lid. Of course, if you don’t have such an implement, you can fashion your own with a regular bread pan and some sort of lid – a tile or small metal pan that can serve as a lid. You will also need a weight. I used a piece of flagstone from our yard.

If you want to make the investment in the pan, you may have a hard time finding it at your local kitchen store. Fortunately the pans are readily available by mail order or on the internet. I bought mine from King Arthur Flour . They sell two sizes of the pain de mie pans complete with lids. The smaller size measures 9 x 4 x 4 inches and sells for $29.95. The larger pan measures 13 x 4 x 4 inches and sells for $34.95. This recipe is designed for the larger sized pan.

Notes:

The crumb of this bread is amazingly soft. At the same time, the crust is brown and, well, crusty. All of this is due to the ingredients::

You should use a flour with lower protein content. Don’t use bread flour. All-purpose flour will work, but Southern lower-protein flours like White Lily, Martha White or Gladiola, are even better.

Potato flour, made from ground dried potatoes and also called potato starch, adds moisture.

Powdered milk also adds moisture along with a little sweetness, but it may prevent the dough from rising as fully.

Butter should be unsalted, and it should be softened to room temperature so that it can be readily incorporated into the dough.

Be sure to pre-heat the weight so that baking of the bread is even.


RECIPE

Pain de Mie

Ingredients

  • 2/3 cup milk (110° F, 43°C)
  • 1 cup water (110° F, 43°C)
  • 6 tablespoons butter, softened at room temperature
  • 2¼ teaspoons salt
  • 1½ tablespoons sugar
  • ¼ cup dry milk
  • 2 tablespoons potato flour
  • 1 package instant dry yeast
  • 4¾ cups unbleached all-purpose flour

Method

  1. In a large bowl, combine the milk, water, butter, salt, and sugar. Then add the dry milk, potato flour, and yeast, stirring with a whisk until well mixed. Add 4 cups of the flour, one cup at a time, stirring until the flour is completely incorporated and the batter pulls away from the side of the bowl.
  2. Turn the dough onto a clean work surface dusted with the remaining ¾ cup of flour. Knead until the dough is smooth and elastic, about 10 minutes. Then place the dough in a greased bowl, cover with plastic wrap, and let rise in a warm place until doubled, about 1½ to 2 hours.
  3. After it has risen, turn the dough onto a lightly oiled surface, deflating it gently. Let rest for 10 minutes. With the palm of your hand, flatten the dough into a rectangle that is the length of the pan and about twice as wide. Fold in half lengthwise, and pinch the seam closed tightly. Place the dough, seam side down, in the well-greased pan. Also, make sure the under-surface of the lid is well-greased.  The dough should come up to no more than 1/3 of the height of the pan. Place the lid on the pan, leaving it open several inches. Cover the opening with oiled plastic wrap and let rise for the second time until the dough comes to about ¼ inch below the lip of the pan, about 1½ hours.
  4. In the meantime, pre-heat the oven and the lid weight to 375°F
  5. Remove the plastic wrap, carefully close the lid, and let rest for another 10 minutes. Be very careful not to deflate the dough with the lid.
  6. Bake for 30 minutes in the middle of the oven at 375°F with the weight placed on the lid. After 30 minutes, remove the weight and lid, and bake for an additional 15 minutes. The loaf should register 190°F with an instant read thermometer. Remove from the oven, let rest for 10 minutes, and then turn onto a cooling rack. Cover with a clean cloth and let cool completely.

7 Comments

Filed under Food, Photography, Recipes

QUINOA, MUSHROOM, CORN AND THREE-BEAN SALAD

In my last post, I mentioned that I had been charged with salad for a dinner party. The main course was going to be barbecued ribs. Potato salad seemed out as too heavy. Besides I wasn’t sure if someone else would bring that. It’s also no longer the season for pasta salad, so I thought about one of my old favorites, three-bean salad. Someone reminded me that it seemed sort of old-fashioned, but it still sounded good to me. Then I thought about quinoa. Light, refreshing, and a little bit unusual. I usually make it with gandules or pigeon peas, but they were nowhere to be found in the local markets, so I reconsidered the three-bean salad and decided to combine my two top options.

If you have never cooked with quinoa, you will find it to be an amazing ingredient. It is a seed that comes from plants originally grown in South America but now cultivated throughout the world. It is used like a grain, but it is not a grain so it does not have the gluten that so many people worry about these days. It is rich in protein and reportedly has all of the essential amino acids, so it certainly sounds healthy. You do need to be aware that it is also loaded with saponins. These are naturally occurring detergents that make the quinoa taste soapy if you don’t wash them off. Many pre-packaged quinoa products have had the saponin removed, but the detergent may still be present in bulk quinoa. In either case, it is probably a good idea to rinse the quinoa before you cook it. You can do this easily by placing the amount you plan to use in a fine-mesh strainer and rinse it under a spray of cold water until all of the foam subsides – maybe a minute or so. Drain it well and get ready to cook it.  Besides being tasty, cooked quinoa is also beautiful. The seeds burst open and reveal a delicate little curl. My wife, the botanist, is not sure but thinks the curl is probably the endosperm.

Except for cooking the quinoa and preparing pickled mushrooms (as I described in my last post) this is pretty much a chop and dump recipe, so it is very easy to prepare.


RECIPES

Quinoa, Mushroom, Corn and Three-Bean Salad

Ingredients

  • 1 cup washed quinoa
  • 2 cups water
  • salt and white pepper
  • 1 batch pickled mushrooms (see recipe in previous post)
  • ½ red onion, diced
  • ¼ cup each, green, red, yellow, and orange bell peppers, diced
  • ½ cup corn kernels, fresh or frozen, cooked and drained
  • 14.5 ounce can black beans, drained and rinsed
  • 14.5 ounce can red or pinto beans, drained and rinsed
  • 14.5 ounce can cannellini beans, drained and rinsed
  • 1 cup cherry tomatoes, halved
  • vinaigrette (recipe below)

Method

  1. In a small saucepan, bring the water to a boil and stir in the quinoa. Return to the boil, cover, and reduce heat to the simmer. Simmer for 15 minutes. The seeds should have absorbed all of the water, burst open, and tender. If they are not cooked, remove the lid and boil gently until all of the water is absorbed. Season with salt and white pepper, drain, cool, and place in a large bowl.
  2. Stir in the mushrooms, red onion, diced bell peppers,  canned beans, corn, and cherry tomatoes.
  3. Dress the salad to taste with 4 to 6 tablespoons of vinaigrette. Chill until ready to serve.

Vinaigrette

Ingredients

  • 2 tablespoons cider vinegar
  • ¼ teaspoon dry mustard
  • ¼ teaspoon garlic powder
  • salt and pepper
  • 6 tablespoons extra virgin olive oil

Method

  1. In a small bowl, whisk together the vinegar, mustard, garlic powder, and salt and pepper
  2. Very slowly, a few drops at a time, whisk in the olive oil to form an emulsion.
  3. If the sauce separates, whisk it together again before dressing the salad.

6 Comments

Filed under Food, Photography, Recipes

PICKLED MUSHROOMS

For a recent dinner we shared with friends, I was tasked with the salad. I decided to make a quinoa and three-bean salad. One of the ingredients was these pickled mushrooms. I was concerned that a single post with all of the food and preparation would be too much, so here is the mushroom recipe. The quinoa and three-bean salad will follow shortly.

This is a very old recipe that is based on one I got from the wife of an office colleague nearly forty years ago. It is – for sure – straight out of the 70s. On the other hand some things that are old never lose their luster if they are good to begin with. I think this recipe qualifies.

Originally, the mushrooms served as a bite to go along with cocktails. You can use them that way if you like, but you can also put them in salads or as a garnish for vegetables and side dishes.

One of the most important tricks of the dish is to buy the smallest mushrooms you can find. Even though they shrink when you boil them, you don’t want a giant mushroom hanging off the end of a cocktail pick. If you can’t find small mushrooms, halve or quarter the ones you do find.

Pickled mushrooms

Pickled mushrooms

RECIPE

Pickled Mushrooms

Ingredients

  • 2 quarts water
  • 1 tablespoon lemon juice
  • 1 pound button mushrooms, trimmed and cleaned
  • 1 cup wine vinegar
  • ½ cup extra virgin olive oil
  • 1 tablespoon salt
  • 1½ teaspoons sugar
  • 1 tablespoon pickling spices
  • 2 garlic cloves, minced
  • 2 teaspoons minced chives
  • 2 teaspoons minced parsley
  • 1 bay leaf

Method

  1. In a large pot, bring the water to the boil, add the lemon juice and then add the mushrooms. Return to the boil and boil for 3 minutes. Drain, cool, and set aside.
  2. Meanwhile, prepare the pickling mixture by combining all of the remaining ingredients in a large bowl.
  3. Stir  the mushrooms into the pickling mixture. Marinate in the refrigerator overnight, stirring from time to time.
  4. Drain. Rinse off the pickling spices with a brief spray of water.
  5. Serve as an appetizer or use in another recipe.

6 Comments

Filed under Food, Photography, Recipes

SPAGHETTI SQUASH WITH PARMESAN AND POACHED EGGS

Snow is on our local mountains, so winter is not far away. The farmers market has all but closed except for apples and a bounty of winter squashes – pumpkins, acorn, and butternut squashes. That means lots of soup, pies, and acorn squash roasted with maple syrup or brown sugar. My favorite squash is spaghetti squash, because it is so versatile, and the strands hold their crispness even with cooking.  We usually eat it with just butter, salt, and pepper. Of course, you can substitute it for spaghetti with marinara. I decided to do a riff on a pasta dish that Jacques Pépin demonstrated years ago on his television show. That recipe has become a favorite, especially when we are in a hurry for lunch or a light dinner. This time I just substituted spaghetti squash.

RECIPE

Spaghetti Squash with Parmesan and Poached Eggs

Ingredients

  • medium spaghetti squash
  • 4 tablespoons butter
  • 4 tablespoons olive oil
  • ½ cup freshly grated Parmesan cheese
  • ¼ cup finely minced parsley
  • 1 clove garlic, minced
  • poached eggs

Method

  1. Pierce the squash several times with a metal skewer, going all the way to the center. This is important. Otherwise you will have an explosion and mess in your oven
  2. Bake the squash in the middle of the oven pre-heated to 350°F (190°C) for 1 hour. Test for doneness by piercing with a sharp fork. The squash should be tender.
  3. Remove the squash from the oven and let rest for 5 minutes until you can handle it comfortably. With a large, sharp knife, cut the squash in half lengthwise.
  4. Scrape out the seeds. Then, with a fork, scrap out the flesh into a bowl. The squash will form spaghetti-like strands.
  5. Stir in the butter, olive oil, Parmesan, and parsley. Season to taste with salt and pepper.
  6. Place individual servings in pasta bowls and top each with two poached eggs.
  7. You should be able to make four servings.

6 Comments

Filed under Food, Photography, Recipes

ANDOUILLE SAUSAGE

A while back, my friend, John Ed, and I made a batch of Andouille sausage. We used a recipe from an excellent book, Charcuterie: The Craft of Salting, Smoking, and Curing, Michael Ruhlman and Brian Polcyn, W.W. Norton and Co., New York and London, 2005. We wound up with more than we had anticipated, so I put some of it in the freezer. The other night when I woke at 3 AM and couldn’t get back to sleep, I decided to reorganize the freezer. (What else is there to do at three in the morning?) I came across the Andouille and thought a bowl of gumbo would be good during the changing fall season.

I wasn’t sure, though, how the sausage would taste after those many month of storage, so I made a quicky throw-together meal to try it out. The meal turned out better than I expected, and the Andouille was in good shape. Next on the schedule, then, is chicken and Andouille gumbo.

For making the sausage, you should have a stand mixer which can be fitted with a meat grinder/sausage stuffer attachment. You will also need some sausage-making supplies including “pink salt” (DQ Curing Salt, aka DC Curing Salt, aka Prague Powder #1, aka Insta-Cure, aka Modern Cure.) Whatever the name, the salt is a mixture of regular salt and 6.25% sodium nitrite. The sodium nitrite prevents bacterial growth, especially the organism that cause botulism. You will also need sausage casings, preferably medium natural hog. If you live in a big city you can probably find those things in a local meat-packing or butcher supply house. If you can’t find them, you can get them on-line from Butcher and Packer

The quick dish is basically tomato sauce and cooked spaghetti, but the flavorings from the Andouille season the mixture beautifully. Few dishes to wash, and you can get back to whatever you are doing.

RECIPES

Andouille Sausage

Ingredients

  • 5 pounds boneless pork shoulder, cut into chunks
  • 3 tablespoons kosher salt
  • 2 teaspoons cayenne pepper
  • 1 teaspoon pink salt *(see above)
  • 1 teaspoon dried thyme
  • ½ teaspoon ground mace
  • ½ teaspoon ground cloves
  • 1/8 teaspoon ground allspice
  • 3/4 teaspoon dry mustard
  • 1 cup yellow onions, diced
  • 1 tablespoon minced garlic
  • 10 feet of medium hog casings , rinsed free of preservative salt and soaked for 30 minutes

Method

  1. In a large bowl, combine all the ingredients and chill until ready to grind.
  2. Using the meat grinder attachment of your stand mixer, fitted with the small die, grind the mixture into the mixer  bowl that has been set in a larger bowl filled with chopped ice.
  3. On medium speed, using the paddle beater, mix the ground meat mixture for about 1 minute until it becomes sticky.
  4. Correct seasoning by frying a small piece of the ground meat in a small skillet, tasting it, and adjusting seasonings as needed to suit your taste.
  5. Change the meat grinder so that it has the sausage stuffing horn attached.
  6. Thread the hog casing onto the stuffing horn, and working slowly but smoothly, fill the hog casing with sausage mixture.
  7. Twist the filled casing into 6-inch links.
  8. Hand the sausage string on a hook or stick and let dry for 2 hours at room temperature.
  9. Smoke the sausages in a Bradley stove-top smoker or in a charcoal grill with damp wood chips added. Internal temperature should reach 150°F (65°C)
  10. When the sausages are smoked, cool in an ice bath, and then refrigerate or freeze until ready to use.

Sausage and Mushrooms with Quick Tomato Sauce

Ingredients

  • 3 smoked Andouille sausages
  • 2 tablespoons olive oil
  • ½ yellow onion, diced
  • 4 medium crimini mushrooms, sliced
  • 1 41.5 ounce can, tomato sauce
  • 2 cloves garlic, minced
  • 1 cup cut dry spaghetti

Method

  1. In a heavy-bottomed medium pot, brown the sausages and set aside.
  2. In the same pot, cook the onions and mushrooms, being careful not to burn. Return the sausage to the pot.
  3. Stir in the tomato sauce and minced garlic. Simmer for 15 minutes.
  4. Stir in the cut spaghetti, and cook at a slow boil until the spaghetti is tender, about 10 minutes.
  5. Adjust the seasoning with salt and pepper. Serve while still hot.

3 Comments

Filed under Food, Photography, Recipes

SOPAIPILLAS

Nearly every cuisine I’m aware of has a deep-fried fritter that is puffy and flaky. The Northern New Mexico version is the sopaipilla. I first had them during a visit with my aunt and uncle in Los Alamos when I was ten yers old. I liked the treat so much that I brought the recipe back home with me and tried to make them – probably with not much success. Since then I’ve had countless sopaipillas, some delicious, some not very good, some light and fluffy, some greasy.

The most memorable sopaipillas I never had were at the Cactus Taqueria in Dumas, Texas. On a long road trip, our family had stopped for lunch. After we had placed our order, one of the kids went to the restroom only to report on return that there was a dead cow in the kitchen. When I checked it out for myself, sure enough there was a black and white spotted cow lying in the kitchen with its four legs stuck straight up. That should have been our first clue to leave, but we decided to wait for our food.

While we were eating we noticed three cowboys at a nearby table. The waitress brought them their traditional complimentary basket of sopaipillas for dessert. The men ate the puffs with honey and then stuck the squeeze bottle of honey in their mouths, sucking out the last few drops. We left before we got our dessert.

Sopaipillas make great containers for both sweet and savory foods. Traditionally, they are served with honey (although traditionally it is expected that you put the honey container back on the table instead of your mouth) but they are also delicious when filled with stew or chili.

The real thing should be made with lard, but you can substitute vegetable shortening.

If you are trying to make them for the first time, you may have difficulty in getting them to puff. The two secrets are that you need to make sure the deep-frying oil is hot enough, and you can hasten the process by holding the frying sopiapilla under the surface of the frying oil for a few seconds using a spatula.

The frying oil should be hotter (400° F) than the usual 350° F recommended for deep frying. I have suggested using peanut oil because it has a smoke point above that temperature even though sopaipillas are traditionally fried in hot lard with a smoke point below 400° F. I used my new infra-red thermometer to measure the surface temperature of the oil. That was amazingly similar to the temperature that I got with an instant-read probe. Use whatever thermometer you want as long as it will register the temperature of deep-frying oil.

If the sopaipillas don’t puff up right away in the hot oil, they won’t puff, but you can still eat them, covered with honey, with a fork.

RECIPE

Sopaipillas 

Ingredients

  • 1 cup unbleached all-purpose flour
  • 1 teaspoon baking powder
  • ¼ teaspoon salt
  • 2 tablespoons lard
  • ¼ cup water
  • powdered sugar (optional)

Method

  1. Combine the flour, baking powder, and salt in a bowl. Cut in the lard with a pastry blender until the mixture resembles cornmeal.
  2. Add the water and knead gently until the dough comes together. If it is too sticky, add a little more flour. If it is too dry add a little more water a few drops at a time. The dough should form a a firm, smooth, ball.
  3. Turn the dough onto a floured surface. Flatten it out with the palm of your hand. Then fold it in half. Repeat this process 10 or so times. Then form the dough into a ball, cover it with plastic wrap, and let rest for 15 minutes.
  4. With a rolling pin, roll the dough into a rectangle about 1/8 inch thick. Cut into squares, rectangles, or triangles about 6 inches on a side.
  5. Cover the cut pieces with a cloth to keep them from drying out before you fry them.
  6. Heat at least 3 inches of peanut oil in a heavy skillet or deep-frying pot to 400°F. When the oil is hot, drop one or two pieces of dough into the oil and hold them under the surface of the oil with a spatula for a few seconds until they begin to puff.  Fry the sopaipillas on both sides until they are golden brown.
  7. Remove the fried fritters to drain on several thicknesses of paper toweling. Then transfer to an oven heated to 200°F to keep them warm until you have finished frying the remaining dough pieces.
  8. Serve immediately while still hot. If you wish, you can sprinkle them generously with powdered sugar or a mixture of cinnamon and sugar.  Serve with honey for a dessert or serve them plain if you want to fill them with stew or chili. They are also delicious just plain with butter.

Leave a comment

Filed under Food, Photography, Recipes