Category Archives: Photography

FAMILY MEAL AT RICH TABLE

We are in the Bay Area to celebrate Thanksgiving with our family. Rich Table will be closed on Thanksgiving Day, and our family will take over the space. In the meantime, grandkids are out of school while their parents are working full-time, so I am baby-sitting in San Francisco and my wife is child-tending (The girls are too old to be baby-sat, they remind us!) in Silicon Valley.

Thus, I have spent some time at Rich Table during the past several days. It is always interesting to watch the rhythm of work in the kitchen during the day. Most of us don’t even think about all the preparation that is required for a busy evening in a restaurant, but the day starts before noon. All of the line cooks are there, and preparation is going full blast along with the music playing on Pandora.

The line crew prepping for the night ahead

The line crew prepping for the night ahead

Sarah and I are there to analyze a new dessert offering that has not yet made the menu because it is not quite right: too sweet, not enough tang, subtleties that evade my amateur palate.

The pastry crew has arrived even earlier, and loaves of the popular fennel-pollen-scented levain have already been baked and are sitting on the counter to cool.


Fennel-pollen-scented levain cooling

Fennel-pollen-scented levain cooling

Marrow bones have been roasted, and the unctuous marrow is being spooned out to make a puree for the yogurt and bone marrow dip that goes with beet chips and sorrel.

Marrow bones

Marrow bones

Today  it is Stephen’s turn to make family meal, the early evening dinner that the whole crew – cooks and wait staff – share right before service. Family meal is a chance for each of the cooks to show his or her stuff and to share his real family’s favorite foods with co-workers. The meal also builds the camaraderie that is so important for a well-functioning kitchen.

Commerial mandoline - a potentially lethal instrument.

Commerial mandoline – a potentially lethal instrument.

Stephen has chosen to braise a pork shoulder and turn it into pulled pork, to be served with freshly baked home-style biscuits. The braise includes Stephen’s own flavorings, including whole mustard seeds. He has offered me a sample which, of course, I do not refuse. It is delicious, and I only wish I could join the crew for family meal.

Pulled pork - braised pork shoulder

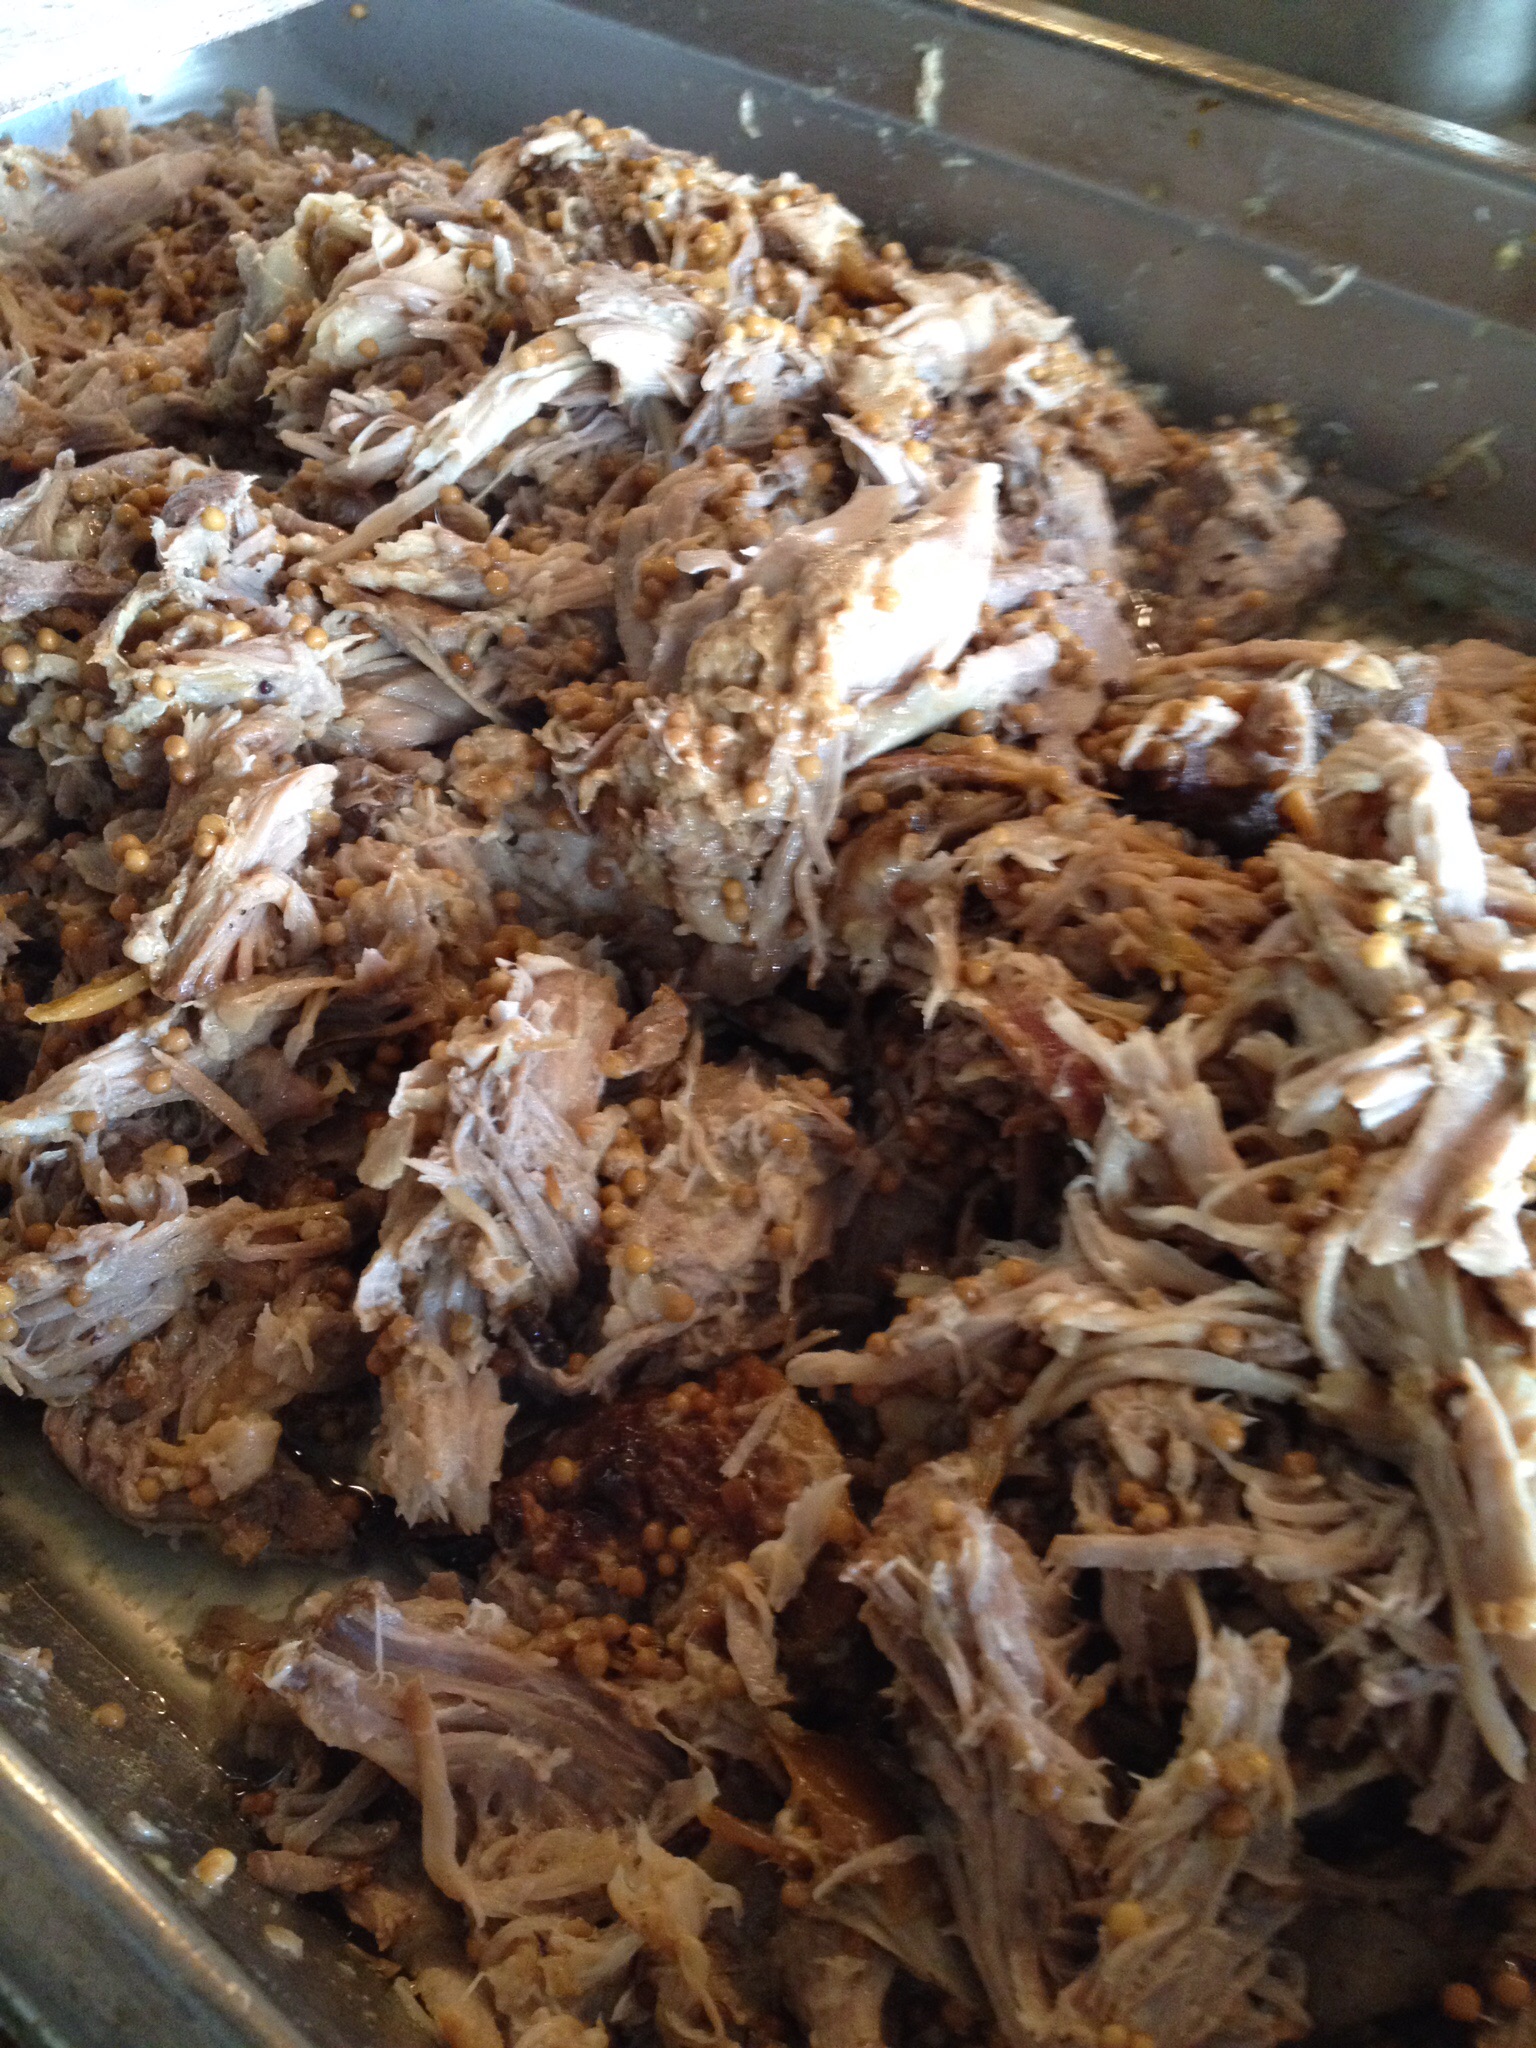
Pulled pork – braised pork shoulder

HAPPY THANKSGIVING!

Leave a comment

Filed under Food, Photography, Restaurants

BLUE CORNMEAL WAFFLES WITH PINE NUTS AND BACON

Food with blue corn in it is always popular when family comes to visit. Blue  corn tortillas are ubiquitous, and blue corn chicken enchiladas with green chile sauce and a fried egg is one of my all-time favorites. Blue cornmeal pancakes are also good. Add pine nuts  and you have a classic New Mexico combination. During her recent visit, Carol specifically requested blue cornmeal waffles,  so of course I had to accommodate her.

RECIPE

Blue Cornmeal  Waffles with Pine Nuts and Bacon

Ingredients

  • 1 cup all-purpose flour
  • 1 cup blue corn meal
  • 2 teaspoons baking powder
  • ½ teaspoon baking soda
  • ¾ teaspoon salt
  • 2 cups buttermilk
  • ¼ cup pure maple syrup
  • 5 tablespoons, bacon drippings, melted
  • 2 large eggs, separated
  • ½ cup pine nuts, lightly toasted
  • ½ cup crumbled crisp-fried bacon

Method

  1. In a large bowl, whisk together the flour, corn meal, baking powder, soda, and salt.
  2. In another bowl, whisk together the buttermilk, syrup, bacon drippings and 2 yolks from the separated eggs
  3. Pour the wet ingredients into the dry ingredients and stir together until just combined.
  4. In another bowl, beat the egg whites until they form stiff peaks. Fold in thirds into the batter being careful not to overbeat.
  5. Fold in the pine nuts and bacon pieces
  6. Spoon a little more of the batter than recommended by the manufacturer into a hot waffle iron. Bake until golden brown.
  7. Serve immediately with butter and maple syrup. Eggs and bacon on the side is a nice addition
  8. Makes about twelve 4-inch square waffles.


Leave a comment

Filed under Food, Photography, Recipes

NORTH DAKOTA CHEESE BUTTONS (KÄSE KNÖPFEN OR KASE KNOEPFLA)

The State of North Dakota has only one official food. That’s the official fruit: choke cherry, used for jams jellies, and of course home-made wine. Many believe that cheese buttons should be the official food. As far as I have been able to learn, they are absolutely unique to the state. My step-grandmother made them often as a celebratory dish when I was growing up. I loved them, but I have never eaten them since she stopped making them many years ago. She came from a large German family who farmed on the prairies of eastern North Dakota. No doubt they were part of the immigrant wave of German farmers who came to the Dakotas at the end of the nineteenth century. The immigrants actually came from Russia where they had originally moved with the urging of Catherine the Great. There they were successful wheat farmers, so successful in fact that the native Russians grew increasingly hostile and drove them out. Apparently, North Dakota has many similarities with that part of Russia, so it was only natural that the immigrant Germans again became successful wheat farmers.

My step-grandmother cooked meals for an itinerant threshing crew headed by my grandfather. He had two little boys in tow after their mother had died in the Great Influenza Epidemic of 1918. Both my grandfather and my step-grandmother thought the little boys needed a mother, and so they married. The little boys and their offspring grew up eating a lot of German food including sauerkraut and cheese buttons. There are many variant spellings of the local name of the dish. Perhaps the most common is kase knoepla, but the literal German translation is Käse knõpfen, so I’ll go with that.

Cheese buttons have some amazing similarities with Italian ricotta ravioli. The recipe for the noodle dough is exactly the same as a common recipe for pasta, and the recipe for the farm cheese is similar to at least one version of ricotta. You will note that the dish is remarkably deficient of any green vegetable. Instead it is heavy on bread and flour from the wheat as well as eggs, milk,  and butter from the barn yard. That should serve as a warning that this is not a dish for you if you are worried about your cholesterol. But if you like butter, it is hard to think of a better dish. It goes without saying that you cannot substitute margarine or oil.

RECIPES

Farm Cheese

Ingredients

  • 2 quarts whole milk
  • ½ cup white vinegar
  • 3 large eggs
  • 2 teaspoons salt
  • pepper to taste

Method

  1. Pour the milk into a large, heavy bottomed pot and heat slowly over a medium-low flame, stirring occasionally to avoid scorching on the bottom. When the milk has reached 150°F, stir in the vinegar, remove from the heat, and cover. Stir occasionally as the mixture cools, and the curds form, about 45 minutes.
  2. Line a large colander with fine-mesh cheesecloth or a clean kitchen towel. Pour the curds and whey into the towel and allow them to drain. The curds should form a ball in the bottom of the cheesecloth. Twist the cloth gently between your hands and over the sink to squeeze out any remaining whey.
  3. Transfer the cheese to a bowl and combine with the eggs and salt.  Add pepper to taste and set aside.

Cheese Buttons

Ingredients

  • 3 cups all-purpose flour + more for kneading and rolling
  • 3 large eggs
  • 5-9 tablespoons water + more to seal the edges of the buttons

Method

  1. Pour the flour in a mound in the middle of a large, clean, flat work surface. Make a deep well in the center of the mound
  2. Break the three eggs into the well, and using a table fork, beat the eggs gently. Stir in 3 tablespoons of water and then begin to draw the flour in from the edge of the well, stirring and mixing as you go. Continue to draw in the flour, adding 1 more tablespoon of water. Avoid adding too much water, or the dough will get sticky. When the flour is completely incorporated, form the dough into a ball and knead for a 5 to 10 minutes until it is glistening and forms a smooth ball.  Cover loosely with a kitchen towel and let rest for 20 minutes.
  3. When you are ready to roll out the dough, flour the work surface lightly. Divide the dough into 4 equal pieces. Roll out one piece with a rolling pin, covering the remaining pieces in plastic while you work. Roll each piece into a round about 16 inches in diameter. Dust the dough lightly with flour if it is too sticky.
  4. Cut the dough into 2 inch squares. Place a scant teaspoon of the cheese mixture in the center of each square. Moisten the edges of the squares with water and fold over into triangles and/or rectangles (Your choice!). Gently squeeze the edges between your fingers until they are well sealed.
  5. Bring a large pot of salted water to the boil. In batches, add the cheese buttons to the boiling water. They will sink to the bottom but eventually float. Let the buttons continue to cook for a few minutes after they have floated. Transfer to a bowl with a slotted spoon and keep warm in the oven until all of the buttons have been cooked.
  6. Cut any extra noodle dough into thin strips, boil for 4 -5 minutes, drain, and add to the buttons.


Fried Bread Sauce

Ingredients

  • ½ to 1 cup (1 or 2 sticks) unsalted butter
  • about 5 ½-inch slices of home-made or good quality white bread, crusts removed and cubed

Method

  1. Melt the butter in a cast iron skillet over medium heat
  2. Stir in the bread cubes and sauté until the bread cubes are lightly browned and crisp.
  3. Pour over the boiled cheese buttons and noodles, stirring gently to mix.
  4. Serve immediately.

38 Comments

Filed under Food, Photography, Recipes

PISTACHIO-STUFFED MUSHROOMS

Stuffed mushrooms are so retro. They were very popular in the 1960s, but you almost never see them now except at the Olive Garden. That is too bad, because they are easy to make and delicious to eat. They are perfect with cocktails and also make a good first course. The important step is to sauté the mushroom caps before you stuff them. Then you can let your imagination run wild and stuff them with whatever sounds appealing. We have a big bowl of pistachios that we have been snacking from for days, and even though pistachios are surprisingly low-cal, they are not when you eat them by the bowlful. Stuffing them into mushrooms seemed like a good dodge. That’s partly because I have no idea how many calories are in a stuffed mushroom.

RECIPE

Pistachio-Stuffed Mushrooms

Ingredients

  • 8 large crimini mushrooms (the largest you can find not labeled as Portobellos)
  • 2 tablespoons olive oil
  • 2 scallions, including green ends, chopped coarsely
  • ¼ cup shelled pistachio nuts, chopped coarsely
  • ¼ cup shredded Swiss cheese
  • ¼ cup fresh bread crumbs
  • ¼ cup sour cream
  • 2 teaspoons Pernod
  • salt and pepper
  • ¼ cup Parmesan cheese, grated

Method

  1. Remove the stems from the mushrooms and set aside. Heat the olive oil in a sauté pan over medium heat and add the mushroom caps. Sauté for about 3 minutes and turn over. Sauté the other side of the mushroom caps until cooked through. Remove to a plate, draining any liquid that has accumulated in the caps.
  2. Remove any woody part of the mushroom stems and chop finely. Return them to the sauté pan along with the chopped scallions. Add more olive oil if needed. Sauté until cooked through. Transfer to a small bowl and stir in the pistachios, Swiss cheese, bread crumbs, sour cream, and Pernod. Adjust the seasoning with salt and pepper.
  3. With a small spoon, fill the mushroom caps with the pistachio mixture. Sprinkle the tops with the grated Parmesan cheese, and place under a hot broiler until the mushrooms are heated through and the tops have browned.
  4. Serve immediately.

2 Comments

Filed under Food, Photography, Recipes

CHEESE BLOSSOMS THREE WAYS

Cheese straws are such a classic Southern tradition that it seems almost cliché to write about them. They are served at ladies’ luncheons, cocktail parties, and holiday festivities. I have been making them for years except that  during my early attempts I had a hard time turning the dough into “straws”. I used a cookie press, and the treats came out flowers. Never mind, my kids loved them so I have been making them that way ever since.

Cheese straws/blossoms are required at every family gathering, especially at Thanksgiving and Christmas, so I make double and triple batches and lug them in my carry-on luggage when I travel. That way they don’t get turned into cheese crumbs.  Even at that, the little gems disappear before everyone has had his or her fill. In fact, after many years, I have learned that some of the family have hidden away private stashes, not trusting the others to share gracefully.

This year, Carol and Cameron will be visiting from Los Angeles for a few days. Then my wife and I will head to the Bay Area to enjoy Thanksgiving with the others. I decided to make three batches and to try different cheese combinations. The usual version uses extra sharp Cheddar cheese. I gave Swiss (Emmentaler) and bleu (Roquefort) cheeses a try as well. The recipes are not wildly different, but because of the different moistures and consistencies of the three cheeses, a little different approach is required for each. In the end, though, I was pleased with the result.

RECIPES

Cheddar Cheese Blossoms

Ingredients

  • 8 ounces extra sharp Cheddar cheese
  • 1¾ cups all-purpose flour
  • 1 teaspoon Worcestershire sauce
  • 1/8 teaspoon cayenne pepper
  • ½ teaspoon salt
  • 8 tablespoons (one stick) chilled butter, cut into 8 pieces. Important: Do NOT use margarine.

Method

  1. With the grater blade in place, grate the cheese in food processor. Transfer to a plate and let come to room temperature.
  2. Change to the metal blade of the food processor. Add grated cheese, flour, Worcestershire sauce, cayenne pepper and salt in the bowl of the food processor. Pulse until well combined, scraping down the sides of the bowl from time to time.
  3. Add the butter and continue to process until it forms a ball.  Do not over-process or the butter will melt and separate.
  4. Turn out on a work surface, Knead until any extra crumbs of the dough are incorporated into the ball.
  5. Working in batches, use a cookie press to form flower shapes on an ungreased cookie sheet, spaced about 1 inch apart.
  6. Bake in the middle of oven preheated to 300°F for 20 to 25 minutes. Bake a few minutes longer if you want a darker color. Cool on a baking rack and store in an air-tight tin.
  7. Makes about 6 dozen.

Swiss Cheese and Dill Blossoms

Ingredients

  • 8 ounces “Swiss” (Emmentaler) cheese
  • 1¾ cups all-purpose flour
  • 1 tablespoon Kirsch
  • 2 tablespoons dill fronds, finely chopped
  • ½ teaspoon salt
  • 8 tablespoons (one stick) chilled butter, cut into 8 pieces. Important: Do NOT use margarine.

Method

  1. With the grater blade in place, grate the cheese in food processor. Transfer to a plate and let come to room temperature.
  2. Change to the metal blade of the food processor. Add grated cheese,flour, Kirsch, dill and salt in the bowl of the food processor. Pulse until well combined, scraping down the sides of the bowl from time to time.
  3. Add the butter and continue to process until it forms a ball.  Do not over-process or the butter will melt and separate.
  4. Turn out on a work surface, Knead until any extra crumbs of the dough are incorporated into the ball.
  5. Working in batches, use a cookie press to form flower shapes on an ungreased cookie sheet, spaced about 1 inch apart.
  6. Bake in the middle of oven preheated to 300°F for 20 to 25 minutes. Bake a few minutes longer if you want a darker color. Cool on a baking rack and store in an air-tight tin.
  7. Makes about 6 dozen

Roquefort Cheese Blossoms

Ingredients

  • 8 ounces Roquefort cheese
  • 1¾ cups all-purpose flour
  • 1 tablespoon Pernod
  • ½ teaspoon salt
  • 8 tablespoons (one stick) chilled butter, cut into 8 pieces. Important: Do NOT use margarine.

Method

  1. Crumble the cheese into the bowl of the food processor. Add  flour, Pernod,  and salt. Pulse until well combined, scraping down the sides of the bowl from time to time.Add the butter and continue to process until it forms a ball.  Do not over-process or the butter will melt and separate.
  2. Turn out on a work surface, Knead until any extra crumbs of the dough are incorporated into the ball.
  3. Working in batches, use a cookie press to form flower shapes on an ungreased cookie sheet, spaced about 1 inch apart.
  4. Bake in the middle of oven preheated to 300°F for 20 to 25 minutes. Bake a few minutes longer if you want a darker color. Cool on a baking rack and store in an air-tight tin.
  5. Makes about 6 dozen

4 Comments

Filed under Food, Photography, Recipes

NON-CHAMPIONSHIP CHILI

This was the weekend for the Chili Appreciation Society International (CASI) world championship in Terlingua, Texas. Around 300 competition chili cooks from all over the country were there along with their families and friends. I was not there. It is an invitational event, and all of those cooks have been entering cook-offs all year-long to collect enough points for an invitation. I am home. We have returned from California, having enjoyed the California Chili Cook-Off Championship and then an extended visit with our family in the Bay Area. It should be apparent by now that I did not win anything at the cook-off, but it turned out to be a lot of fun. On top of that I learned a lot about chili competitions if I should ever decide to enter another one. This post will include lessons learned along with a chili recipe based upon my non-championship chili  but made milder for my good wife who has no tolerance for spicy foods. The recipe also will contain the greatest of heresies – pinto beans and tomatoes. Those and the garnishes cut the piquancy of the dish and make it a family favorite. If you want a hotter chili, just double all of the amounts of chili powder. You can order these specialized chili powders on line from Pendrey’s Spices in Fort Worth, Texas or Mild Bill’s Spice from Ennis, Texias. If you don’t want to go to that bother, you can just use store-bought chili powder. You can even try a combination of the stand-bys: McCormick’s, Gebhardt’s, and Mexene. LESSONS LEARNED 1. Don’t be too ambitious. It rapidly became obvious that on my second attempt, it was foolish to enter contests for the best salsa, the best guacamole, and the best chili. That clearly wound up being too many balls in the air. 2. Try not to have anything to chop. Cutting up avocados, green onions, and tomatoes for a half-gallon of guacamole is nearly a full-time job in itself. Besides, having sharp knives anywhere in the vicinity of the booth is dangerous. A sliced finger will send you to the first aid station or the emergency room. 3. Grease is the challenge of the chili cook. A pool of glistening red grease floating on the top of the turn-in cup is probably the surest way to be disqualified. It presents a paradox that even the most accomplished cooks wrestle with. Most use 80/20 ground beef. That is, 80% meat and 20% fat. The fat definitely enhances the flavor, but it is also unattractive and needs to be removed. Some champion cooks make huge meatballs and boil them in water for 30 minutes before they add them to the chili mix. That gets rid of the grease, but it reduces the amount of umami savor from the Maillard reaction developed with browning of the meat. Some cooks brown the meat and pour off any extra grease, but they are still stuck with a lot to deal with. Compromise solutions include browning the meat balls before boiling or boiling and straining the meat after it has been drained. It seems to me that both of these approaches sacrifice some of the umami. Another alternative would be to blot the browned meat in a clean kitchen towel. An approach all good cooks undoubtedly use is to skim any grease that rises to the top during cooking, using a small spoon or ladle or a wad of paper towel. There is a final mop-up of the sample ladled into the turn-in cup. Whatever, it is a problem to be dealt with. 4. Be sure to bring plastic bags for trash and a container to hold discarded liquids. You would be surprised at how much trash one generates just cooking one pot of chili. It may easily fill up a household trash bag, so be sure to bring plenty. Another problem is what to do with all the production liquids, including the water for boiling meatballs, drained grease, and skimmings. It is considered bad form to pour any of that on the ground. And you are responsible for cleaning your booth. 4. Camp stoves are not the same as kitchen stoves. I practiced several times making chili on the stove at home, but it was an entirely different experience on a butane camp stove. The flame kept going out, and it seemed like it was either on – burning things – or off – not cooking as I had thought it was. Fortunately, my friend, Reggie,  had brought a butane fire lighter or I would have used up a box of kitchen matches. However, the experience pointed out the need to practice on a camp stove under challenging conditions. 5. Visitors can be distracting. While we were busy cooking our competition chili and worrying about the deadline, crowds kept coming by to sample our chili, guacamole, and salsa. It was fun to meet all the different people, but it certainly increased my anxiety level. 6. You will need a lot of luggage. When you travel to chili cook-offs, you need to have everything you need. Of course, that means your ingredients, your utensils, and your stove. There are other things to worry about: the contest sponsors may or may not furnish a table and chairs. You need both. An umbrella or other cover is handy to shield you from the sun and rain. If you are entered in the showmanship contest, you will need all of your props along with lots of giveaways and your pirate costume if that is your theme. Clearly, at least one and maybe two of the largest suitcases you can find are important. Unless, of course, you do what many fierce competitors do. They buy a motor home so that they can pull up next to their friends on the circuit, spend the night, have space for all of their gear along with a refrigerator well stocked with beer and/or wine.

RECIPES

Spice Packs

First “dump”

Ingredients

  • 1½ teaspoons Fort Worth Light chili powder
  • 1½ teaspoons RT-Rio Tejas chili powder
  • 1 teaspoon chicken bouillon granules
  • 2 teaspoons beef bouillon granules
  • 1 tablespoon onion powder
  • ¼ teaspoon cayenne
  • ½ teaspoon salt
  • ½teaspoon monosodium glutamate (MSG)
  • 1 packet Goya Sazón with cilantro and annatto (con cilantro y achiote)

Second “dump”

Ingredients

  • 1½ teaspoons Fort Worth Light chili powder
  • 1½ tablespoons San Antonio Red chili powder
  • ½ teaspoon onion powder
  • 2½ teaspoons garlic powder
  • 5 teaspoons ground cumin
  • ¼ teaspoon ground black pepper
  • ¼ teaspoon ground white pepper
  • 1 packet Goya Sazón with cilantro and annatto )con cilantro y achiote)

Third “dump”

Ingredients

  • 1½ teaspoons San Antonio Red chili powder
  • 1/8 teaspoon cayenne
  • ¼ teaspoon ground cumin
  • ¼ teaspoon turbinado sugar

Method

  1. Measure ingredients into three small plastic containers with tight-fitting lids.
  2. Have the containers ready so that you can add them, one at a time, at the appropriate time during cooking.

Non-Championship Chili

Ingredients

  • 2 pounds 80/20 ground chuck
  • 2 tablespoons cooking oil
  • 3 ounces pork stew meat
  • 3 fresh Serrano chiles, pierced several times with a sharp knife
  • 8 ounces tomato sauce
  • 14.5 ounces canned beef broth
  • 14.5 ounces canned chicken broth
  • 2 tablespoons ketchup
  • 15 ounce can pinto beans, drained
  • 15 ounce can, petite diced tomatoes, drained
  • spice packs
  • chopped white onion (for garnish)
  • grated Cheddar cheese (for garnish)
  • Frito original corn ships (for garnish)
  • sour cream (for garnish)

Method

  1. In a heavy-bottomed pot over medium-high heat, brown the ground beef in the vegetable oil, stirring frequently to break up any clumps of the meat and to prevent burning. When the meat is well-browned, remove from the heat, drain in a colander, and pat dry with a kitchen towel. Set aside.
  2. Wipe the pot clean with a paper towel or kitchen towel. Return to the heat. Add the pork, Serrano chiles, tomato sauce, beef and chicken broths, and the first spice “dump”. Stir until well combined. Bring to the boil and boil for 30 minutes.
  3. Remove the pot from the heat. Then remove the pork and the chiles, squeezing their juice into the pot. Return to the heat, add the cooked ground beef, and cook over a low flame for 1 hour.
  4. At the end of the hour, return the mixture to the boil for 10 minutes. Stir in the ketchup, and simmer, covered, for 25 minutes.
  5. Stir in the second spice “dump”  and continue to simmer for 15 minutes.
  6. At the end of the 15 minutes, stir in the third spice “dump”. Continue at a slow boil for 20 minutes.
  7. Stir in the beans and tomatoes and simmer until completely heated, about 5-10 minutes.
  8. Serve with garnishes

2 Comments

Filed under Food, Photography, Recipes

ROASTED GOLDEN BEET SOUP WITH SOUR CREAM AND DILL

Root vegetables are making their mark on the garden scene as autumn begins to blend into winter. All the vendors at the farmers market have an abundance of beets. Even though beets are not among my favorites, it seems a shame not to give them a go. Bright red borscht seems an obvious choice, and for years we have made a clear beet soup that almost gleams. An alternative seemed to be in order. The other thing about red beets is that they stain everything they touch, including your GI tract.

Golden beets seemed like a good alternative choice, and so I bought a nice bunch at a recent farmers market. Even then, there are several choices: beet salad, Harvard beets, or beets and greens. Honestly, the consistency of cooked beets is not pleasing to me, so I opted for soup.

There are a couple of classic partners to beets: dill and sour cream. The recipe below combines those ingredients.

Bunch of golden beets from the farmers market

Bunch of golden beets from the farmers market

Roasted golden beet soup with sour cream and dill

Roasted golden beet soup with sour cream and dill

RECIPE

Roasted Golden Beet Soup with Sour Cream and Dill

Ingredients

  • 1 bunch golden beets, tops removed – about 4 to 5 medium size beets
  • vegetable oil
  • 2 tablespoons olive oil
  • 1 medium onion, chopped
  • 1/3 cup long-grain white rice
  • 2 cups chicken stock
  • water
  • 1/4 teaspoon nutmeg
  • salt and pepper to taste
  • 1/2 cup sour cream + more for garnish
  • 1/2 cup fresh dill fronds, snipped + more for garnish

Method

  1. Wash and dry the beets. Coat generously with vegetable oil and wrap individually in squares of aluminum foil. Place on a baking sheet lined with foil, and roast in the middle of an oven pre-heated to 350 for 30 minutes or until they are easily pierced with a kitchen fork. Remove from the oven, unwrap, and cool until they are easy to handle. The skin should slip off easily between your fingers. Cut the peeled beets into 1/2 inch cubes and set aside.
  2. In a medium saucepan over a medium flame, heat the oil and sweat the onions, covered, for 5 minutes until translucent and the juices have been released. Do not brown. Stir in the rice and cook for a minute or two until the grains are translucent. Ad the chicken stock, and simmer for 30 minutes or until the rice is completely cooked and soft. Add water as needed if the soup is too thick.
  3. Add the beets and simmer for another 10 minutes. Stir in the nutmeg.
  4. Remove from the heat and puree in a blender or with a stick blender until smooth. For aded smoothness, you may pass the puree through a strainer or chinois. Adjust seasoning with salt and pepper.
  5. Stir in the sour cream and dill. Serve hot or cold with a dollop of sour cream and more minced dill as garnish.


6 Comments

Filed under Food, Photography, Recipes

QUINOA CON GANDULES

Quinoa is gaining recognition as a substitute for rice, pasta, and other starches. Most of my experience with quinoa is by itself or as the base for a cold salad. This recipe substitutes it for rice in the traditional Puerto Rican arroz con gandules which I first enjoyed at an office Christmas party in El Paso. One of my co-workers from Puerto Rico brought the dish to the pot luck table. Indeed, arroz con gandules is apparently a traditional Christmas dish.

The hard part of this recipe is finding the gandules aka pigeon peas. They were readily available in El Paso, but not so in Santa Fe. After some detective work, I found a single can on the shelf at the local branch of Talin Market World Food Fare. Quinoa made a great substitute for the rice.

RECIPE

Quinoa con Gandules

Ingredients

  • 1 cup quinoa, rinsed
  • 2 cups water
  • 1 can (15.5 ounces) dry pigeon peas, drained
  • 3 mild snacking peppers, seeds and ribs removed, diced
  • 1 packet Goya Sazón cilantro y achiote
  • 2 tablespoons vegetable oil
  • 1  red onion, diced
  • 2 cloves garlic, peeled and minced
  • ½ cup ham diced
  • ½ cup tomato sauce
  • salt and pepper

Method

  1. Combine the quinoa and water in a medium saucepan. Bring to a boil, stir, cover, and reduce the heat to simmer. Simmer for 20 minutes or until all the moisture is gone. Remove the lid if necessary to finish the cooking. Fluff with a fork, stir in the pigeon peas, diced peppers, and  the Sazón, and set aside.
  2. Heat the oil in a medium skillet over a medium flame. Stir in the onion, garlic, and ham, cooking until the onion is translucent. Add to the quinoa mixture, along with the tomato sauce, and heat over medium flame until everything is warm. Adjust the seasoning with salt and pepper. Serve.

2 Comments

Filed under Food, Photography, Recipes

CREAM OF GLOBE SQUASH SOUP

The weather has definitely shifted to autumn, and the farmers market has begun to wind down. The other day, one of the vendors had piles of different squashes, none of them with labels. I saw a beautiful winter squash that would make a great soup. I thought I was buying a calabaza, but when I got it home it turned out to be a zucchini-like globe squash. Yes, I can hear you saying, “Another zucchini recipe.” I split the squash in half, and roasted it anyway, and it turned out to make a savory soup that was just right for a cool autumn lunch. You can make it vegetarian by using vegetable stock. You could even make it vegan by substituting vegetable oil for the butter and silky tofu for the cream.

RECIPE

Cream of Globe Squash Soup

Ingredients

  • 1 large globe squash
  • 3 tablespoons unsalted butter, melted
  • 1 medium onion, chopped
  • 4 tablespoons olive oil, divided
  • 1/3 cup long-grain rice
  • 2 cups chicken or vegetable stock
  • ½ cup cream
  • nutmeg
  • salt and pepper
  • 1 clove garlic, peeled and sliced thinly
  • 1 slice French bread, crusts removed and cut into cubes
  • mozzarella cheese, grated
  • salted, roasted pumpkin seeds (pepitas)

Method

  1. Cut the squash in half, stem to blossom end, and remove the seeds. Brush the melted butter on the cut surface, and place cut-side down on a lipped baking sheet lined with aluminum foil. Bake for 30 minutes in the middle of a 350°F oven. Check for doneness with a kitchen fork. If the flesh is soft, remove from the oven and scoop the squash into a bowl. Set aside
  2. Meanwhile, in a 4-quart covered saucepan sweat the onions in 2 tablespoons olive oil over medium heat. Do not allow the onions to brown. Add the rice, and stir until the grains have become translucent. Add the stock and bring to the boil. Reduce to the simmer, covered, for 30 minutes or until the rice is completely cooked and soft. Stir in the squash, return to the boil, and then simmer for another 5 minutes.
  3. Remove from the heat, and cool enough to work with easily. Puree with a blender. You may need to work in batches. Return the soup to the saucepan,, add cream, and bring to the simmer. Do not boil. Add nutmeg to taste and adjust seasoning with salt and pepper.
  4. In a small sauté pan, heat the remaining 2 tablespoons olive oil over medium flame. Add the garlic and stir until the garlic starts to brown. Remove the garlic and add the bread cubes. Sauté until crisp and lightly browned. Drain the croutons on paper towels and salt lightly.
  5. Ladle the soup into serving bowls, and garnish with croutons, grated mozzarella and pumpkin seeds. Serve

Leave a comment

Filed under Food, Photography, Recipes

ASPEN COLOR AND THE IZANAMI JAPANESE INN

The aspen colors are at their height right now, so the other day we took a drive up Hyde Park Road to the Ski Basin.  Although my knees and back are not as limber as they once were, we walked up a couple of our favorite trails, and I took pictures, in spite of already having hundreds images of golden aspens. The colors are not as multi-hued as they are in New England, but an entire mountainside clothed in bright yellow still elicits a gasp from me, along with the need to take yet another image.


We avoid the weekends looking at the colors. It seems as though the entire city makes the pilgrimage on Sunday so that there are traffic jams on the winding mountain roads. During the week, the crowds are smaller, and there is an additional excuse to stop for a late lunch after our viewing and shooting.

Toward the bottom of the mountain is one of our favorite restaurants.  Izanami has been carefully and beautifully built to resemble a Japanese inn and to afford spectacular mountain views in all directions. . The food and service are also Japanese. The restaurant only opened months ago, and it was a semifinalist for the national James Beard New Restaurant of the Year Award. The food is delicious and so far as I know, authentic (I’ve never been to Japan). Some detractors complain that their peanut sauce is not truly authentic, even though I can find recipes for Japanese peanut sauce on the web.

Whatever, the restaurant is the latest addition to Ten Thousand Waves Spa. There are communal baths, massages, and therapies, and Japanese-style lodging. People come from all over the world to enjoy the luxury, and now they have delicious Japanese food to add to the experience.

The menu offers many choices, all with Japanese-sounding names. One of our favorites is kinpira gobo (slivered burdock root and carrot served with a sesame soy dressing). Other good choices include red pepper-tomato soup,  tofu dengaku (tofu cubes glazed with yuzu-miso), pork belly kakuni, and tonkatsu (panko-breaded pork loin cutlets with hot mustard and miso katsu sauce).

A short trip back home, and it was time for a nap.  All in all, a great day.

2 Comments

Filed under Food, Photography, Restaurants