Category Archives: Recipes

FRICO – CHEESE CRISPS

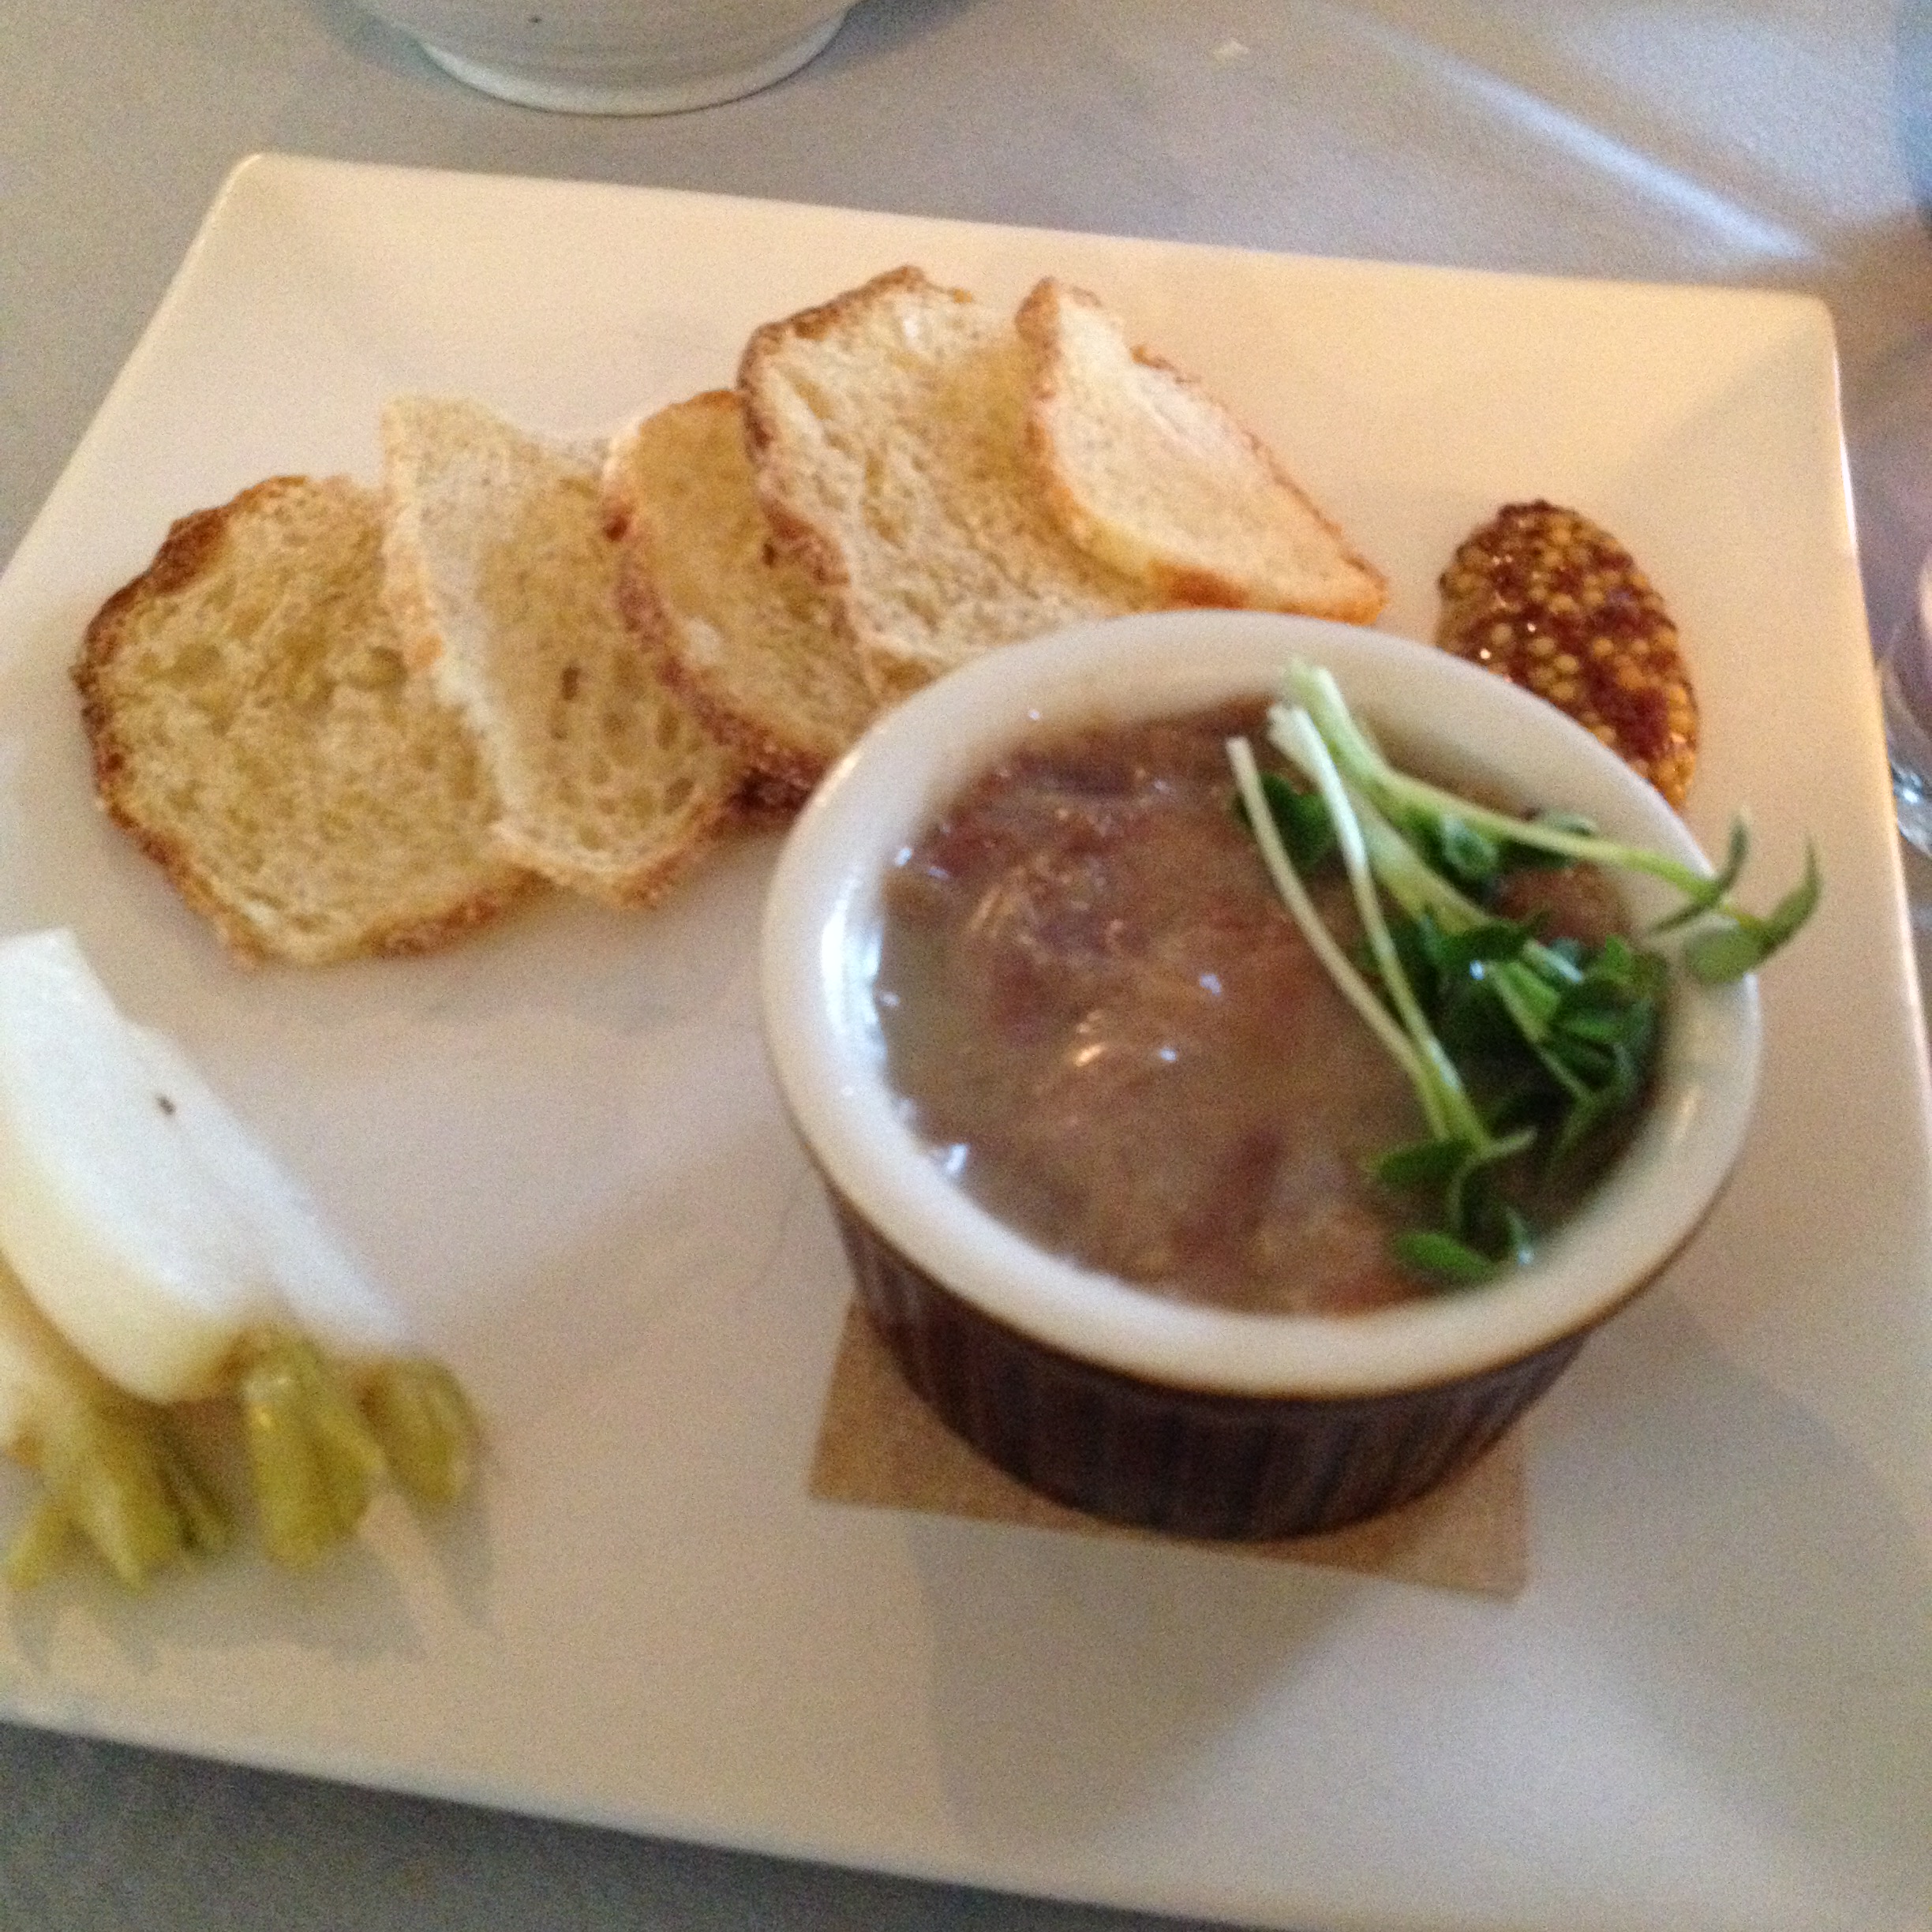
Cheese crisps, those incredibly lacy, crisp, and tasty wafers that some restaurants tuck into a bread basket, use to decorate a salad, or sit beside a bowl of soup look so hard to make, but are actually simple.

The hard part is figuring out what to call them and what their origin might be. Some people call them frico, and some people call them parmesan crisps.  Some sources say that “frico” comes from the Friulian language spoken in Friuli Venezia Giulia, an autonomous region in northeast Italy. Its capital is Trieste, and it stretches from the sea to some of the most beautiful mountains in Italy.  It is the part of Italy where Italian, Slavic, and Austrian cultures have bumped against one another for centuries. Some say that “frico” means little trifle in Italian, but there is no such entry in my Italian-English dictionary.

Some sources say that frico is similar to the Swiss rösti, a crisp, savory dish made of potatoes and cheese. In particular the cheese is supposed to be Montasio or Asiago cheese. Lidia Bastianich has a recipe on her website, lidiasitaly.com.

There are several recipes for frico/parmesan crisp on the web by various celebrity cooks, and Martha Stewart has one for cheddar crisps. Some cooks add chopped herbs, seeds, and other flavorings, so you can do just about whatever you want to and still call it a frico (Shouldn’t the plural be frici? That is more fun to say.)

To add to the complication, Montasio may be hard to find where you live. Our cheese monger didn’t have any. And even then you have to make a decision because Montasio comes in three versions depending upon its age. The cheese is made from raw cow’s milk, and that  may explain why it is hard to find in this country. Younger cheeses have a soft paste that doesn’t lend itself to crisping. The middle-aged cheese is firmer and might work, but you really want the fully aged cheese.

Undoubtedly availability is one of the reasons that most American recipes call for freshly grated Parmesan. At first, I was a bit dismayed by Martha Stewart’s suggestion to use cheddar. Then I started to play around with various cheeses in my stocks. I had some leftover Mexican cheese that I had used for my green chicken chilaquiles. I was surprised and pleased to learn that it made a very acceptable frico.

Another source of disagreement is whether to mix the grated cheese with a little bit of flour. Some think the flour makes the crisp too doughy and soft. I think it helps to absorb the fat that is released when the cheese melts. Do whatever you want.

Finally, there is the bake-them-in-the-oven school of thought and the cook-them-on-a-hot-skillet persuasion. I favor the latter because I think it gives me more control of the process, but again, choose your own pathway.

In view of the short list of ingredients and the even shorter process, all of this is probably a lot more than you want to know about fricos (Or is it frici?) Whatever, you are bound to enjoy these crispy trifles; guaranteed they will disappear quickly from a buffet table.

RECIPE

Frico

Ingredients

  • 1 cup grated Parmesan cheese (coarse or fine depending on the texture you desire)
  • 1 tablespoon all-purpose flour

Method

  1. Combine the grated cheese and flour
  2. If you are making the fricos on a skillet, heat a dry, heavy-bottomed skillet over medium heat. Spread about one tablespoonful of the cheese mixture in a circle about 3-4 inches across. Press down. Heat until the frico is lightly browned on the bottom. Turn over and brown the other side. Remove to paper towelling to cool.
  3. If you are baking the fricos in the oven, preheat the oven to 400°F. Spread tablespoonful-sized circles of the cheese mixture on a silicone-lined baking sheet. Do not crown. Press down. Bake for 3 to 5 minutes or until the fricos are lightly browned and crisp. Cool on paper towelling.


Leave a comment

Filed under Food, Photography, Recipes

GREEN CHICKEN CHILAQUILES

Chilaquiles are a dish that you make with leftovers. The basic recipe calls for three ingredients: stale corn tortillas, salsa (either red or green), and cheese. It is perfect for breakfast. The first time I ever had it was when a community health worker brought  a hot casserole to a staff breakfast in our clinic in the colonias southeast of El Paso. Since then, I have had chilaquiles many times in Saltillo, Mexico, gatherings in many small towns, and in Santa Fe.

The beauty of the dish is that you can dress it up as much as you wish with lots of other ingredients. That way you can turn it into a party dish. In fact, Texans have done just that. The famous Texas buffet dish, King Ranch Chicken, is basically chilaquiles made with canned mushroom, chicken, and celery soups instead of salsa.

Chilaquiles are perfect for cleaning out the refrigerator (It seems like I am always cleaning out the refrigerator). That is exactly what I did in anticipation of “Senior Day” at the local grocery store when the elderly (me) get a 10% discount on their grocery bill. I had a big can of El Pato brand green enchilada sauce (The Duck, hecho in México) that had been sitting in the pantry for months if not years. I also had a lot of stale corn tortillas. Of course I always have a bunch of stale corn tortillas. As to the enchilada sauce, it was way too vinegary for my taste. You would be better off to make your own. But then this would no longer be a recipe that you can toss together after you get home from work. I also had some cooked chicken, scallions, and snacking peppers that needed to be used. The only other ingredient I needed was cheese. For this dish I cheated and got shredded Mexican cheese from the grocery store. This is a combination of Cheddar, Monterrey jack, queso de quesadilla, and asadero that they sell for tacos and enchiladas. Again, you can just grate your own. Mozzarella works for asadero. Mushrooms would be a good addition. Just let your imagination and what needs to be used up be your guides. Here’s the recipe.

RECIPE

Green Chicken Chilaquiles

Ingredients

  • stale corn tortillas, about 1 dozen
  • vegetable oil
  • 28 ounces (one large can) green enchilada sauce
  • snacking peppers, about 10, sliced thinly
  • 6 scallions, cleaned and sliced, including the green tops
  • 1 chicken breast, cooked and shredded
  • Mexican shredded cheese, about ¾ pound
  • sour cream
  • fried eggs, preferably sunny-side up (optional)

Method

  1. Cut the tortillas into eighths and fry in the vegetable oil until lightly crisp. Drain and set aside.
  2. Lightly oil a 12 x 8 inch glass baking pan and place a thin layer of the enchilada sauce on the bottom.
  3. Arrange 1/3 of the tortilla pieces over the sauce so that it is completely covered.
  4. Arrange ½ of the sliced snacking peppers on top. Then a layer of ½ of the sliced scallions, ½ of the shredded chicken, and 1/3 of the grated cheese.  Dot with generous dabs of sour cream. Top with 1/3 of the remaining enchilada sauce.
  5. Arrange another layer of tortilla pieces on top. Then repeat the peppers, scallions, chicken, cheese, sour cream, and half of the remaining enchilada sauce.
  6. Arrange the final layer of tortilla pieces on top and cover with the remaining enchilada sauce. Generously sprinkle grated cheese over the top.
  7. Bake in the middle of an oven preheated to 350°F for one hour. Remove from the oven, and let rest for 10 minutes. Cut into squares and serve, topped with the optional fried eggs if desired.

4 Comments

Filed under Food, Photography, Recipes

GRISSINI

Everyone I know loves bread sticks – the kind that sit on the table at your favorite Italian restaurant, daring you to resist them. The Italians call them grissini. The crisp, flavorful restaurant version is delicious. The ones wrapped in cellophane or boxed at the grocery store are usually stale and loaded with preservatives. Then why not make your own? They are very easy to whip up, and the only downside – at least for me – is that I can eat the whole batch by myself before anyone else gets a chance.

This recipe comes from the King Arthur Flour Baker’s Companion (The Countryman Press, Woodstock, Vermont).  It may be the only book you will ever need for bread baking. It tells you all about flour, other ingredients, and baking utensils, along with easy-to-follow, well-tested recipes for bread and baked goods. If you don’t have a copy, you should consider getting one. At least thumb through one in the cookbook section of your local book store. You can order it online for $29.95.

RECIPE

Grissini

Ingredients

  • 2½ cups all-purpose flour
  • 1½ teaspoons dry yeast
  • 1 teaspoon salt
  • 3 tablespoons non-fat dry milk
  • 3 tablespoons olive oil
  • 7/8 to 1 1/8 cup water*
  • 1 egg white whisked with 1 tablespoon water
  • poppy seeds
  • kosher salt (optional)

Method

  1. In a very large bowl, combine the flour, yeast, salt, dry milk, oil, and water. Stir with a large wooden spoon until the mixture is well combined. Then knead in the bowl using your hands until the dough is soft and smooth. If it is sticky, sprinkle in a tablespoon of flour. If it is too stiff, add more water by teaspoonfuls, kneading after each addition. Clean the bowl with water and dry. Return the dough to the bowl, cover with plastic wrap, and let rise until doubled in volume, about 1 to 1½ hours.
  2. Transfer the risen dough to a lightly oiled work surface and roll it into a square  about 14 x 14 inches. Brush the top of the dough with the egg mixture and lightly sprinkle with poppy sees and, if desired, the optional kosher salt. Press the seeds into the dough by lightly rolling with the rolling pin.
  3. Using a pizza wheel, cut the dough into ½ inch strips. Transfer the strips to parchment-lined cookie sheets. Lift the strips from both ends as they will stretch as you lift them. Cover with a kitchen towel and let rest for 30 minutes.
  4. Place the cookie sheets in the middle of an oven preheated to 425°F. Bake for 10 minutes or until golden brown. Watch carefully during the baking, as the grissini burn easily. Transfer to a cooling rack. Serve or store in an air-tight container when the grissini are completely cool.

4 Comments

Filed under Food, Photography, Recipes

PURPLE CAULIFLOWER

One of my favorite stalls at the farmers market often has unusual vegetables that are not available from other vendors. They always have several varieties of eggplants and bok choy. They have baskets of chiles I have never heard of. They also have several varieties of cauliflower including the traditional snow-white head and a cheese-yellow variety they call Cheddar. This last time they had several heads of an intensely purple variety.

A while back I wrote about some nearly black haricots verts that turned green when they were cooked. I wound up writing about the water soluble pigments, anthocyanins, that leech out during cooking. It seemed likely to me that the same situation existed with the cauliflower. I asked the young woman at the cash register if the purple cauliflower would turn green when it is cooked. She assured me that it would remain its same amazing color. Of course, I was skeptical so I bought a head to try.

I wound up grilling the cauliflower as thick “steaks” rather than boiling it. That was really not a fair trial, but the woman was right – the cauliflower kept its vibrant color. I guess I will need to go back, buy another head, and plan a more scientific experiment using boiling water.

Here’s the grilled purple cauliflower “steak” along with baked stuffed tomatoes.  I got the beautiful tomatoes from another  vendor at the farmers market. Together they make a nice vegetarian dinner plate.

RECIPES

Grilled Cauliflower “Steak”

Ingredients

  • vegetable oil
  • 1 head purple cauliflower, cut into ½ inch slabs
  • salt and pepper
  • sesame oil

Method

  1. Heat a grill, indoor or outdoor, to high temperature and lightly oil the surface
  2. Place the slabs of cauliflower on the hot surface and grill for about 5 minutes on each side. The cauliflower should stay crisp and get a light char.
  3. Transfer the grilled cauliflower to a plate and season with salt, pepper, and a few drops of sesame oil to taste. Serve.

Baked Stuffed Tomatoes

Ingredients

  • 2 large, ripe tomatoes
  • 4 crimini mushrooms, chopped finely
  • 2 tablespoons extra virgin olive oil + more for drizzling on the tops of the stuffed tomatoes
  • ½ cup finely grated Parmesan cheese
  • ½ cup fine, dry bread crumbs
  • salt and pepper

Method

  1. Core the tomatoes and cut in half horizontally. Remove the seeds. With a grapefruit knife or paring knife, remove the fleshy ribs of the tomatoes and chop them finely. Set aside.
  2. In a small sauté pan, sauté the chopped mushrooms for a few minutes until completely softened. Remove from the heat.
  3. Combine the chopped tomato ribs, mushrooms, Parmesan, and bread crumbs.  Adjust the seasoning with salt and pepper. Divide the mixture between the four tomato halves
  4. Place the tomato halves on a lightly oiled roasting pan in the middle of an oven preheated to 250°F for about 20 minutes while you are preparing and grilling the cauliflower. Serve.

Leave a comment

Filed under Food, Photography, Recipes

CORNBREAD CHORIZO TAMALE PIE

Recently I reported on our meal in the student center at Fort Lewis College. The highlight was tamale pie, which of course does not contain tamales at all. The original recipe comes from the era of dumping in a can of this and a can of that plus some ground beef in order to wind up with a quick dinner meal for the family. I remember tamale pie as a great favorite during my childhood, but it has gone the way of most casseroles from the 1940s and 1950s – except in school and college cafeterias, of course.

The most amazing thing about the casserole was that the cornbread batter would sink into the very liquid filling and disappear, only to re-emerge magically as a crusty topping at the end of the baking time. The explanation for that is that the batter stays intact in the filling. It then becomes lighter as the baking soda goes to work and floats to the top. Akin to dumplings and bagels. You can minimize this phenomenon by making the filling so thick that the cornbread batter can’t sink. I prefer that, you can make your own choice by adding more liquid.

Here is my version that I cobbled together from things in the refrigerator that needed to be eaten. It seems like I am always cleaning out the fridge.

RECIPE

Cornbread Chorizo Tamale Pie

FILLING

Ingredients

  • 2 cups frozen corn, thawed
  • vegetable oil
  • 1 medium onion, diced
  • 2 Spanish chorizo sausages, sliced thinly (Don’t use Mexican chorizo as it is too spicy and greasy)
  • 6 snacking peppers, seeded and sliced thinly
  • 1 14.5 ounce can petite diced tomatoes
  • 1 cup water
  • 1-3 teaspoons chili powder according to how hot you want it
  • ½ teaspoon ground cumin
  • 1 tablespoon dried Mexican oregano leaves, crumbled
  • 1 cup canned black beans, rinsed and drained
  • 1 tablespoon cornmeal (optional)
  • salt and pepper

Method

  1. In a dry medium sauté pan over high heat, sauté the corn kernels until they are fragrant with a light char. Be careful not to burn. Remove from the heat, transfer to a small bowl, and set aside.
  2. Clean the pan and return to medium heat. Add vegetable oil and sauté the onions until translucent. Add the chorizo and peppers and cook, stirring frequently, until the chorizo is heated through and the peppers are wilted.
  3. Add the tomatoes, water, chili powder, cumin, and oregano. Simmer for 15 minutes. Then add the charred corn and black beans. Stir and continue to simmer for another 10 minutes. If the sauce is too thin for your taste, sprinkle the cornmeal over the surface, stir to completely incorporate the cornmeal and simmer an additional 10 minutes until the mixture is thickened to your liking. Adjust the seasoning with salt and pepper.

TOPPING

Ingredients

  • ¾ cup cornmeal
  • 1 tablespoon all-purpose flour
  • ½ teaspoon salt
  • 1½ teaspoons baking powder
  • 1 egg, beaten
  • ½ cup milk
  • 1 tablespoon vegetable oil
  • sour cream

Method

  1. In a small bowl, stir together the cornmeal, flour, salt, and baking powder.
  2. In another small bowl, combine the beaten egg, milk and vegetable oil.
  3. Pour the wet ingredients into the dry ingredients. Mix thoroughly until well-combined

ASSEMBLY

  1. Transfer the filling to a well-greased 2 quart casserole
  2. Spread the topping over the filling
  3. Bake in the middle of an oven preheated to 425F for 25-30 minutes or until the top is lightly browned
  4. Remove from the oven, and let rest for 5 minutes. Divide into individual servings. Top with sour cream. Serve immediately while still warm.


Leave a comment

Filed under Food, Photography, Recipes

ROMANESCO: THE FRACTAL VEGETABLE

Fractal art has been popular for the last twenty or thirty years. It combines mathematics and art, often using computer algorithms to produce geometric patterns that are repeated at an ever smaller scale  to create irregular shapes and surfaces. You will find some amazing fractal images on the Internet or Wikipedia.

Fractal art (Image from the Internet)

Fractal art (Image from the Internet)


3D fractal art (From Wikipedia)

3D fractal art (From Wikipedia)

There are also some arresting examples of fractals in nature: the shape of the nautilus shell; the ever-diminishing tendrils of a lightning bolt; tree limbs dividing into smaller and smaller branches; pine cones; pineapple; and an aloe plant. A head of Romanesco is one of the most startling and beautiful. The color is almost electric, and the vegetable florets form amazing designs as they get smaller and smaller and rise into tiny pyramids.

My first encounter with Romanesco was when Sarah and Evan humored me a number of years ago, letting me prep vegetables in their first pop-up dinner at Radius in San Francisco. I was fascinated by the chartreuse color, the geometrically perfect florets, and the incredible shapes in a single head.

Since then, I have only seen Romanesco in a few stalls at various farmers markets. I have never seen it at the grocery store. If you should find some, select only the greenest heads and plan to use them in a day or two. Use the vegetable in your favorite recipe for broccoli or cauliflower. Or be adventurous and try something different. They’re even delicious raw.

There is a certain mystery about the vegetable. Some call it Romanesco broccoli. Some call it Romanesco cauliflower. That’s because no one seems to be quite certain what its closest relative might be. The cautious – like me – just refer to it as Romanesco. What does seem clear is that it was first developed in Rome at least as early as the 16th century and hence the name.

The great thing is that you can use it as you would either broccoli or cauliflower. You can also have a good time admiring its unique and beautiful shape. This recipe is an adaptation from one found in the lavishly illustrated, encyclopedic Vegetables from Amaranth to Zucchini by Elizabeth Schneider (HarperCollins Publishers Inc., New York, 2001, p. 124) Somehow, Romanesco, pine nuts, garlic, and Romano all seem to go together. I have browned the garlic in the brown butter. “Whoa,” you say. “Browned garlic is bitter.” But that’s not true if you make sure it doesn’t burn. Think of that delicious Mexican garlic and butter sauce, mojo de ajo. Add some grilled ham and you have a set of complementary flavors and a complete light dinner.

RECIPE

Romanesco with Brown Butter, Pine Nuts, Garlic, and Romano Cheese

Served with Grilled Ham Steak

Ingredients

  • 1/3 cup raw pine nuts
  • 1 head Romanesco
  • salt and pepper
  • 1 stick (½ cup) unsalted butter
  • 3 cloves garlic, minced
  • fresh Romano cheese, grated
  • 4 ounce boneless ham steak, grilled

Method

  1. In a dry sauté pan over medium heat, toast the pine nuts until lightly browned and the oils have been released. Stir frequently. Do not burn. Remove from the heat and set aside.
  2. In a large pot fitted with a steaming rack, place the whole head of Romanesco over about an inch of boiling water and steam, covered, for 10 minutes or until the vegetable pierces easily with a cooking fork. Season with salt and pepper.
  3. While the Romanesco is steaming, melt the butter in a small sauce pan over medium-low heat, stirring frequently until the butter solids begin to brown. Be very careful not to burn. Stir in the minced garlic. The mixture may foam up. If that happens, stir vigorously and remove from the heat until the foaming subsides. Return to the heat only until the garlic is lightly browned.
  4. Grill a small boneless ham steak and arrange in the middle of the serving plate.
  5. Place the steamed Romanesco on the grilled ham steak.  Sprinkle with the toasted pine nuts. Pour over the browned butter with lightly browned garlic. Top with grated Romano. Serve whole and cut into servings at the table.

2 Comments

Filed under Food, Photography, Recipes

FRENCH VANILLA ICE CREAM

It is definitely the time of year to make ice cream at home. It always tastes so much better than what you buy at the store, and these days it is easy to make.

When I was a child, in the hot summer we often sat out on the back porch with the ice cream churn,  a burlap sack of ice, and a big box of rock salt. My mother would set a tinned canister filled with a sweet cream mixture in the middle of the wooden churn bucket, and my father would pack it with ice and rock salt in layers so that the melting ice would stay as cold as possible. Then the kids took turns turning the crank so that the dasher inside the canister would scrape the cream as it froze against the side. The process seemed to take a long time, and no single kid could finish the whole effort. At the end, some grown-up – usually my father – would turn the crank until it wouldn’t turn any more. The dasher came out. The kids took turns licking it, and the ice cream was put back into the ice to firm up a bit before everyone got their own bowlful of the ambrosia.

Next in the evolution of the home ice cream maker was one with an electric motor. Ours never survived very long, because the motor would burn out when everyone forgot to watch it carefully.

Now, there are all sorts of choices and all sorts of prices. We have had our machine for many years, and it continues to work just fine. One advantage is that we can make ice cream whenever we want it. We don’t have to wait for summer. We stick the canister in the bottom of our freezer and forget about it until it is time to make a batch. Then we fill it up, put the dasher in, fasten down the cover, and turn on the motor. In about half an hour, we have ice cream that tastes better than anything one can buy. Our machine cost about $50 when we bought it.  It’s probably a little more expensive these days, but not much. You can buy versions with built-in freezers and elaborate adjustments. Those can easily run to well over $300. In my view, you have to eat a lot of ice cream to justify the expense, but someone must be buying those machines.

This recipe comes from our family cookbook. It is called French vanilla ice cream. I always thought “French” referred to some kind of fancy vanilla, but it turns out that “French” implies that the ice cream is made from custard. That makes me think that the proper name for the dish should be vanilla French ice cream. I don’t look for that change to occur.

Crème anglaise is probably the most common custard base used for ice cream. This recipe is actually based on a modified crème anglaise that uses whole eggs instead of egg yolks. But the same warning applies: don’t let the custard get too hot or the eggs will scramble. Even if you don’t do that, you should always strain the custard before you chill it overnight as invariably there will  be tiny little clumps of egg, and you want the finished ice cream to be as smooth as possible.

RECIPE

French Vanilla Ice Cream

Ingredients

  • 3 eggs
  • 1 cup sugar
  • 2 cups whole milk
  • 2 cups cream
  • 2 teaspoons vanilla extract

Method

  1. In a bowl, using an electric beater, cream the eggs and sugar together until pale yellow and smooth
  2. Add milk and beat until completely combined
  3. Place the mixture in a heavy-bottomed saucepan over medium low heat. Stir constantly until the mixture has thickened and coats the spoon. It should reach about 160°F. Do not boil or the eggs will scramble and you will have to start over. Remove from the heat and cool for about 5 minutes.
  4. Stir in the cream and vanilla. Strain through a fine-meshed sieve into a storage container and refrigerate, covered, over night.
  5. Place the mixture in an ice cream maker and spin according to directions.
  6. Transfer the finished ice cream to a container and place in the freezer for an hour to temper. Serve.

5 Comments

Filed under Food, Photography, Recipes

FOUR YEARS AND 276 POSTS

Yesterday I received a notice that I had just completed four years of blogging. That includes 276 posts. Honestly, I had never planned to go on that long, and I didn’t think that I would come up with that many things and recipes to write about. I’ve been averaging  about one and a third posts per week. For many of my blogging friends that’s not many, but for me it takes a lot of effort.

This blog just started out as a way to communicate with my family and a few friends, but it has evolved into a lot more. I have made friends around the world  who share an interest in food and photography. I have learned a lot about cooking and cameras, and I continue to be amazed at the wonderful recipes and images that the many talented bloggers produce.

Thanks to my followers. I enjoy your comments. Thanks to those I follow; I have enjoyed your insights. Thanks to those who just look in. You have helped sustain my enthusiasm.

5 Comments

Filed under Recipes

HYDE PARK CAFÉ PEACH PUDDING

When two of our kids were in school at the University of Texas at Austin, we would often visit. At least part of each visit inevitably was spent at a restaurant, Mom and Dad paying of course. A favorite place was the Hyde Park Café. It was fairly close to the campus, and the food was very good. It was a little pricey for college budgets so we often went there when we were in town. The rest of the time, Peter and Sarah would usually eat ramen in their house lovingly called Casa Hillmont, or they would choose takeout offered up at the “roach coach” on the street corner just outside the physics building.

The Hyde Park is still very much a part of the Austin food scene, although it has changed its name to the little more upscale Hyde Park Bar and Grill, and they have opened another location in another part of town.

Whenever we ate there,  Susan always got the peach pudding for dessert: a square of warm cake topped with peaches and swimming in a pool of thick cream. It is still on the menu at Hyde Park.

Somewhere along the way, we managed to get a copy of the recipe and it wound up in the family cookbook. It’s still as good as ever, and it makes a great dessert for company or for pot-luck dinners. You can dress it up with whipped cream or crème fraîche or ice cream, but I think it is best warm with thick cream.

RECIPE

Hyde Park Café Peach Pudding

Ingredients

  • 2 pounds canned or frozen peaches (slices or halves, your choice) or fresh if you prefer
  • sugar (If you use fresh peaches*)
  • Fruit Fresh® or citric acid (If you use fresh peaches*)
  • 2½ sticks unsalted butter, room temperature
  • 2¾ cups sugar
  • 3 eggs, room temperature
  • 1½ teaspoons vanilla extract
  • 3¼ cups flour
  • 1¼ teaspoons baking powder
  • ½ teaspoon baking soda
  • 1¼ cups buttermilk, room temperature

Method

  1. Thaw and drain the peaches. If you prefer, you can use fully ripe fresh peaches. It will take about four large peaches. Blanch and peel them, cut them into slices and toss with sugar and Fruit Fresh or citric acid the night before. Refrigerate until you are ready to use them.
  2. Using a stand mixer, beat the butter until smooth. Then cream together with the sugar, beating until light and fluffy. Add the eggs one at a time, beating after each addition until the eggs are fully incorporated. Add the vanilla and beat until fully combined.
  3. Sift together the flour, baking powder, and baking soda.
  4. Add the dry ingredients to the batter, one-fourth at a time and alternating with the buttermilk. Beat well after each addition. Continue beating until smooth.
  5. Pour the batter into a greased 9 x 12 inch metal baking pan. and arrange the peaches evenly on top. Note: The batter will rise and overflow a smaller pan, and baking will be greatly prolonged in a glass pan.
  6. Bake in the middle of a preheated oven at 350°F for 25 minutes. Turn the pan around and bake for an additional 25 minutes. Check frequently during the last 15 minutes of burning as the topping burns easily. If it becomes too brown, cover loosely with aluminum foil. When done and the center has set, remove from the oven and let cool for 10 minutes. Cut into serving-sized squares and serve while still warm with heavy cream, whipped cream, crème fraîche, or ice cream.

2 Comments

Filed under Food, Photography, Recipes, Restaurants

RADISH AND RYE

Last night for our belated anniversary celebration we went down to the Plaza for drinks and dinner. We are always game for places we have never been. Last night was a bonanza.

Our first stop was the Inn on the Alameda. As its name suggests, this smallish collection of casitas is on the Alameda, but it is far enough away from the busy Plaza that it is relatively quiet. They have just recently started serving meals, and their bar is reputed to be outstanding. We lucked into arriving just as their wine and cheese happy hour began. We both got a glass of wine and a plate of cheese and crackers. Then we headed out to the beautiful courtyard, and sat under a huge crabapple tree. The adobe  walls, vines, flowers, and coolness made it a place hard to leave. Besides that, others were enjoying drinks and quiet conversations, unlike the boisterousness that is so common on the Plaza.

Soon enough, it was time for our dinner reservation at Radish and Rye, a restaurant that has only been open for five weeks. It turned out to be a find. In fact, in my humble opinion, I think that it is serving up the best restaurant food currently available in Santa Fe.

The restaurant is in space that formerly housed La Ristra, one of the standbys of the local dining scene but closed because of the death of its owner. The space has been totally redone: light, bright, and airy with bold artwork and interesting lamps and accessories on the walls and side tables. The cocktail and wine menus are presented in wooden books with the restaurant name and logo burned into them with a laser – very stylish. The napkins are bar towels, reminiscent of Rich Table.

The wait staff is very friendly and helpful without being overwhelming, and they are all quite knowledgeable about the menu. The kitchen crew is hard working, and you can watch them from the front dining room.

IMG_4964

The “Rye” in the name of the place recognizes their emphasis on high-quality bourbon. You can order some rare brands neat, but for the rest of us, it is easier to choose a blood orange old fashioned or, as I did, an “Abuelito” (little old grandpa) Manhattan. The Manhattan is served in a beaker fuming with what I guess is a last-minute blast of liquid nitrogen. The wine list is relatively small, but it is well-chosen, even if a bit pricey.

Of course, the main attraction is the food. It is billed as Contemporary American, but it is far more eclectic than that: fried green tomatoes and fall-off-the-bone pork ribs from the South, ceviche from the Southwest, beet salad and grilled cauliflower steaks – perhaps representing California?, gorgeous salmon filets from the Northwest, and a nod to France with the eponymous radishes served with fresh butter and sea salt. .

Notable in their absence were the green chiles that make nearly every other menu in town as well as the enormous elk chops meant to appeal to the many Texan tourists of summer. That in itself is refreshing, as the most famous local restaurants have maintained old menu favorites at the expense of losing their creativity and currency.

Unfortunately, the Yelpers are already complaining about portion size. They don’t seem to get the concept of small plates (as opposed to steaks that will feed a family) that has become so popular in San Francisco, Los Angeles, and New York.

You can choose from “large plates”, regular entrée-sized servings or “small plates” meant to be shared. I guess, if you had a  Yelper/Texan appetite, you could order from both parts of the menu, but we chose a number of small plates. Here’s what we ate:

Sea scallop ceviche: Sea scallops arrive in a little ramekin, bathed in the citrus juice they have been “cooked” in and with golden droplets of a finishing oil flavored with jalapeño. Micro-greens complete the dish. It is delicious.

IMG_4961

Fried green tomato: This Southern classic is prepared in a way not usually seen with fried green tomatoes. The tomatoes are lightly fried in a tempura batter, and between the slices is a tasty dollop of another Southern classic: pimento cheese. I have previously written about pimento cheese, April 17, 2014. This preparation raises a standard ladies luncheon staple to a new level.

IMG_4963

Ham hock croquette: Ordinarily one doesn’t think of ham hocks as delicate, but these come as light croquette, breaded and fried to just the right color and temperature. A whole grain mustard for dipping and pickled shallot complete the dish.

Unfortunately I forgot to get an image. I was too busy admiring the plate

Duck rillette: What could be richer than duck confit poached in duck fat, then chopped finely and mixed with still more duck fat? The dish comes in a little ramekin to be spread on the accompanying razor-thin crostini. The pickled baby turnip makes a perfect foil for all of that richness.

IMG_4959

Grilled cauliflower: Florets of the vegetable are lightly charred and then combined with pecans and capers, then topped with lemon butter and sage.

IMG_4960

Back ribs: The meat literally falls off the bone it is so tender, and it has the smoky taste you expect from the Carolina-style glaze.

Roasted beet: Beet salad is perilously close to becoming cliché in contemporary American cuisine, but this version pulls it out. The beets pair nicely with the sour sweet of balsamic vinegar, and the walnuts, lovage, and blue cheese complement the other ingredients.

IMG_4962

Radish and lemon butter: With a name like Radish and Rye, the restaurant had to offer a radish dish, and this French-style plate of quartered perfect radishes served with sea salt and lemon butter did the trick.

IMG_4958

For dessert, we had a panna cotta with stone fruit topping and a pecan pielet topped with a candle to honor our anniversary. Truly an evening to remember.

4 Comments

Filed under Food, Photography, Recipes, Restaurants